 Chhaya Chauhan presents a case where non-vital internal bleaching was performed to aesthetically treat a severely discoloured LR1.
Tooth whitening is one of the most common cosmetic treatments performed by a dentist, yet it is difficult to sometimes get a good result when performing internal whitening. The following is a detailed step-by-step approach on how internal whitening was performed successfully on a severely discoloured tooth.
The patient presented to the practice stating: ‘I have always had this horrible lower front black tooth. It stops me from smiling and laughing and really knocks my confidence. I wish I could just rip it out and have a normal tooth. It makes me feel so unhappy’.
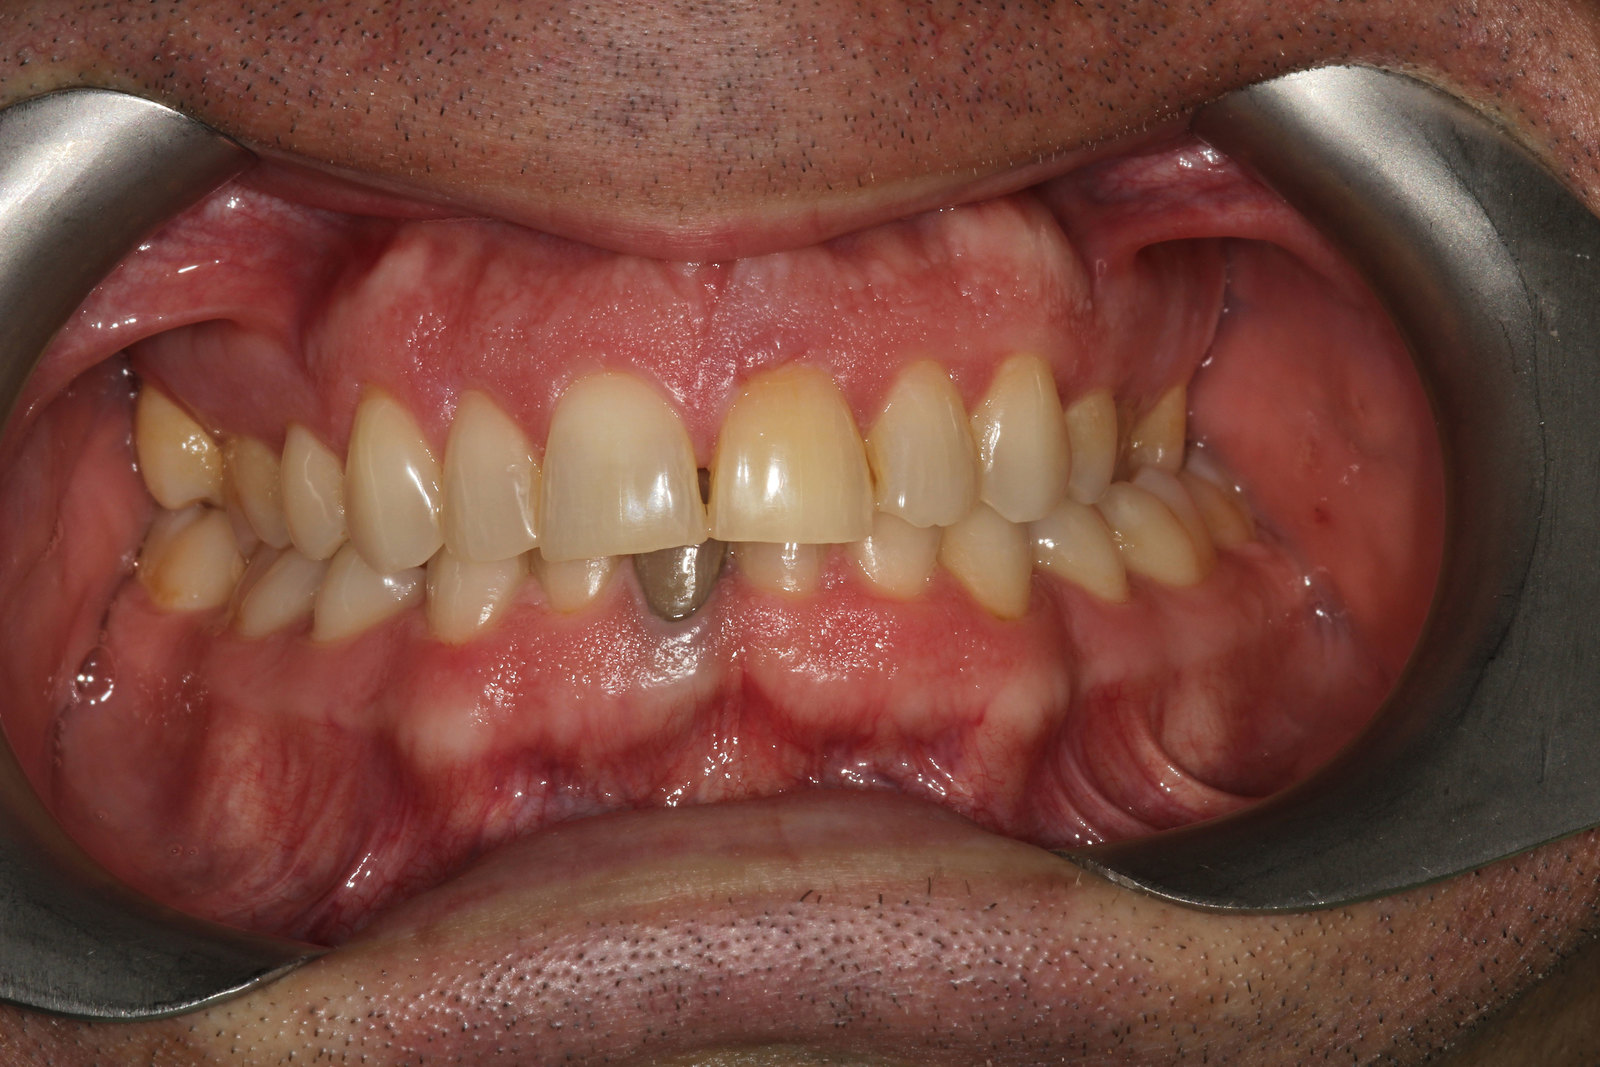
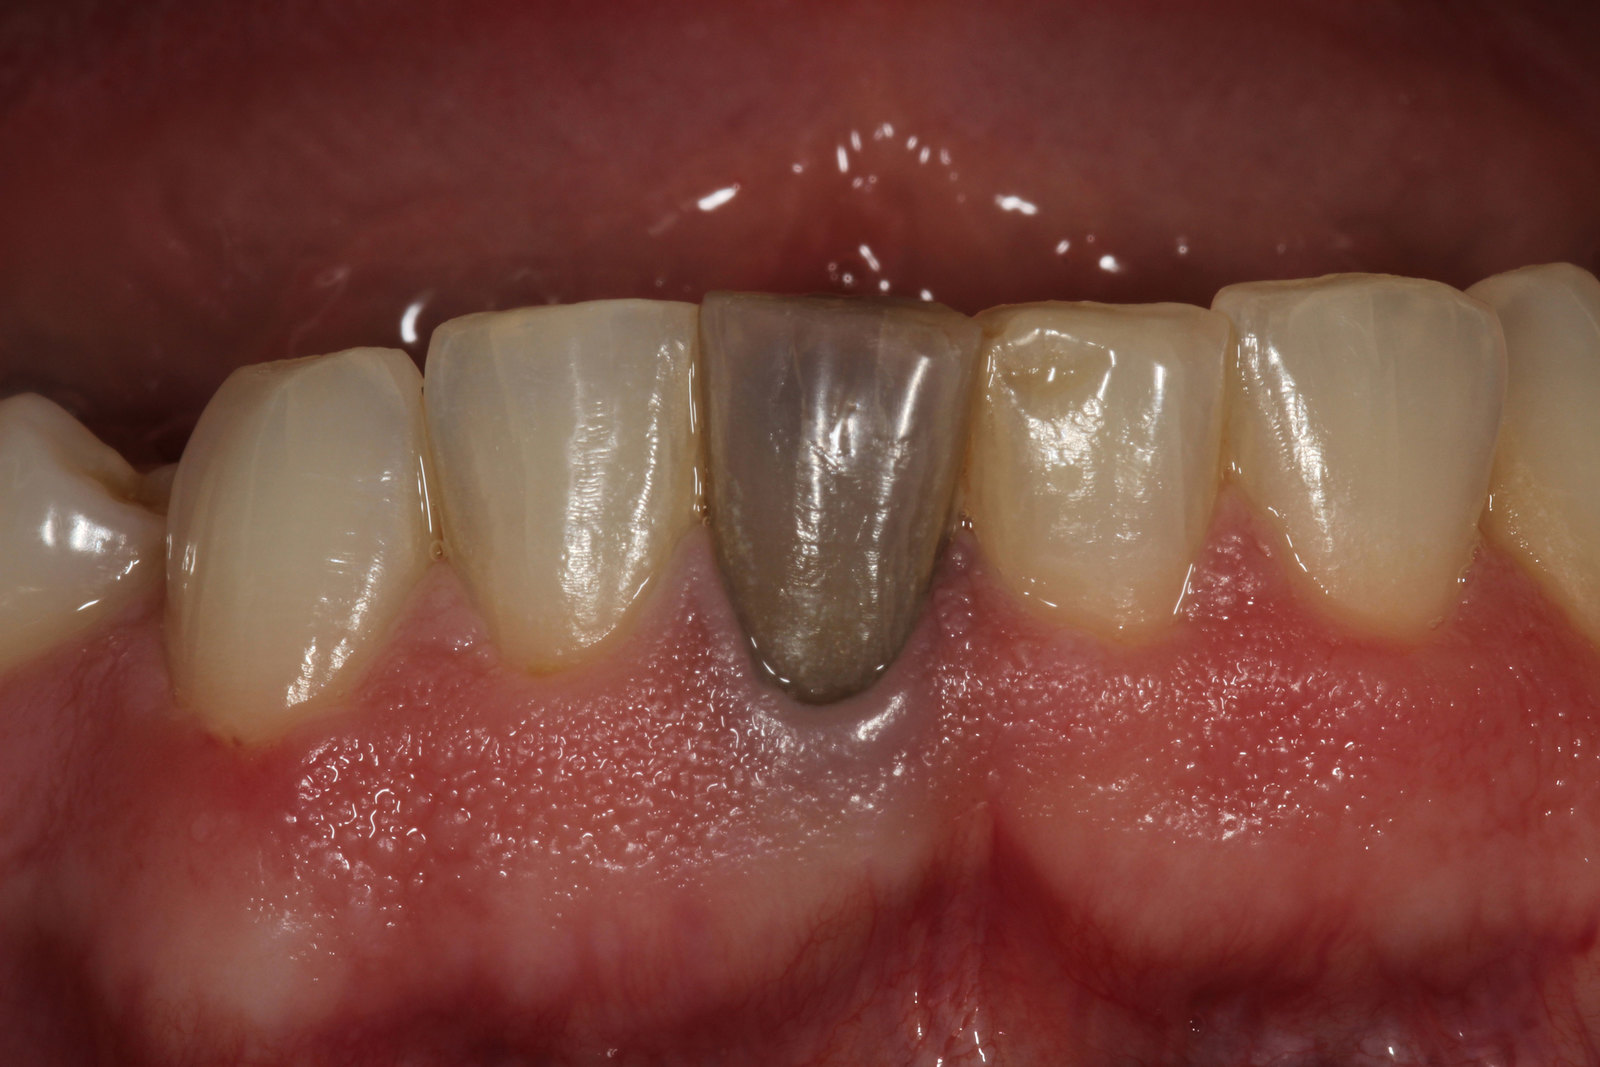
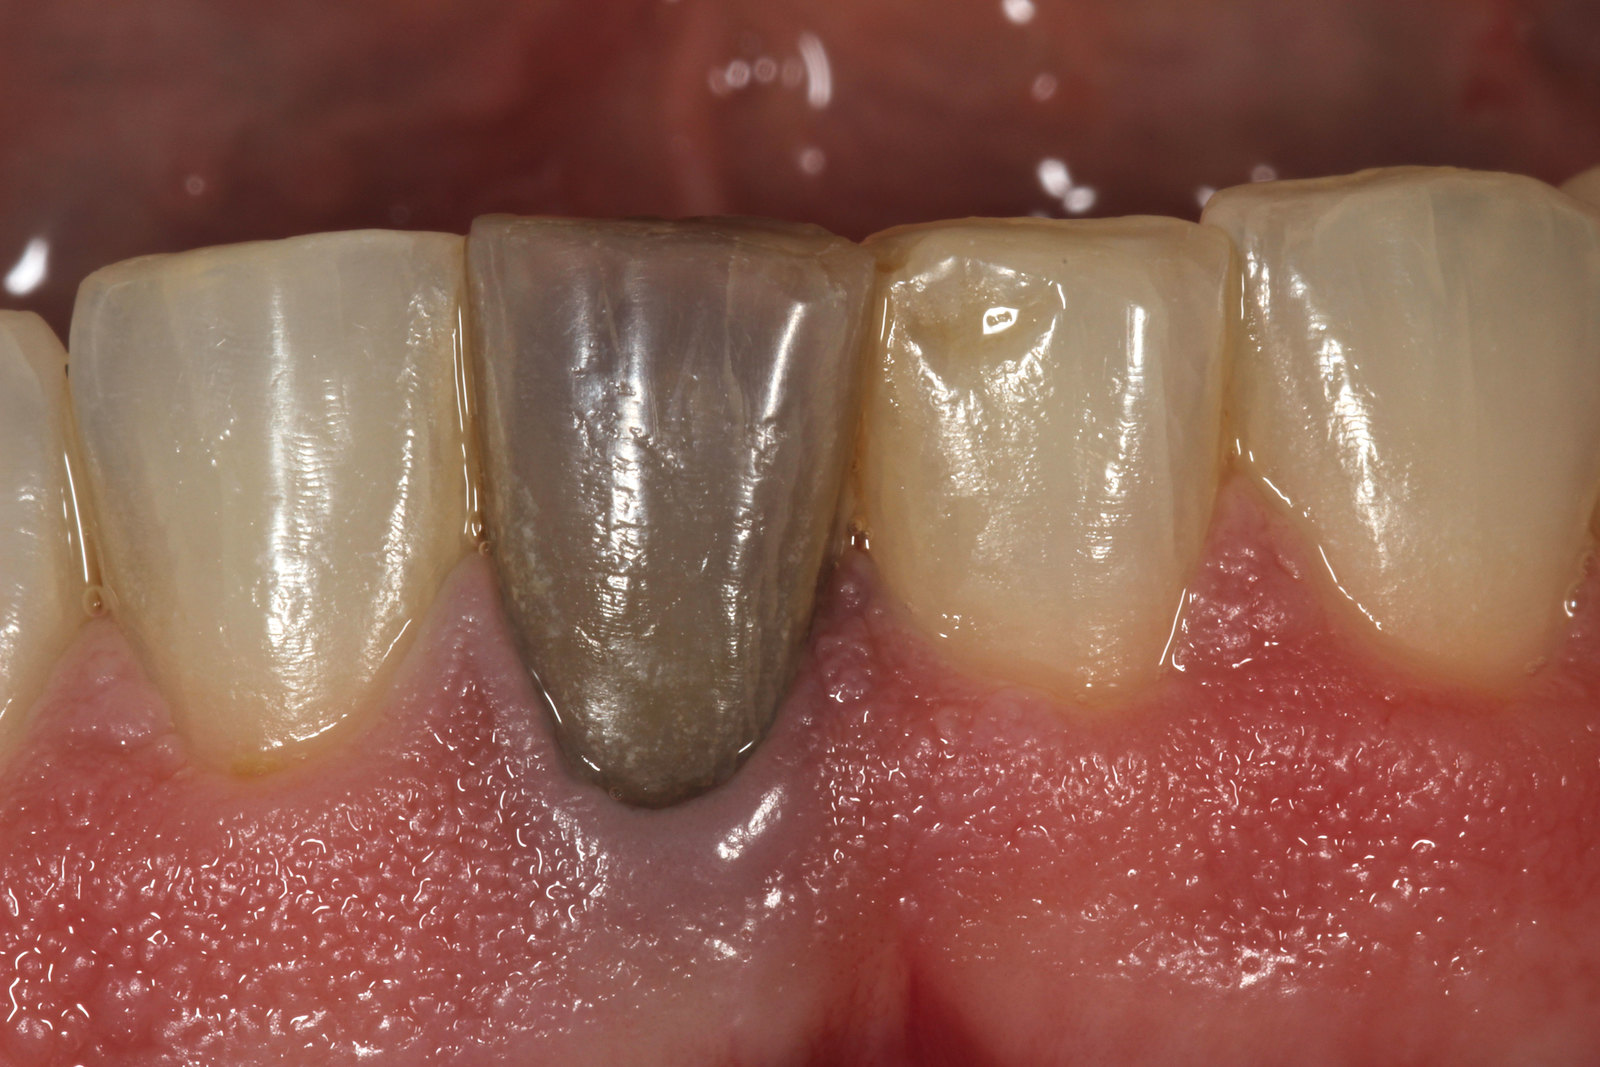
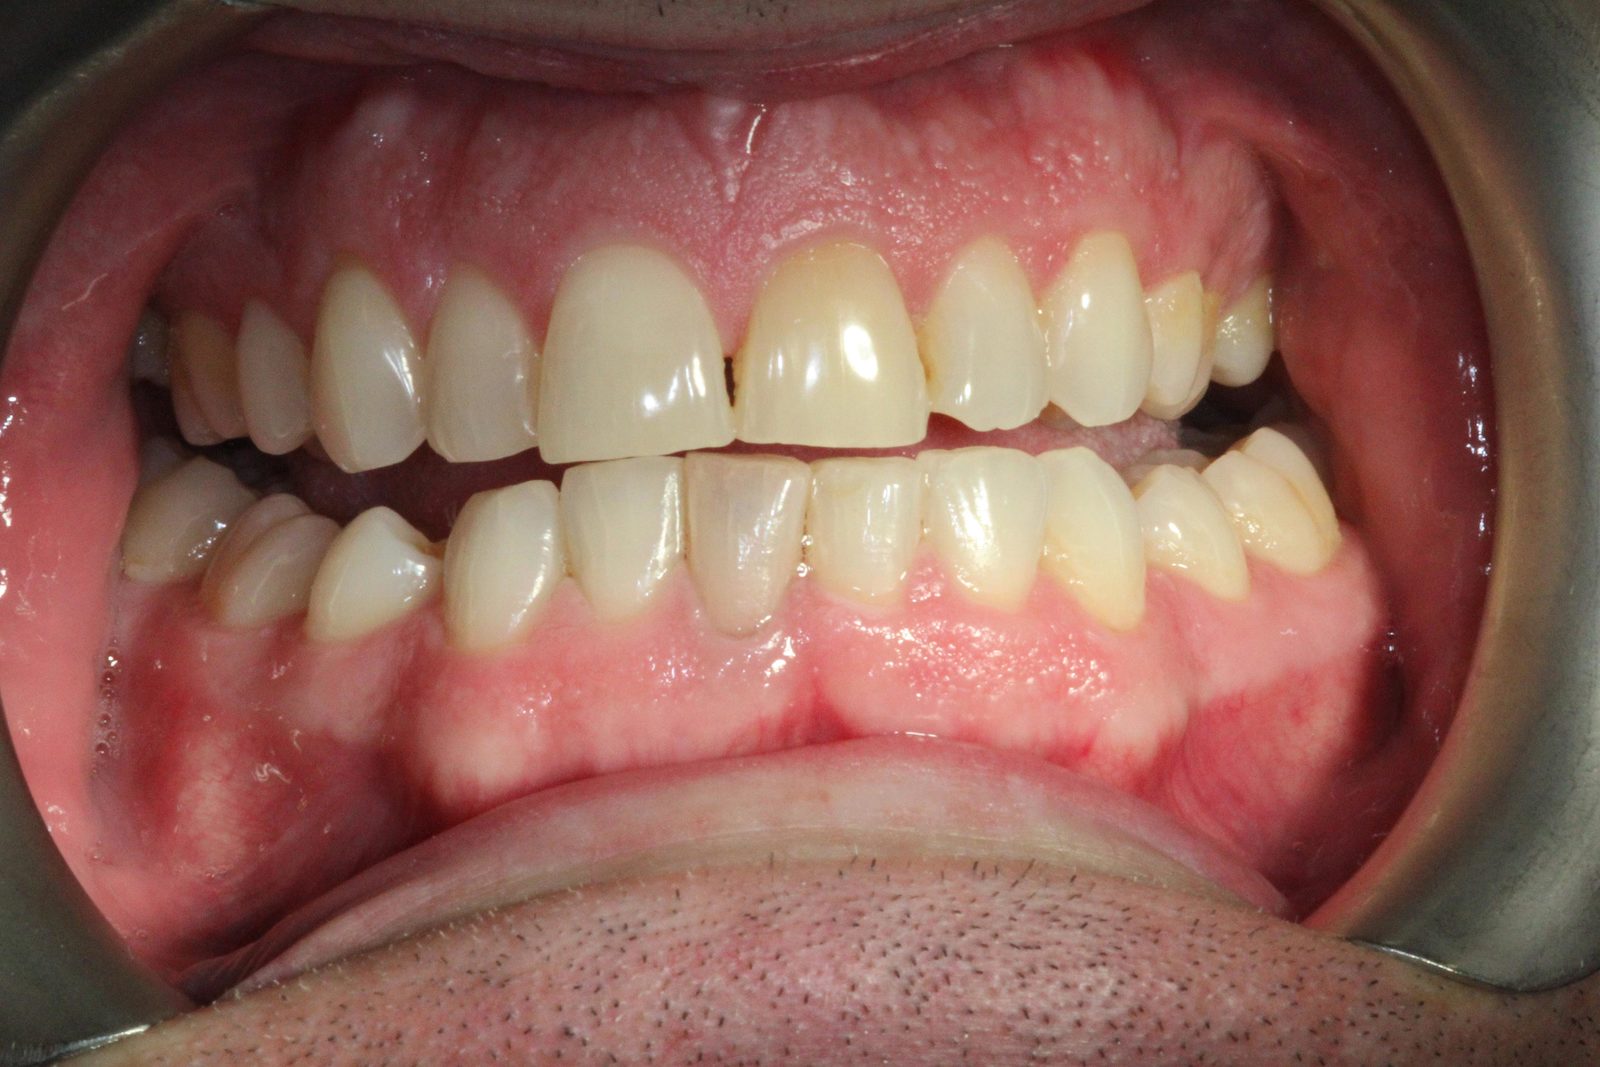
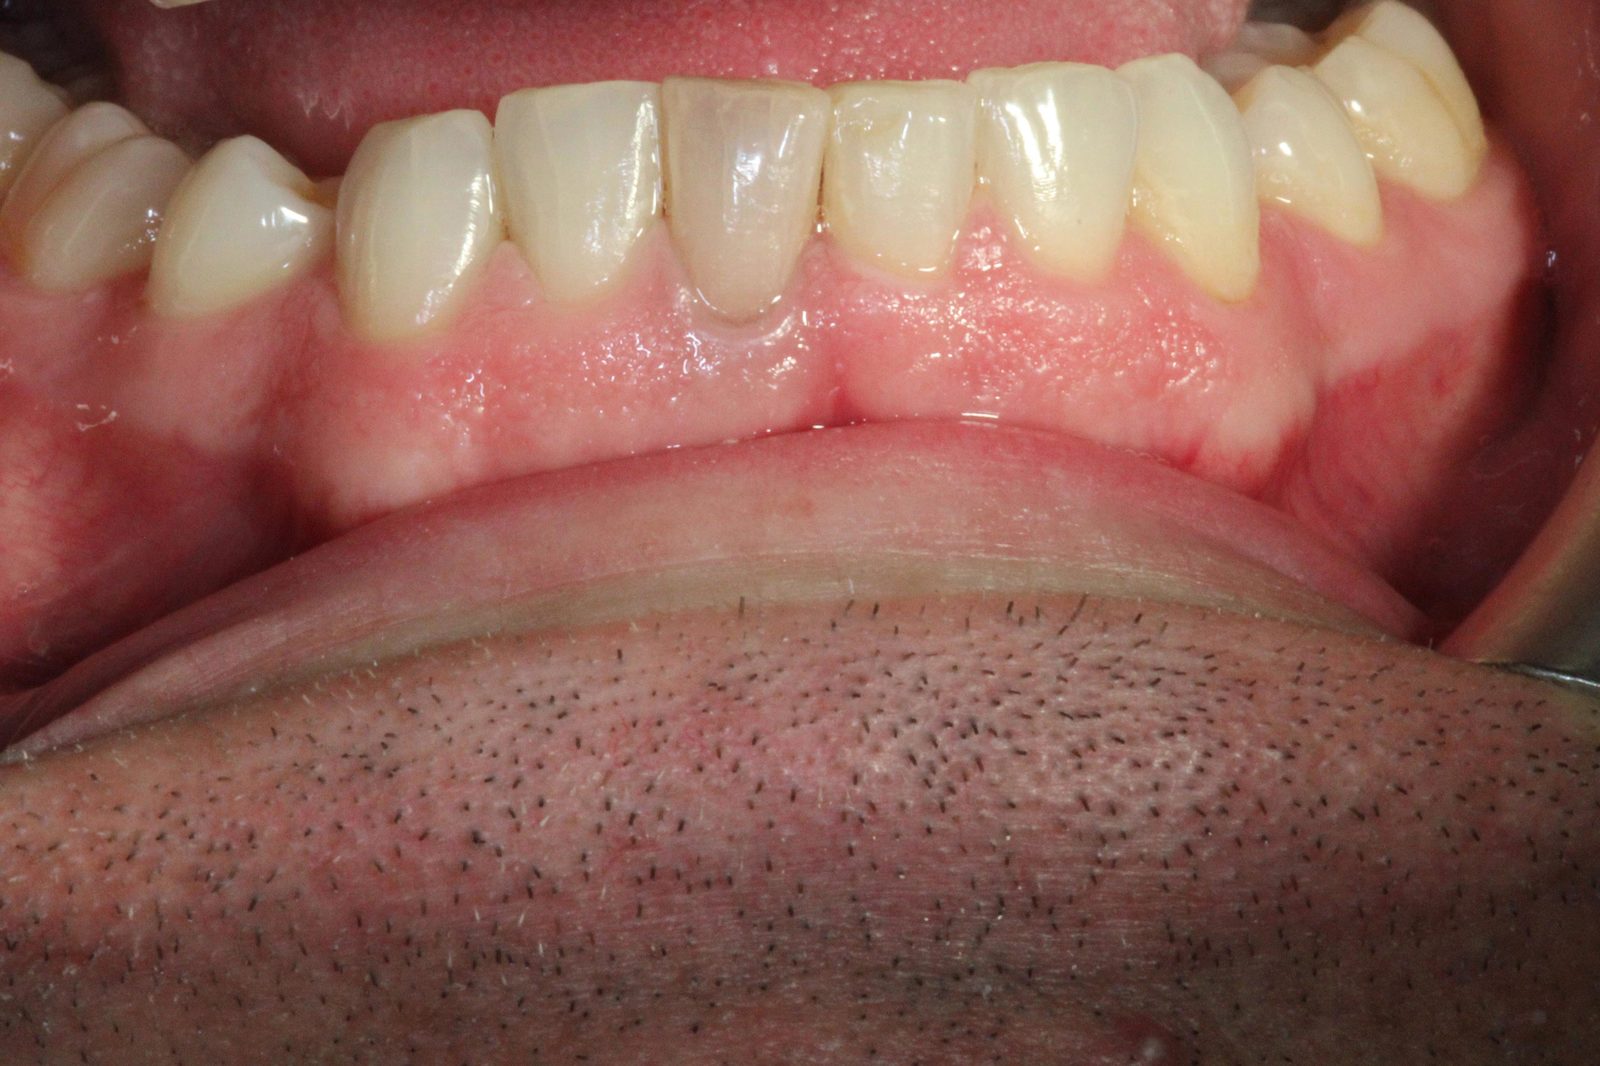
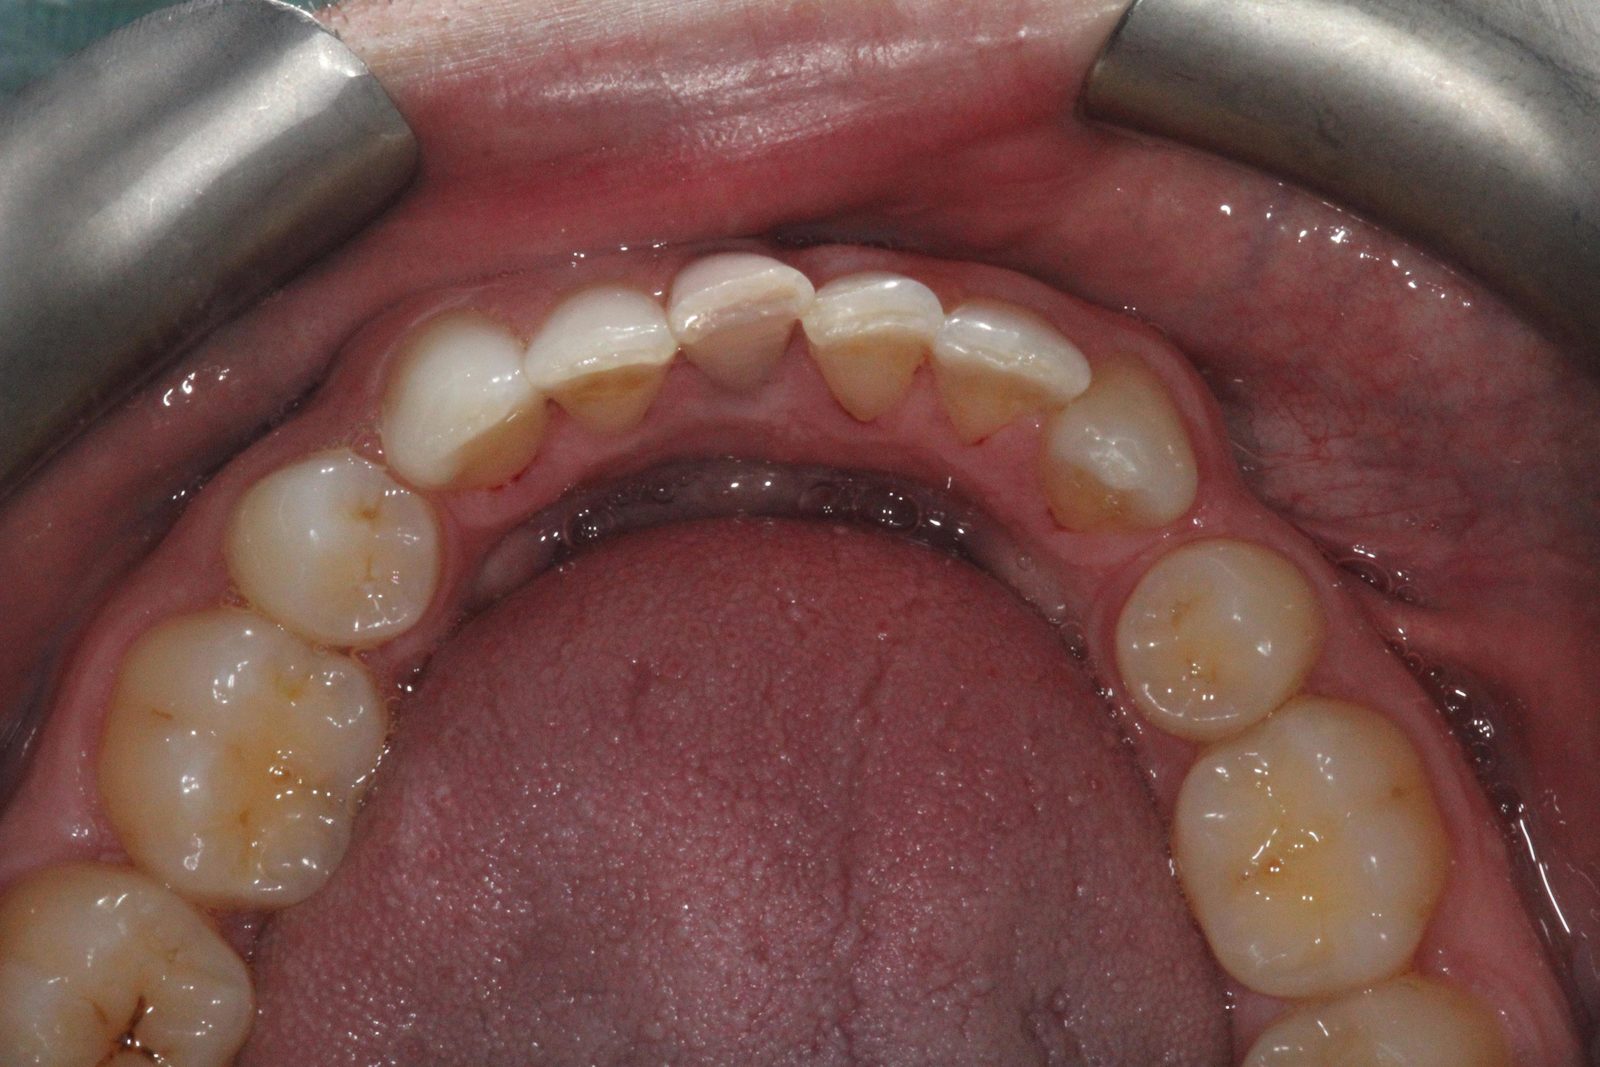
The patient was very unhappy with the colour of the LR1 especially as it is in the centre of the aesthetic zone (Figures 1-4). The patient’s LR1 was knocked when he was a child. It slowly started turning darker over a number of years. He recently had the tooth root canal treated by his GDP. His GDP tried to whiten the tooth without any success and the colour remained the same.
His GDP then advised a crown to mask the discolouration. The patient was not keen on the destruction of the tooth, so he came to see me for a cosmetic consultation to explore the options as he had seen my past cases.
A detailed patient history revealed the patient to be a non-smoker with no family history of dental or medical conditions. Intraoral and extraoral examinations revealed no issues. Overall, the patient was in good gingival health with good oral hygiene. The patient possessed a very discoloured dark LR1 with lingual composite. The shade was very black, darker than any on the Vita shade guide. The tooth was otherwise clinically sound. The UL1 was also yellow in colour and may have been affected by the same trauma. Investigation and treatment was offered for this but the patient wanted to treat the lower dark tooth only, as he has a restricted budget.
Treatment options
Several treatment options were given with risk, benefits and cost discussed:
- No treatment
- Tooth whitening with inside/outside bleaching or walking bleach technique, or external bleaching only
- Extra-coronal restoration (crown or veneer)
- Extraction and replacement with implant or bridge or implant.
The patient chose option two. He wanted to try a conservative approach. He was aware the other options are still open to him and he can choose option two in the future.
Therefore, a treatment plan of non-vital internal whitening of the LR1 using custom-made single tooth whitening trays using the inside/outside bleaching technique.
Treatment execution
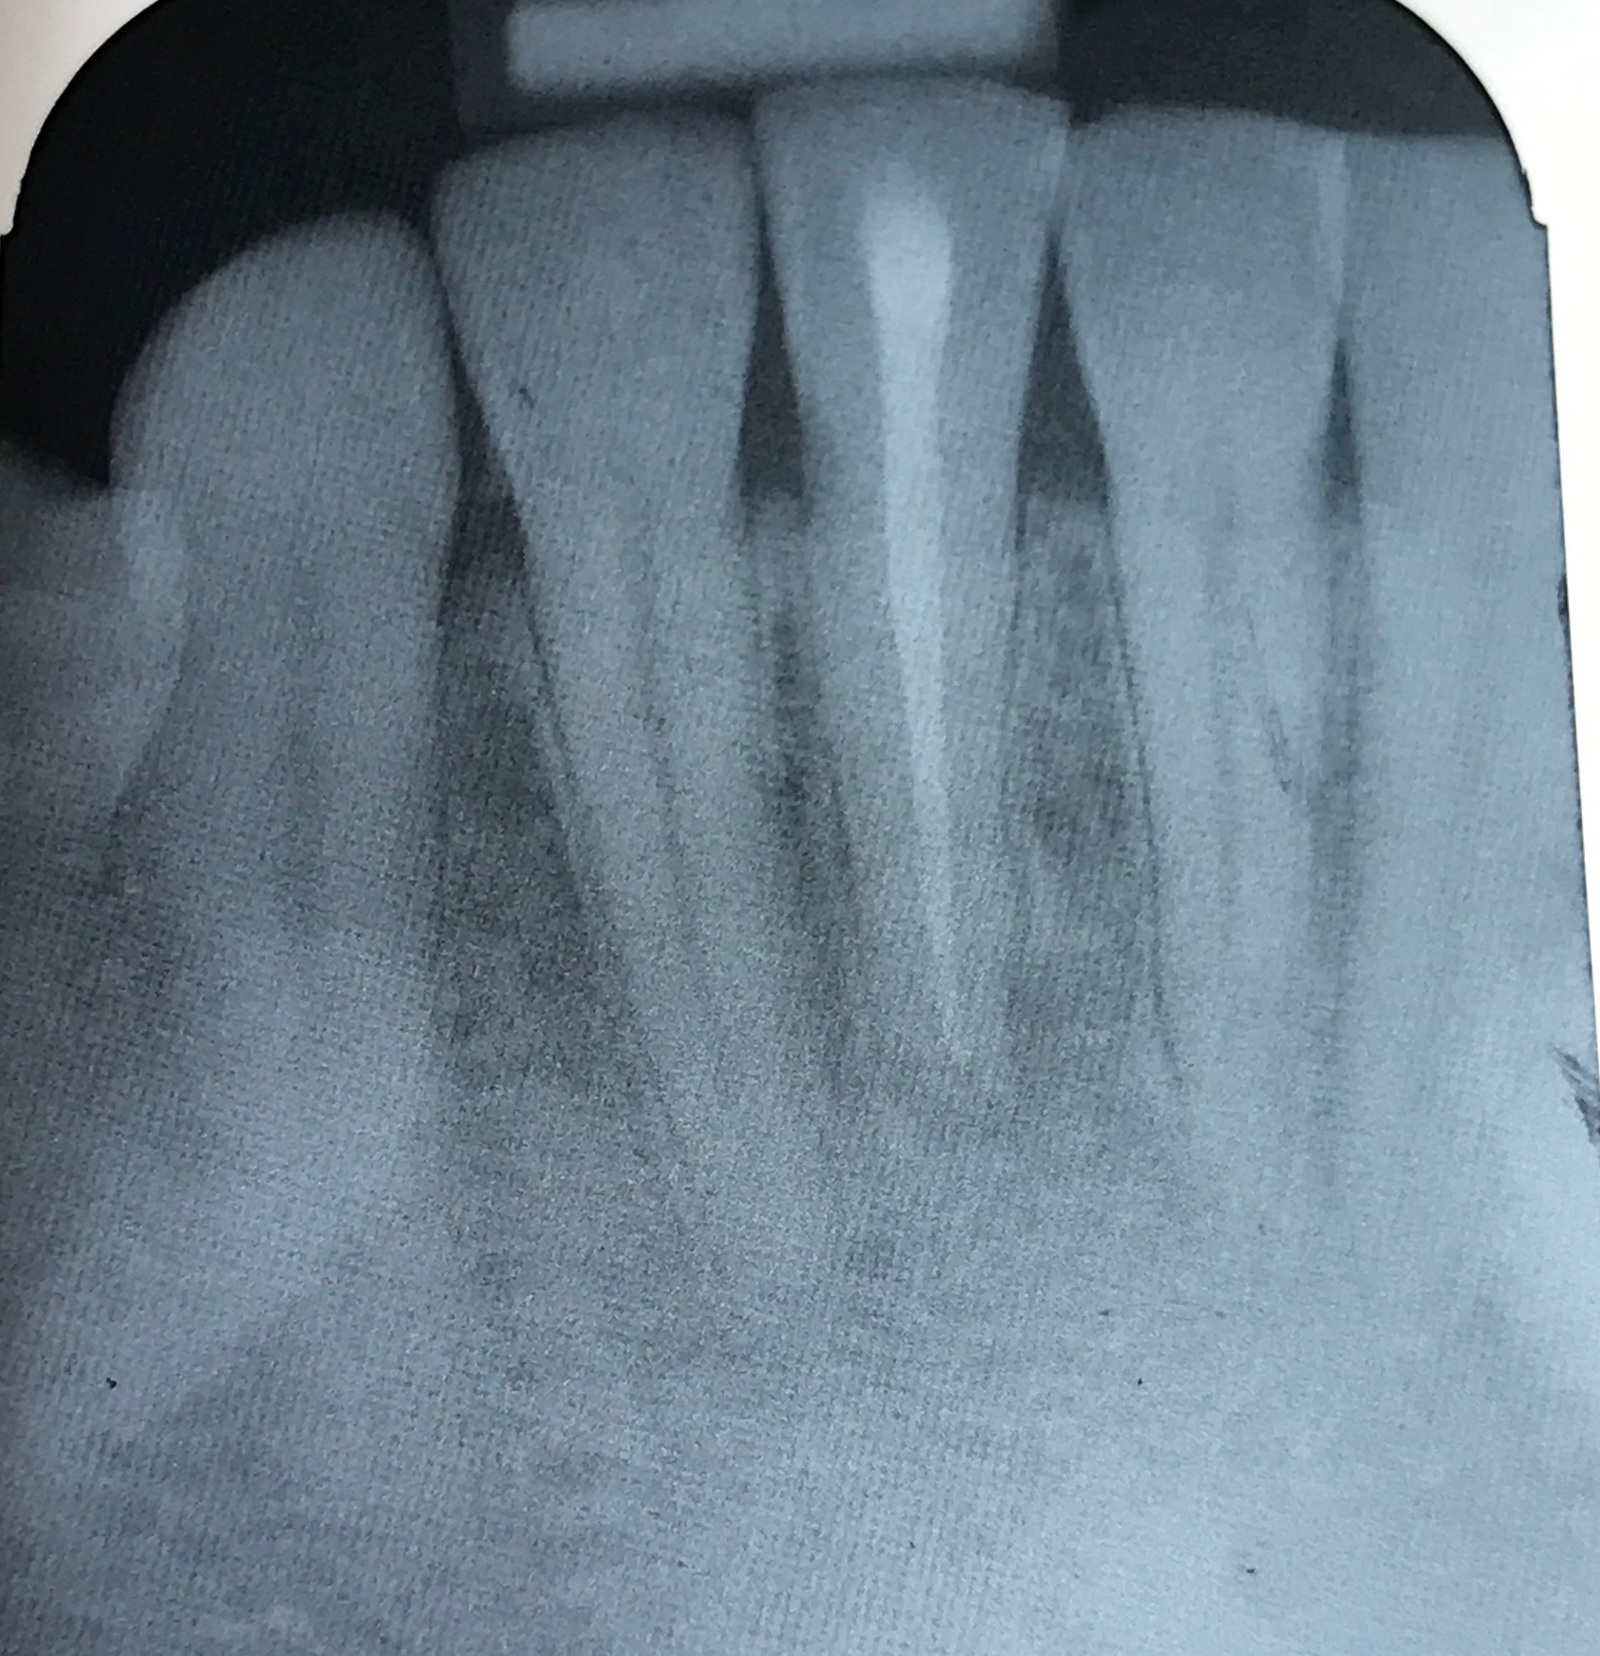
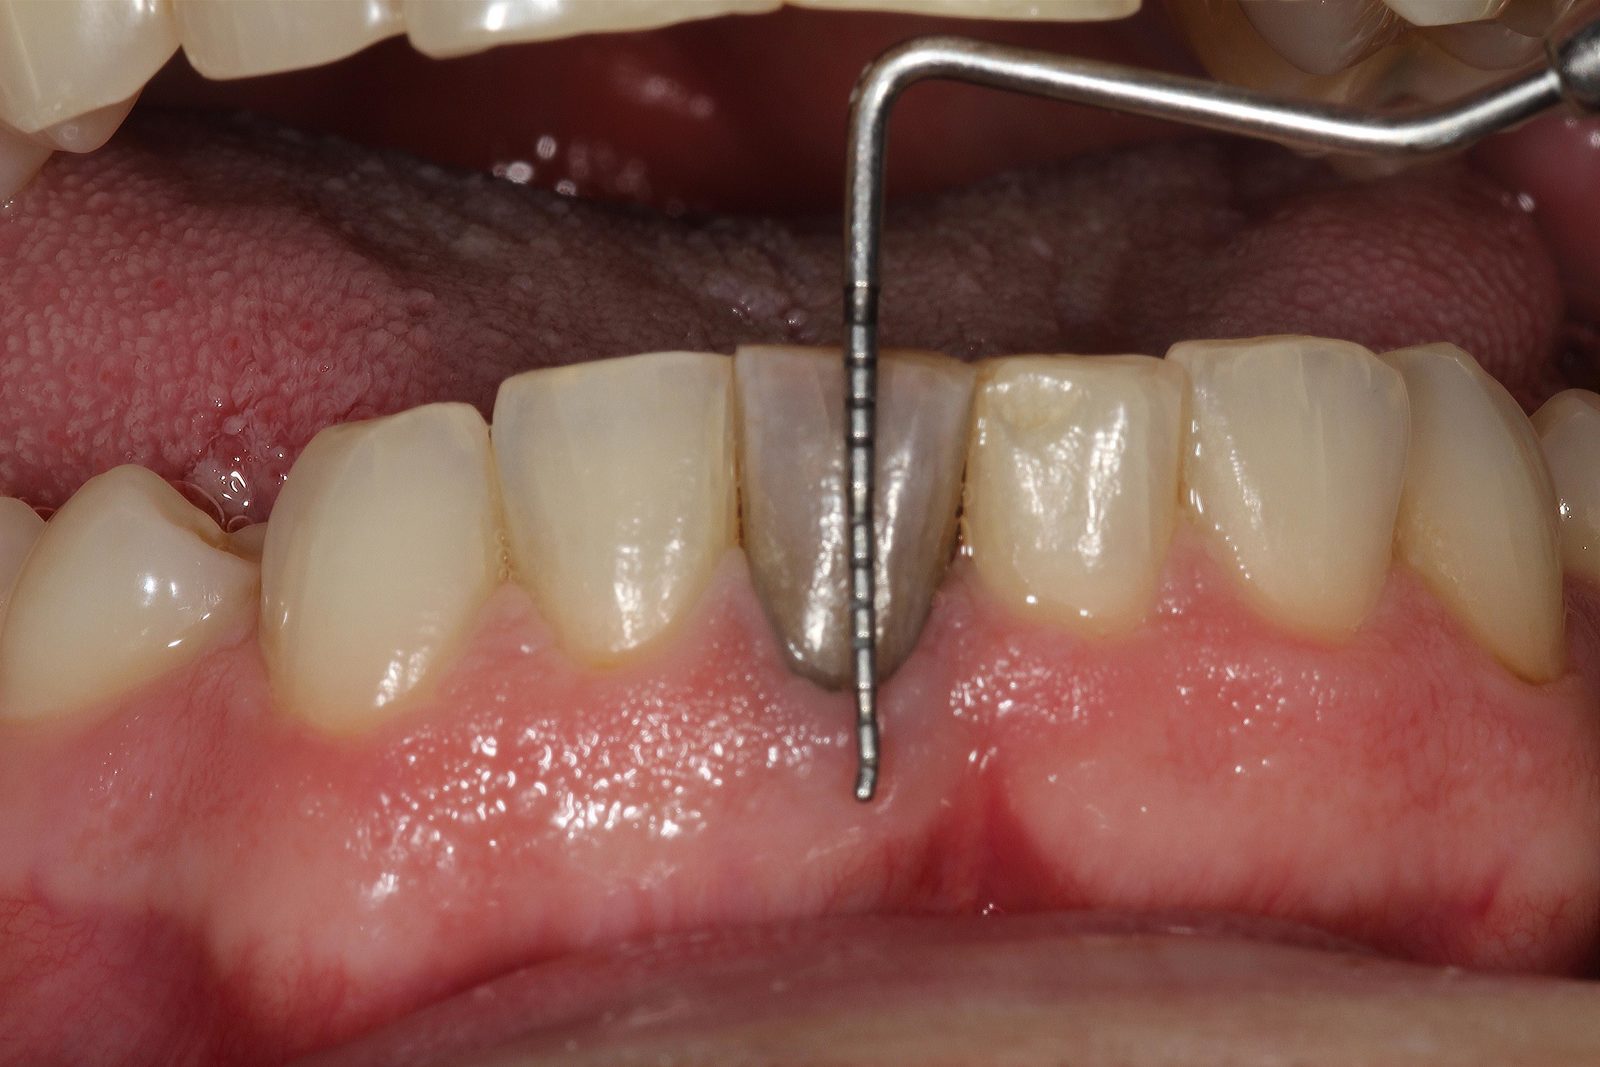
- Patient assessment and preoperative radiograph checked. The tooth was root canal treated by a specialist some years ago (Figure 5)
- Clinical photography of preoperative tooth shade
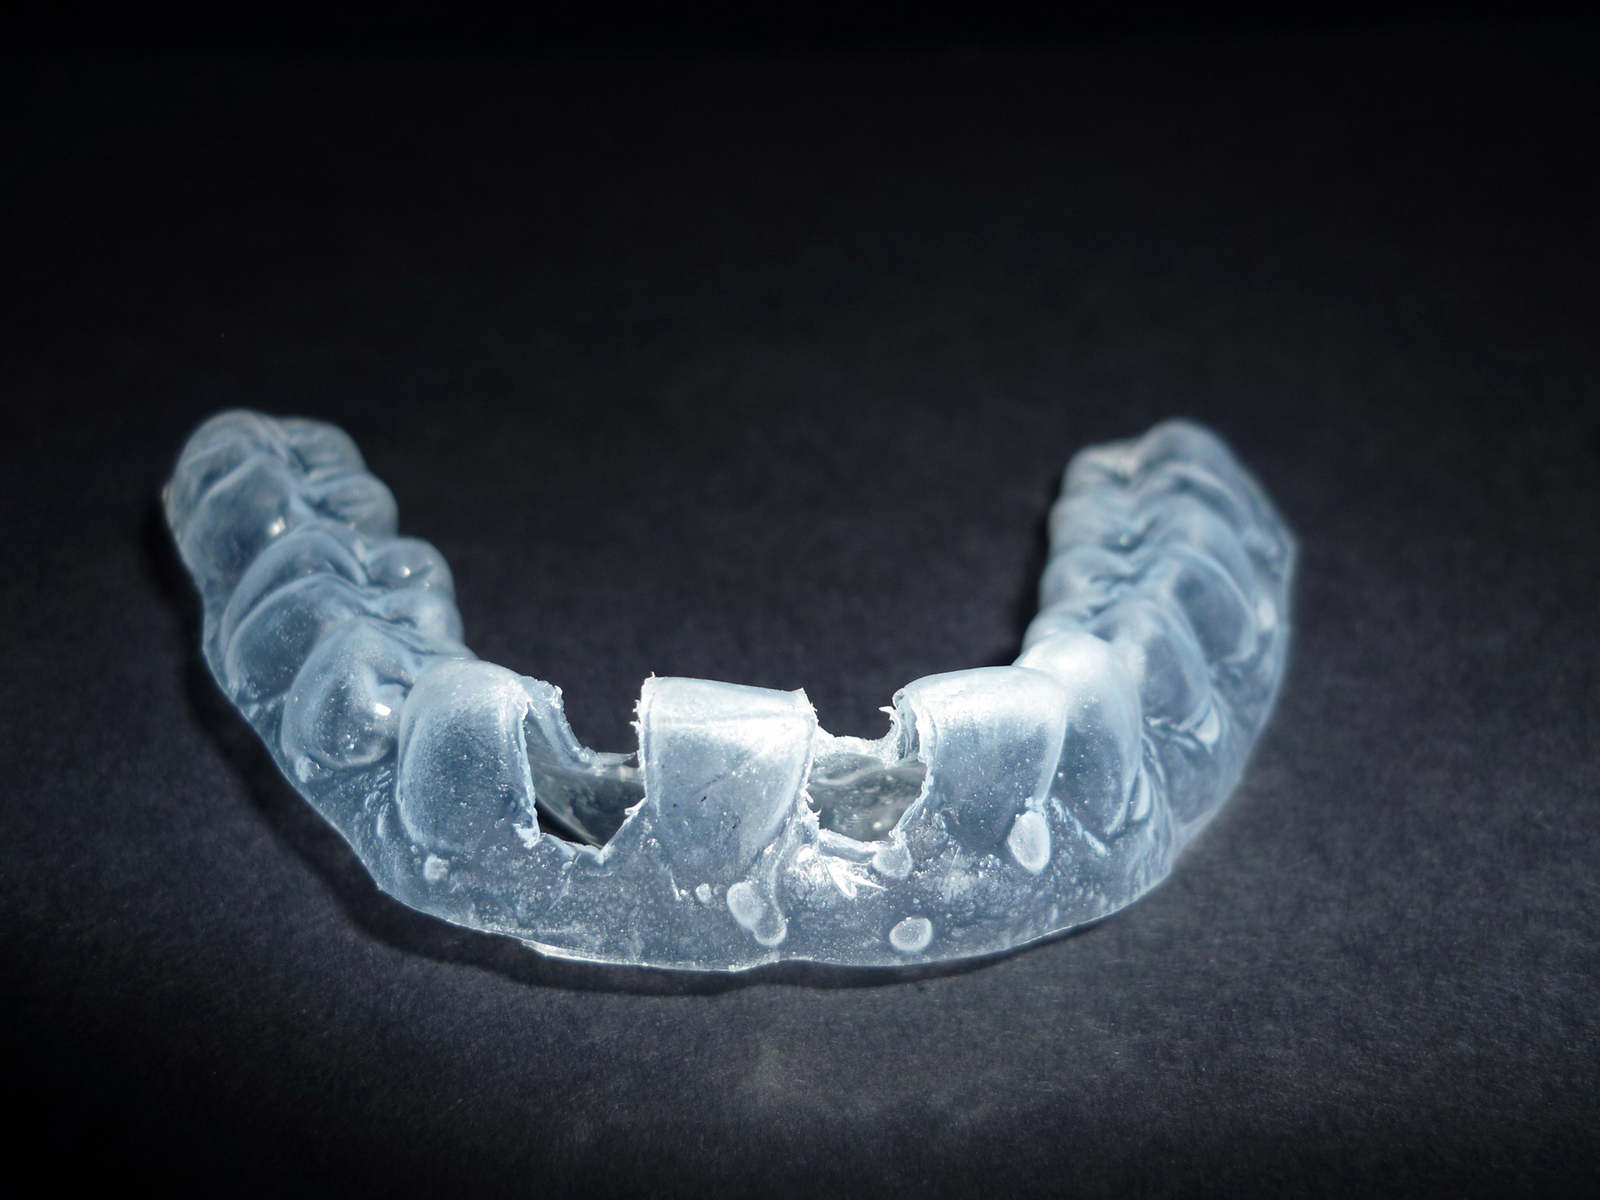
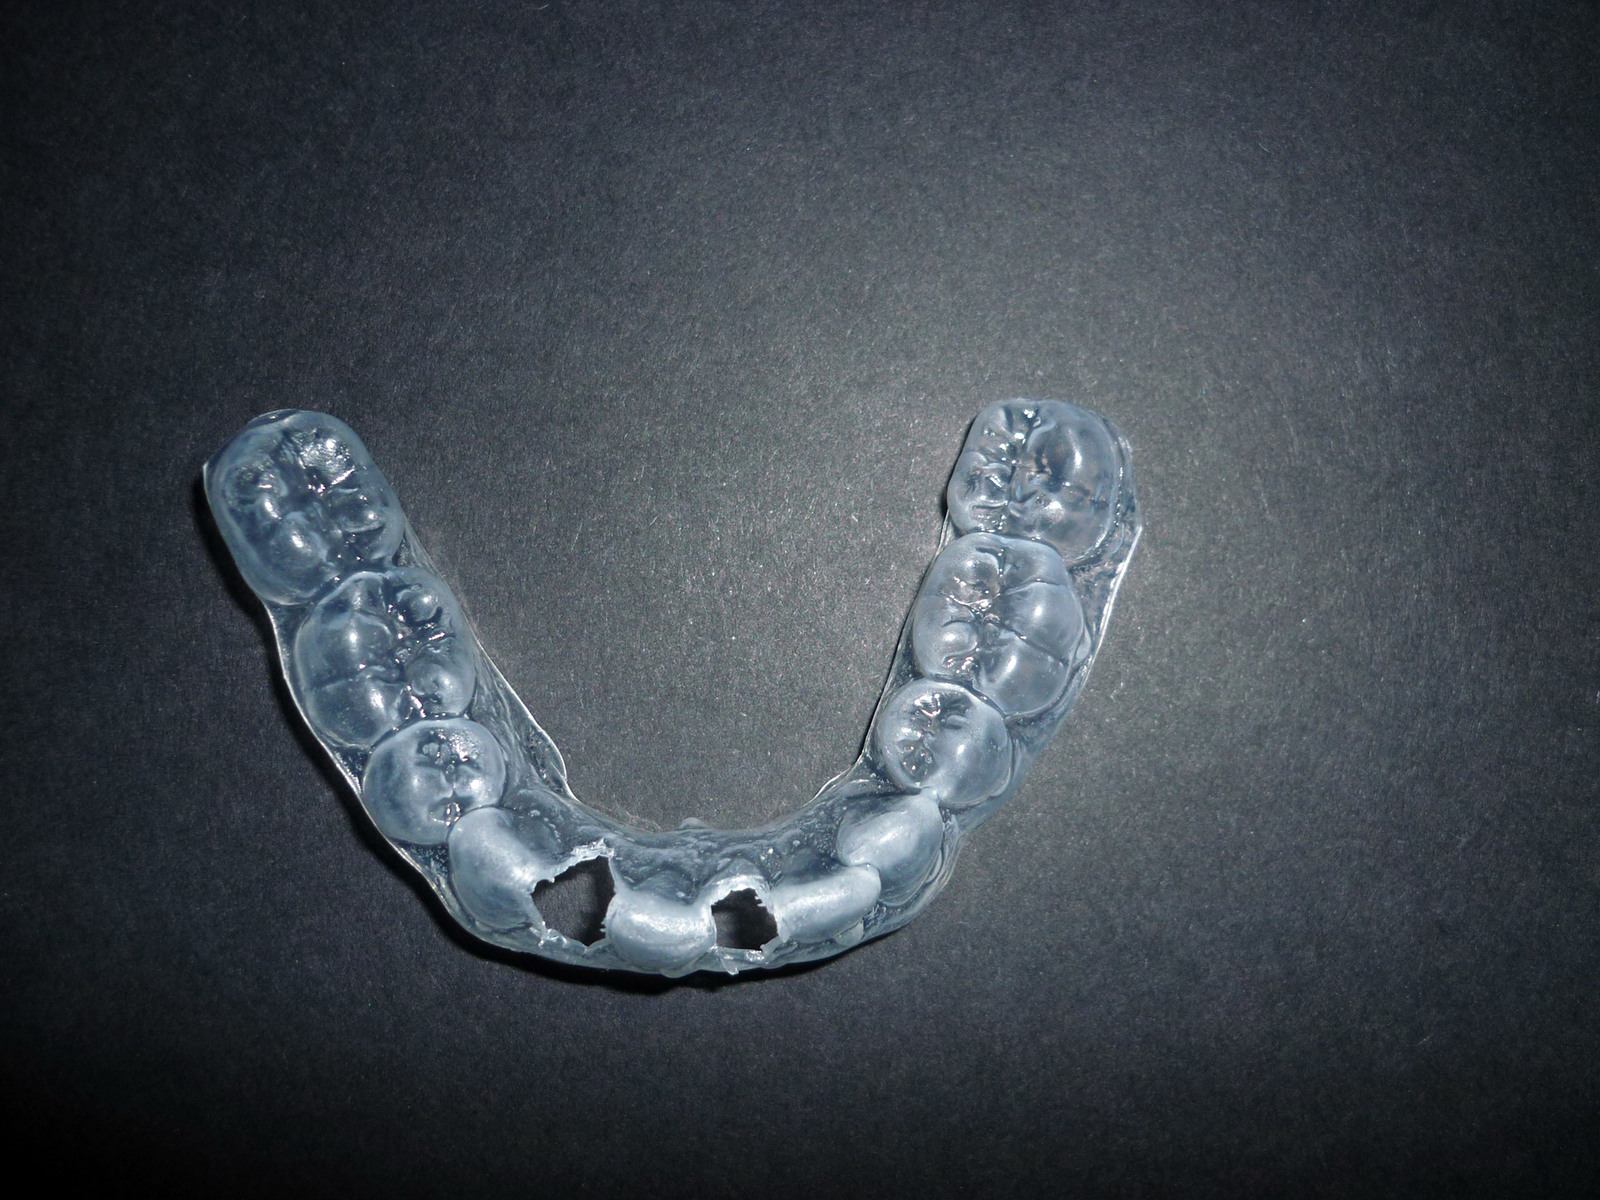
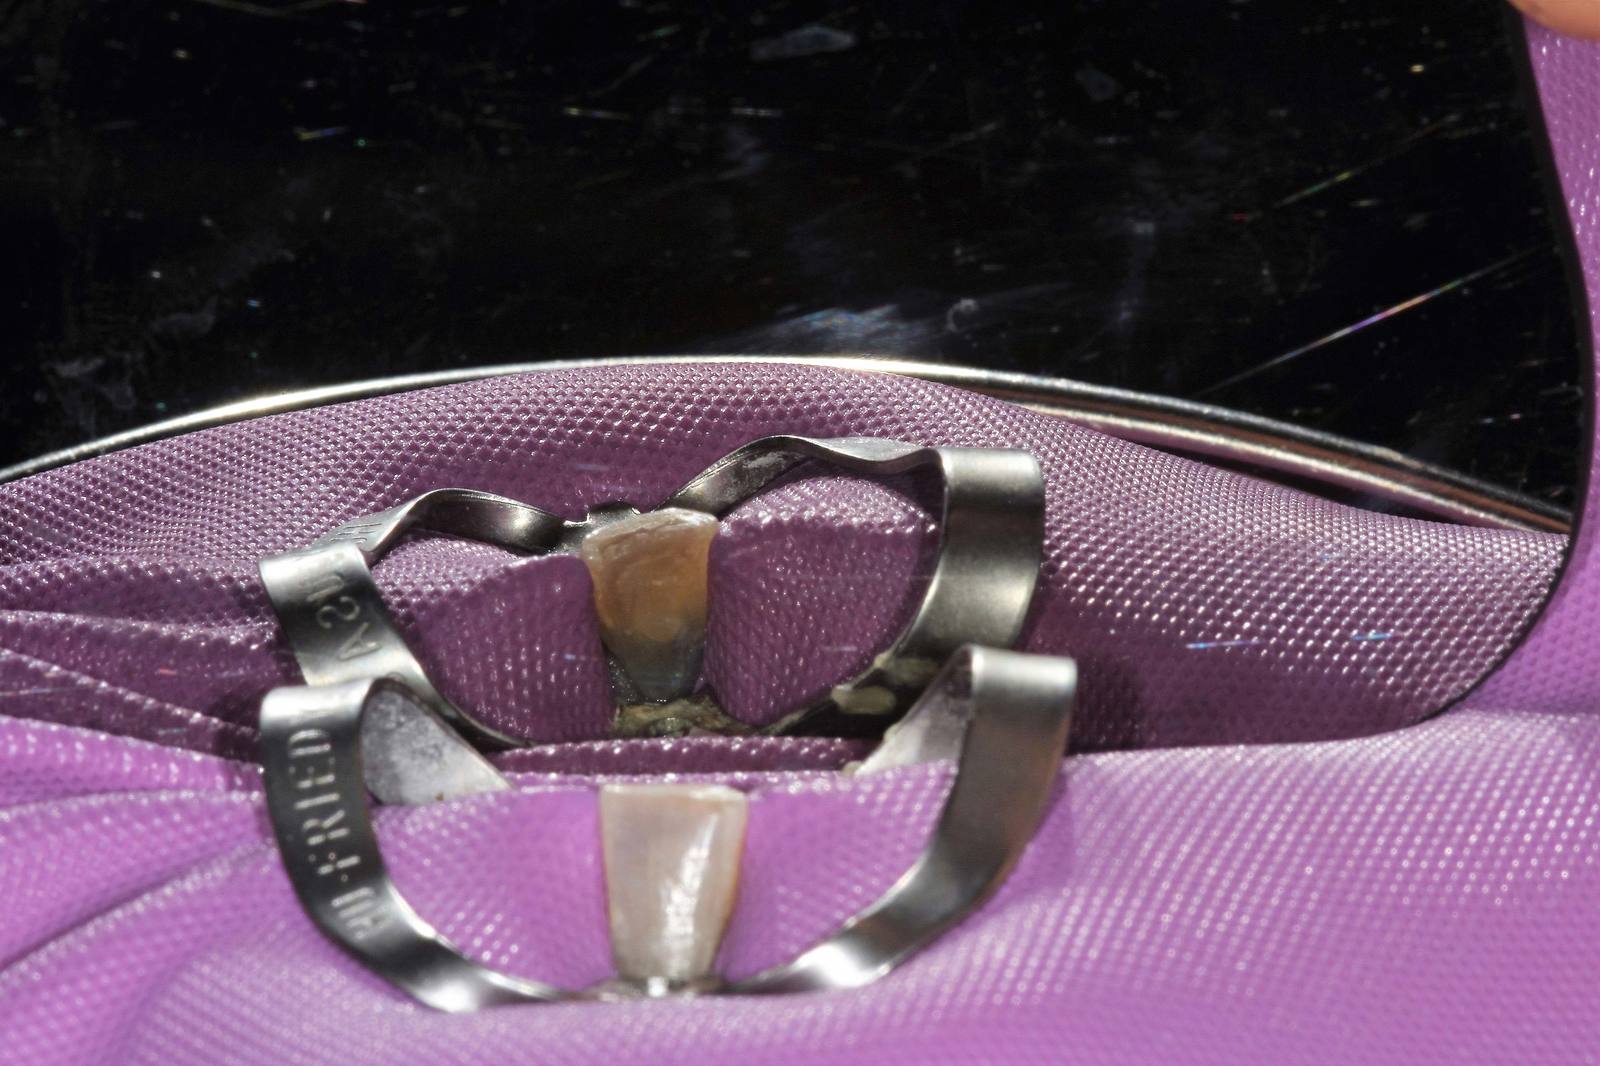
- Alginate impressions of lower arch and construction of lower internal bleaching tray. Specialised tray to be constructed to only cover discoloured tooth, teeth adjacent to discoloured tooth are cut away from the tray to allow the only single tooth to be whitened (Figures 6 and 7)
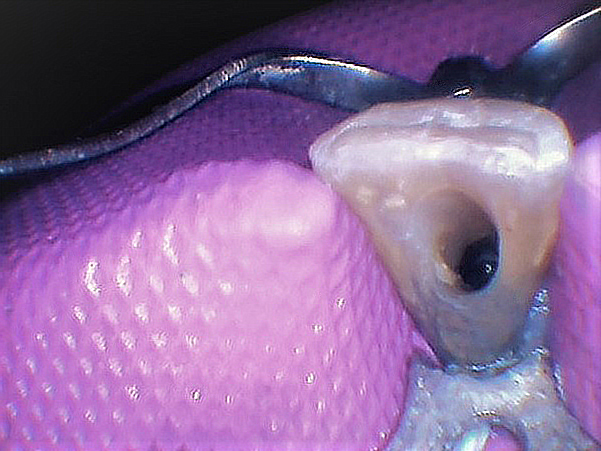
- Isolation of LR1 using rubber dam (Figure 8)
- Removal of coronal seal LR1 and removal of GP 3mm below the cemento-enamel junction allowing the tooth to be whitened from the gingival third upwards (Figure 9). Ultrasonic is used in the remaining cavity to ensure all material has been removed and the cavity is clean
- GIC seal to be placed over the GP (Figure 10)
- Removal of rubber dam
- Patient given instructions and demonstration on placement of 10% carbamide peroxide inside access cavity and instructions on cleaning cavity with Tepe brush every four hours. Some gel was also applied to the labial surface of the tray and worn at the same time over the tooth. The patient renewed the gel every four hours for four days. He was booked in to start the procedure on Friday morning and finished it on Monday afternoon. The patient was asked to carefully watch the tooth and contact the practice if he feels the colour is too light. If this is the case he was asked to stop renewing the gel before time
- Patient returned to the practice on Monday and the colour was reviewed. If the colour is unsatisfactory, step eight is repeated and the patient is reviewed daily. If the colour is satisfactory we proceed to the next step
- Rubber dam is applied. Access cavity to be cleaned thoroughly removing any debris and disinfected. Area to be sandblasted to increase bonding and area to be copiously irrigated. Access cavity to be sealed with composite
- Postoperative clinical photographs and consent forms (Figures 11-13).
Summary
Internal tooth whitening has been described in literature as early as 1961 (Spasser, 1961). Many techniques and procedures have been developed since then such as the inside/outside bleaching technique used for this case. This procedure was first reviewed in 1997 by Settembrini et al (1997).
Good case selection and managing patient expectation is more than half the battle in some cases (Sulieman, 2005). This patient had unsuccessful whitening before and was very sceptical about the success rates of the treatment.
It is very important to determine the cause of tooth discolouration, as this will determine the technique used for whitening. Here the patient reports darkening of the tooth after trauma. This type of discolouration can happen due to the breakdown products of haemoglobin or other haematin molecules from the pulp that can follow a trauma (Marin et al, 1997).
All steps of the treatment were carefully planned especially the trays. It is important for the bleaching trays to be well fitting and custom made. The introduction of saliva into the trays can dilute the gel and negatively effect the result (Dunn, 1998).
A low percentage of 10% carbamide peroxide (Polar Night) was used here to avoid the risk of external root resorption at a later date. The patient was warned about this risk and consented for it (Attin et al, 2003).
Higher percentages of carbamide peroxide and hydrogen peroxide were also considered, but 10% carbamide peroxide was used and a safe low percentage of bleach with low risk and supported by research (Attin et al, 2003; Matis et al, 1999).
This procedure could have been improved by asking the patient to replace the gel every two hours as carbamide peroxide degrades by 50% every two hours (Matis et al, 1999). This may have led to a faster result; however, I felt this would be too much pressure for the patient and I did not want to overload him as this method of whitening is heavily dependent on patient compliance.
Overall this patient was very pleased with the results and felt very happy he did not have to have his tooth drilled unnecessarily.
He is a very nervous patient and was very pleased he had a painless experience with great results. He did not want any further treatment at this moment in time, but further options were discussed should he wish to return in the future.
Internal tooth whitening can be one of the most life-changing treatments, but it must be done following the correct protocol ie, access cavity below the cemento-enamel junction, good patient compliance and an effective coronal seal. Too often it is tried without success and destruction of healthy tooth tissue is favoured (Poyser et al, 2004). This procedure has been a very rewarding case to do it has been life changing for the patient. He is extremely happy with the result and cannot believe such a painless and invasive procedure has given him more than he had ever hoped for.
References
Attin T, Paqué F, Ajam F, Lennon AM (2003) Review of the current status of tooth whitening with the walking bleach technique. Int Endod J 36(5): 313-329
Dunn JR (1998) Dentist prescribed home bleaching: current status. Compend Contin Educ Dent 9(8): 760-764
Marin PD, Bartold PM, Heithersay GS (1997) Tooth discolouration by blood: an in vitro histochemical study. Endod Dent Traumatol 13: 132-138
Matis BA, Gaiao U, Blackman D, Schultz FA, Eckert GJ (1999) In vivo degradation of bleaching gelused in whitening teeth. J Am Dent Assoc 130: 227–235
Poyser NJ, Kelleher MG, Briggs PF (2004) Managing discoloured non-vital teeth: the inside/outside bleaching technique. Dent Update 31(4): 204-214
Settembrini L, Gultz J, Kaim J, Scherer W (1997) A technique for bleaching non-vital teeth: inside/outside bleaching. J Am Dent Assoc 128: 1283-1284
Spasser HF (1961) A simple bleaching technique using sodium perborate. NY Dent J 27: 332-334
Sulieman M (2005) An overview of bleaching techniques: 2. Night guard vital bleaching and non-vital bleaching. Dent Update 32(1): 39-46

