Nilesh R Parmar presents a case where the patient elected for a long-term solution to restore his central incisors.
This professional athlete was referred to me by his general dental practitioner. He had post crowns fitted over 15 years ago in his upper central incisors due to previous trauma. Since the work was carried out, the patient has been an irregular dental attender. He recently had both post crowns decedent after a repeated trauma. His dentist, who recemented the crowns, diagnosed both roots as having had fractured with decay and possible pathology. Medically, the patient was fit and well with no allergies.
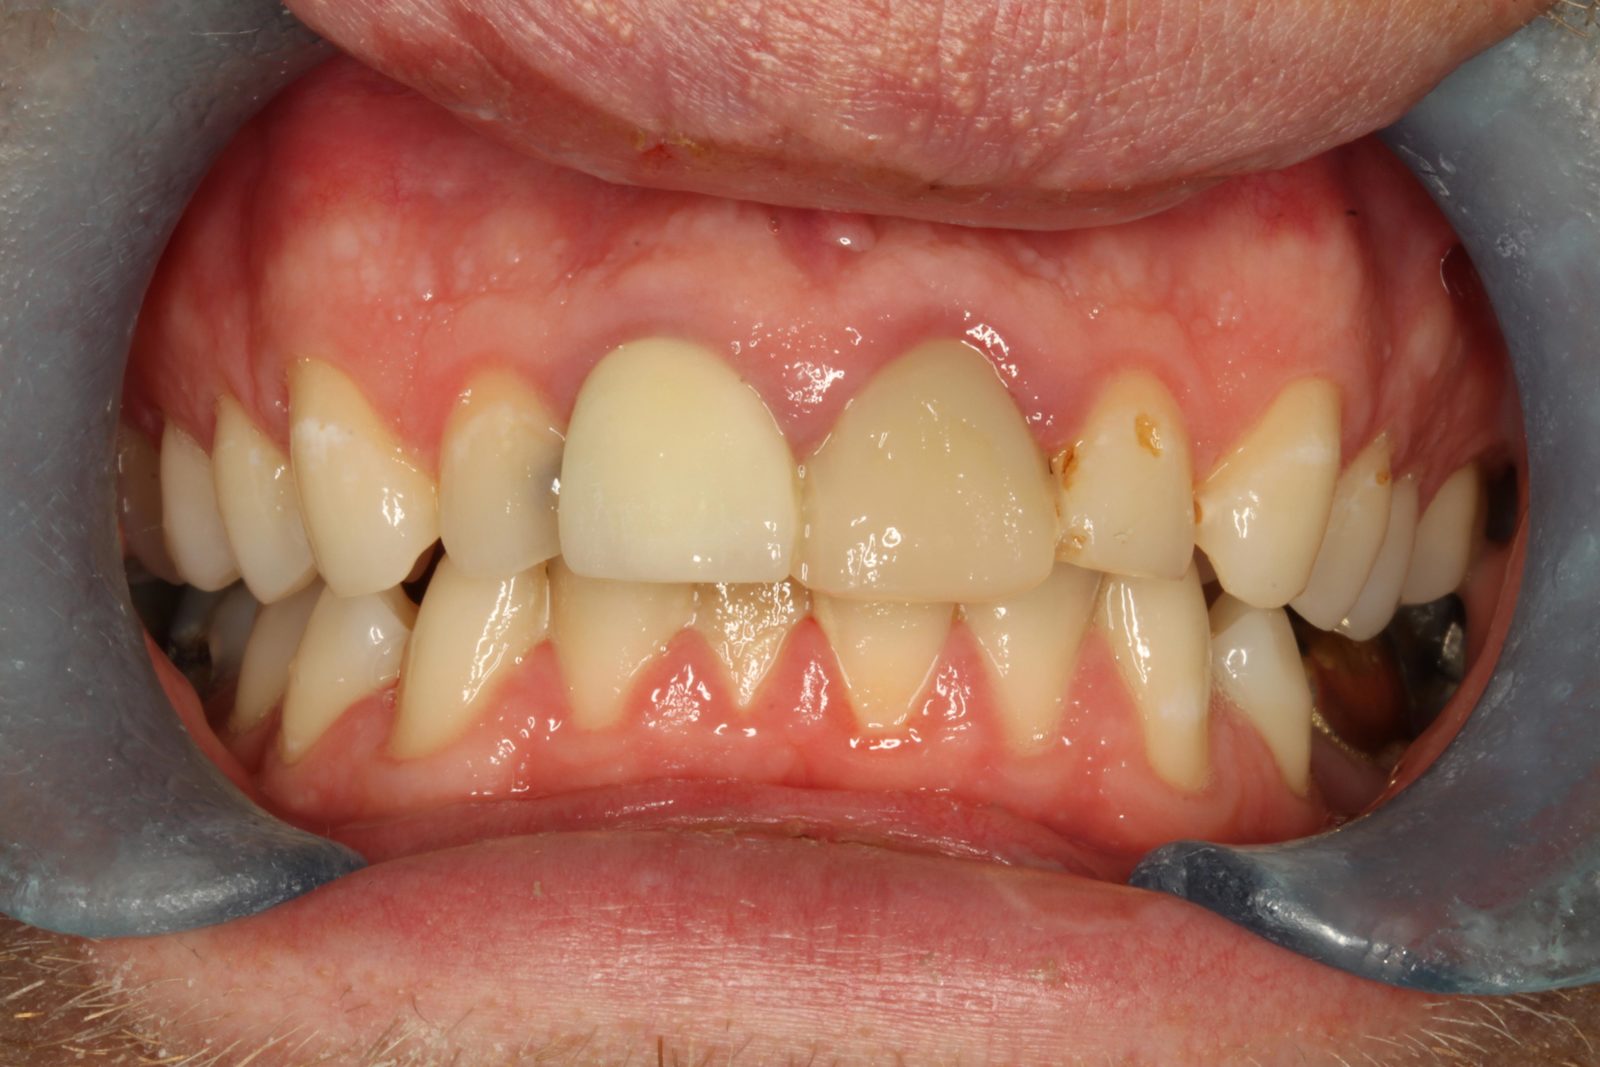
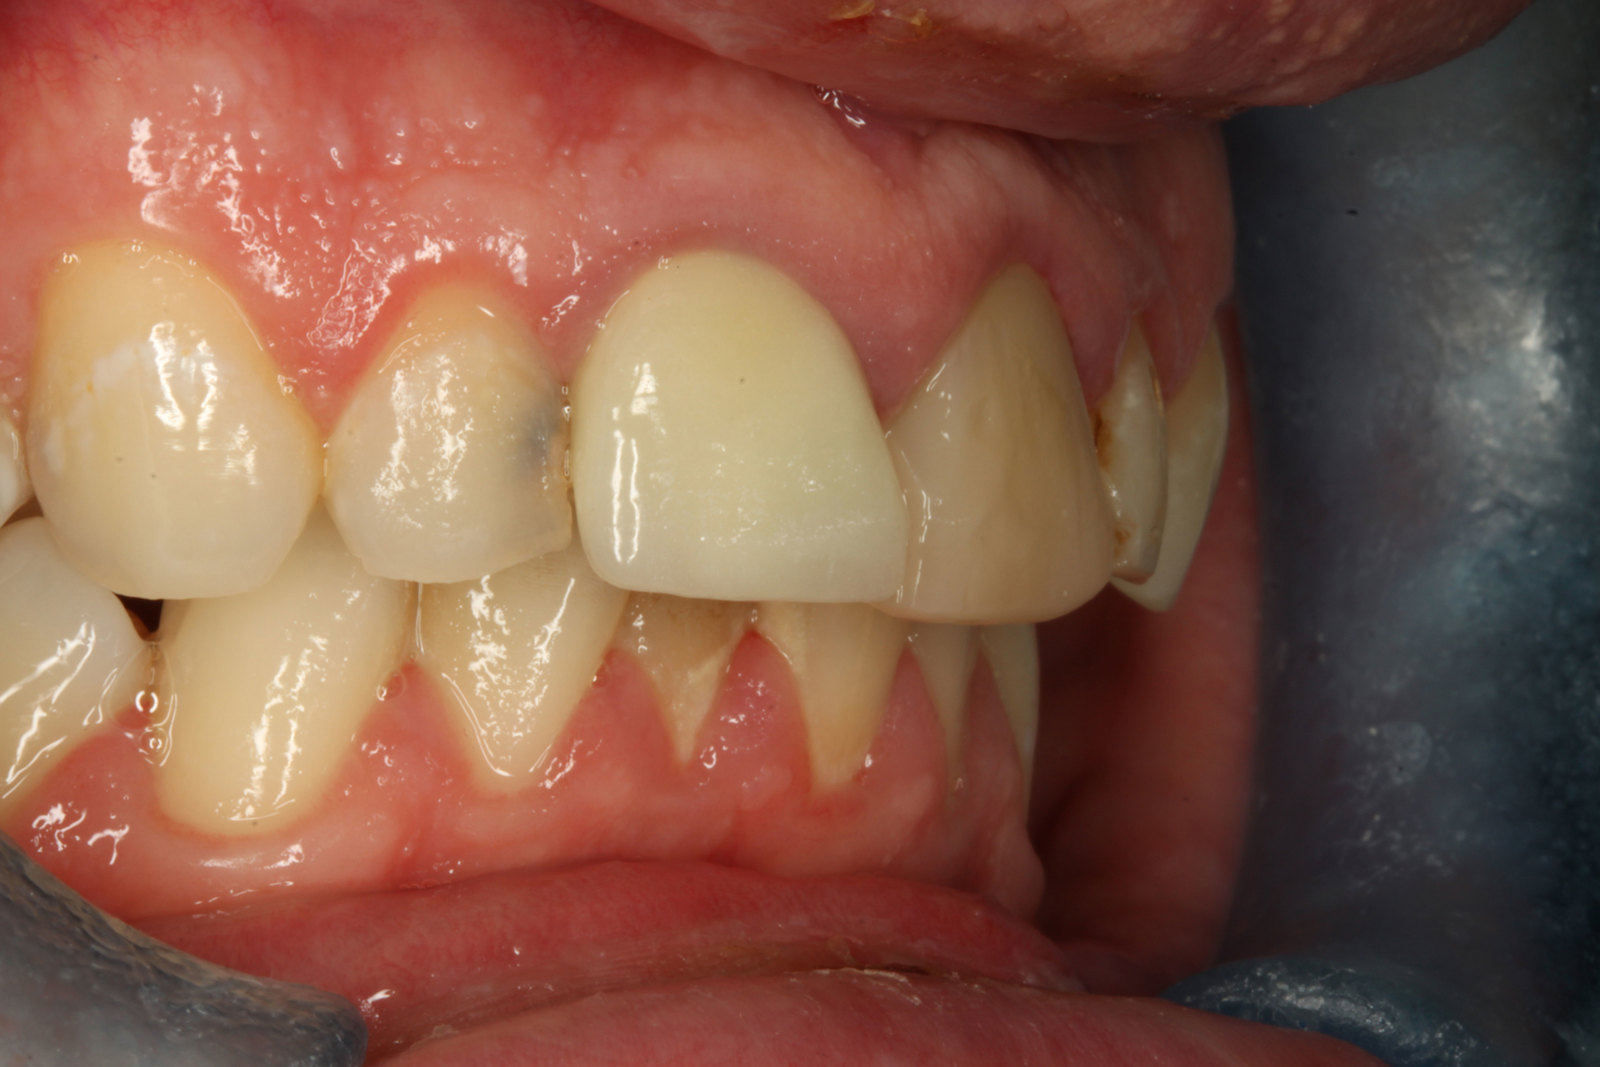
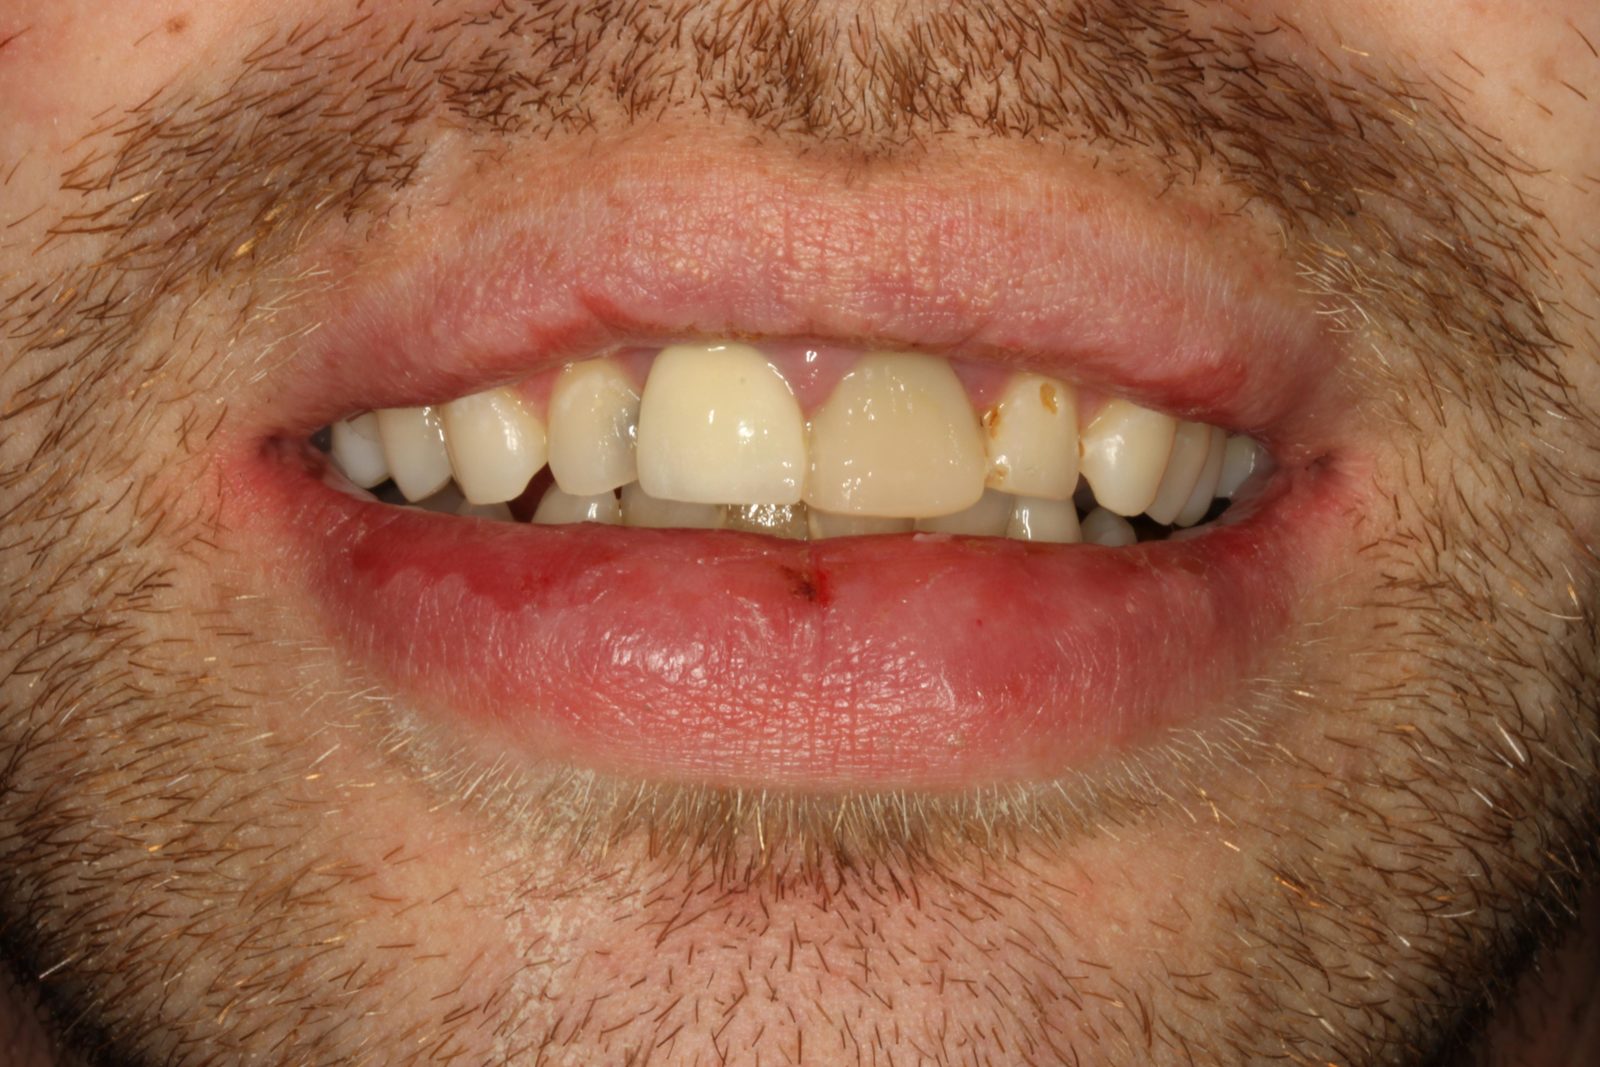
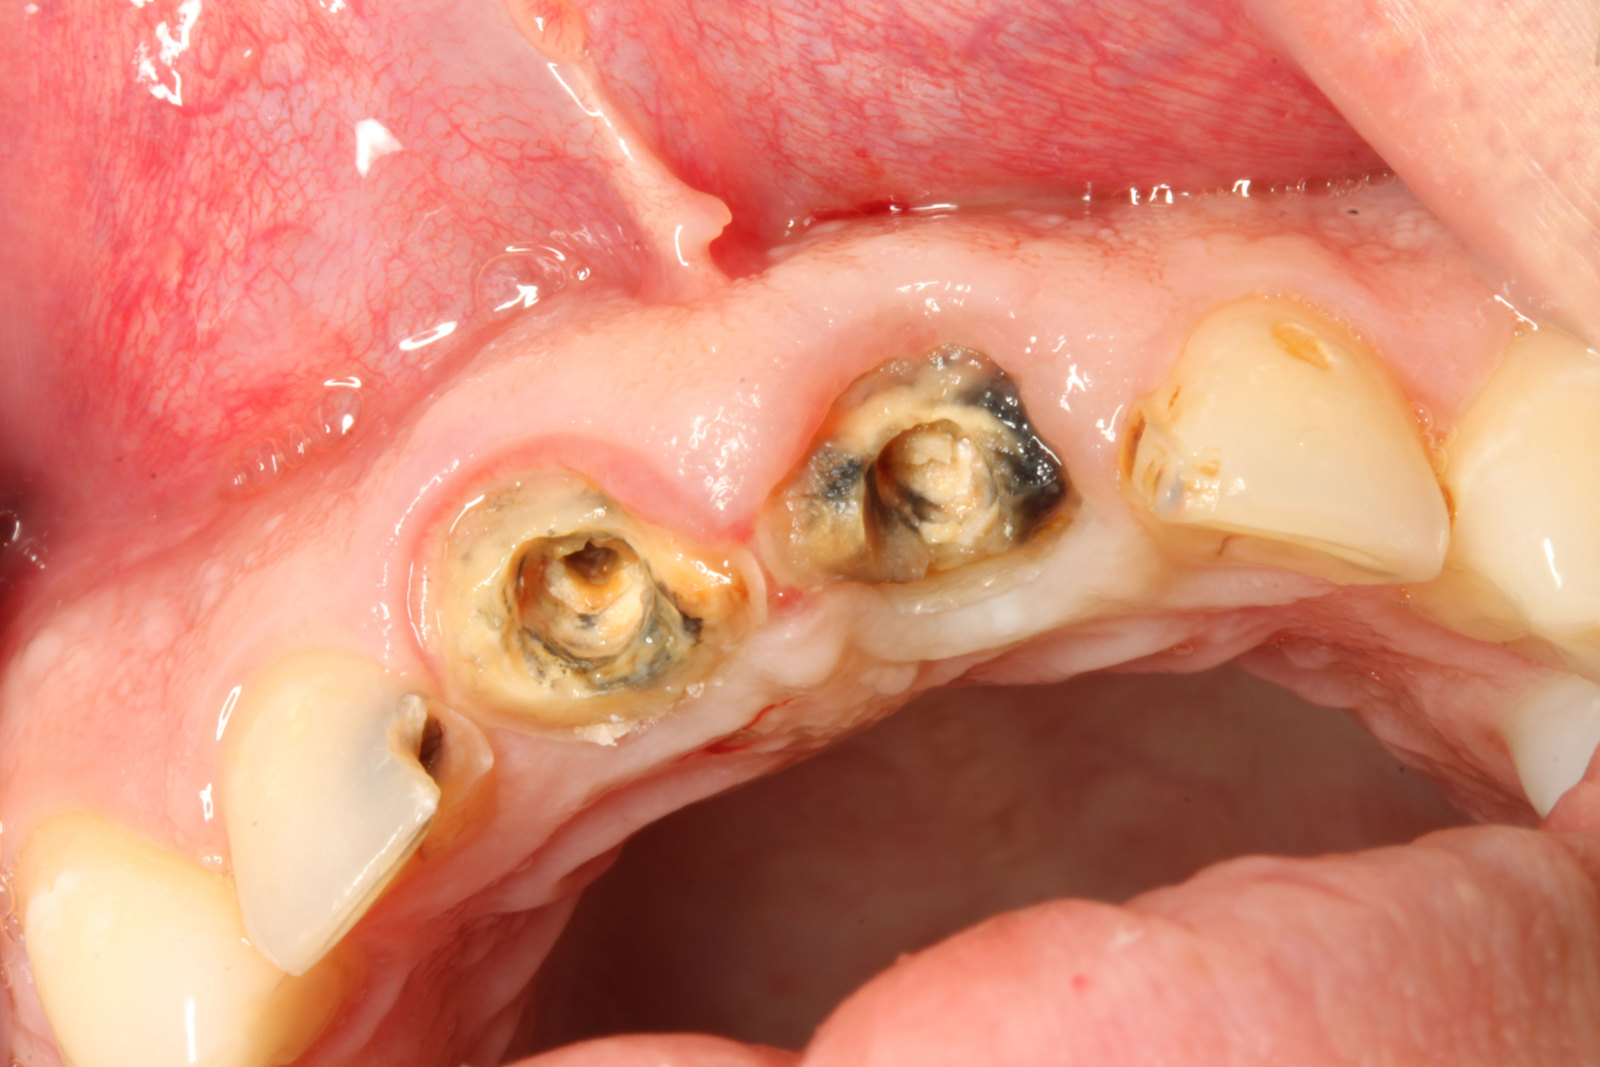
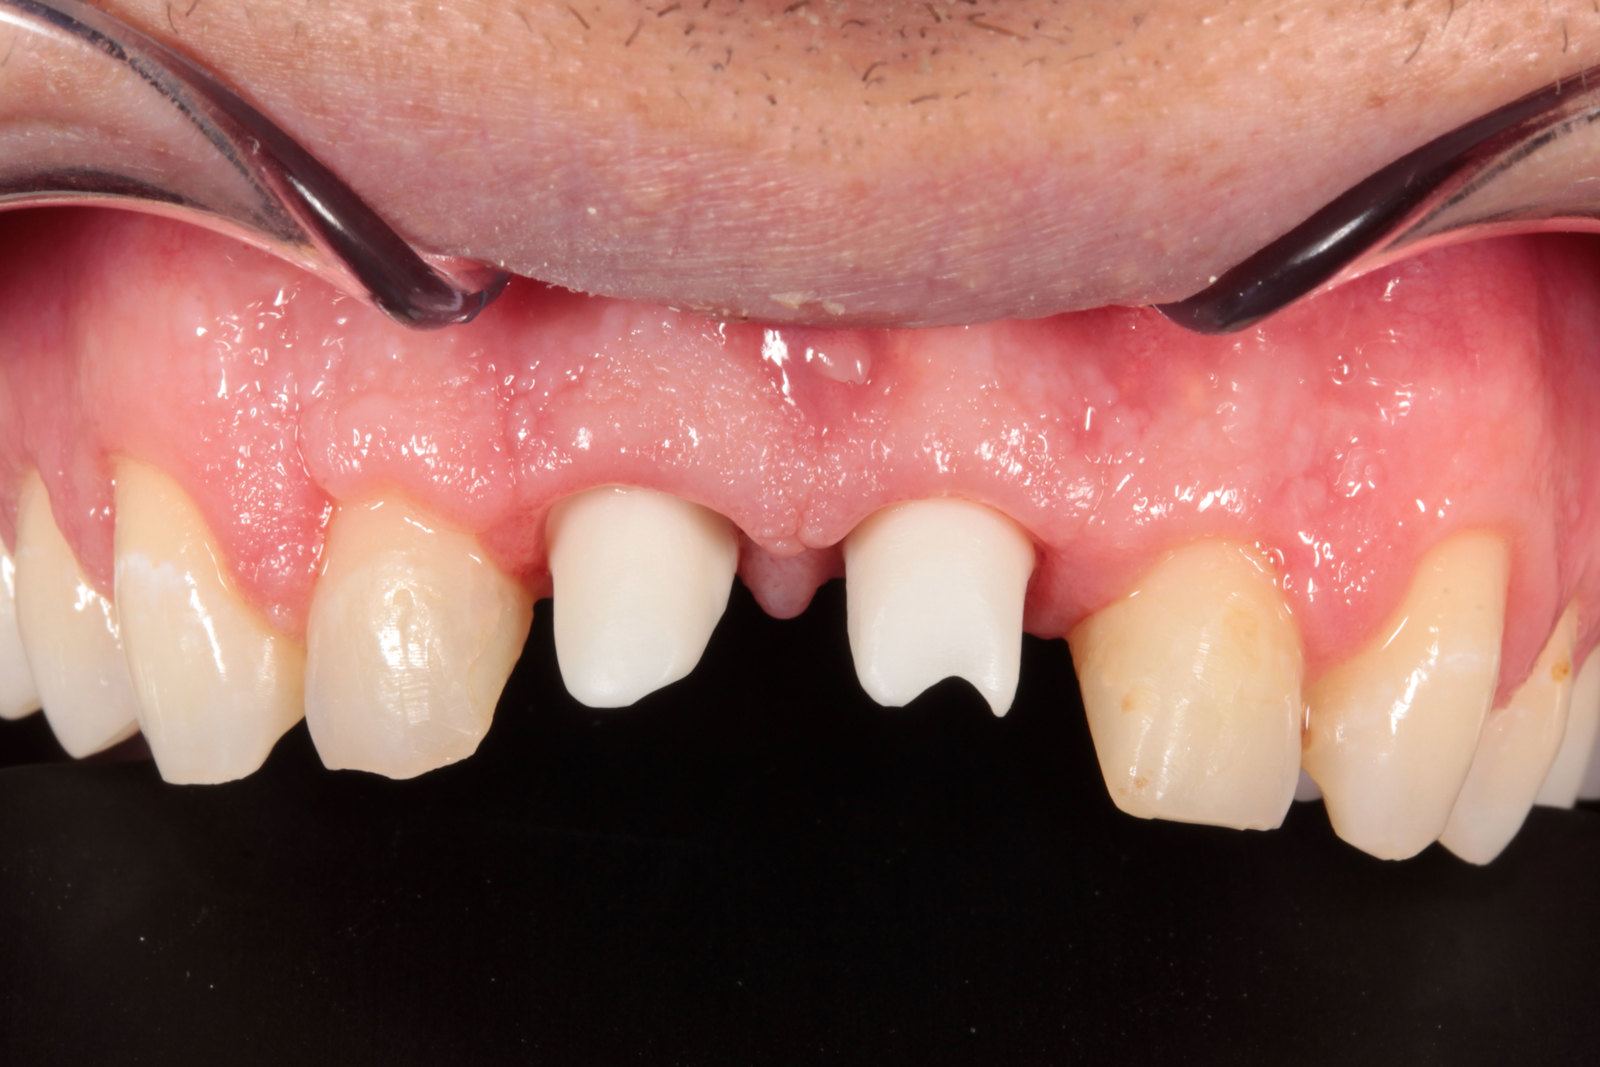
The patient was very concerned about the longevity of his existing central incisors (Figures 1-4). His dentist told him that both roots have a poor prognosis and some alternative restoration modalities are needed. His main concern was not having to wear a denture at any point during his treatment.
he presented with poor oral hygiene and caries in UR2 and UL2, with open margins around the UR1 and UL1 post crowns. The UL1 post crown was mobile and pus was palpable from the gingival crevice. The patient reported feeling demotivated about his teeth and being afraid to smile in pictures.
The patient was unhappy with the appearance of his teeth, with his primary concerns being:
- The failing upper post crowns
- The disharmony in emergence and colour of both upper central incisor teeth
- The health of the gums (periodontal condition).
Treatment options
- Dismantle the current post crowns and attempt to re-make them
- Removal of one or both post crowns and replace them with a removable solution
- Removal of one or both post crowns and replace them with a fixed solution.
The patient was unwilling to entertain a removable solution at any point in his treatment. It was decided to dismantle the UR1 and UL1 and assess if re-making the post crowns would be possible. If not, an implant solution would be pursued.
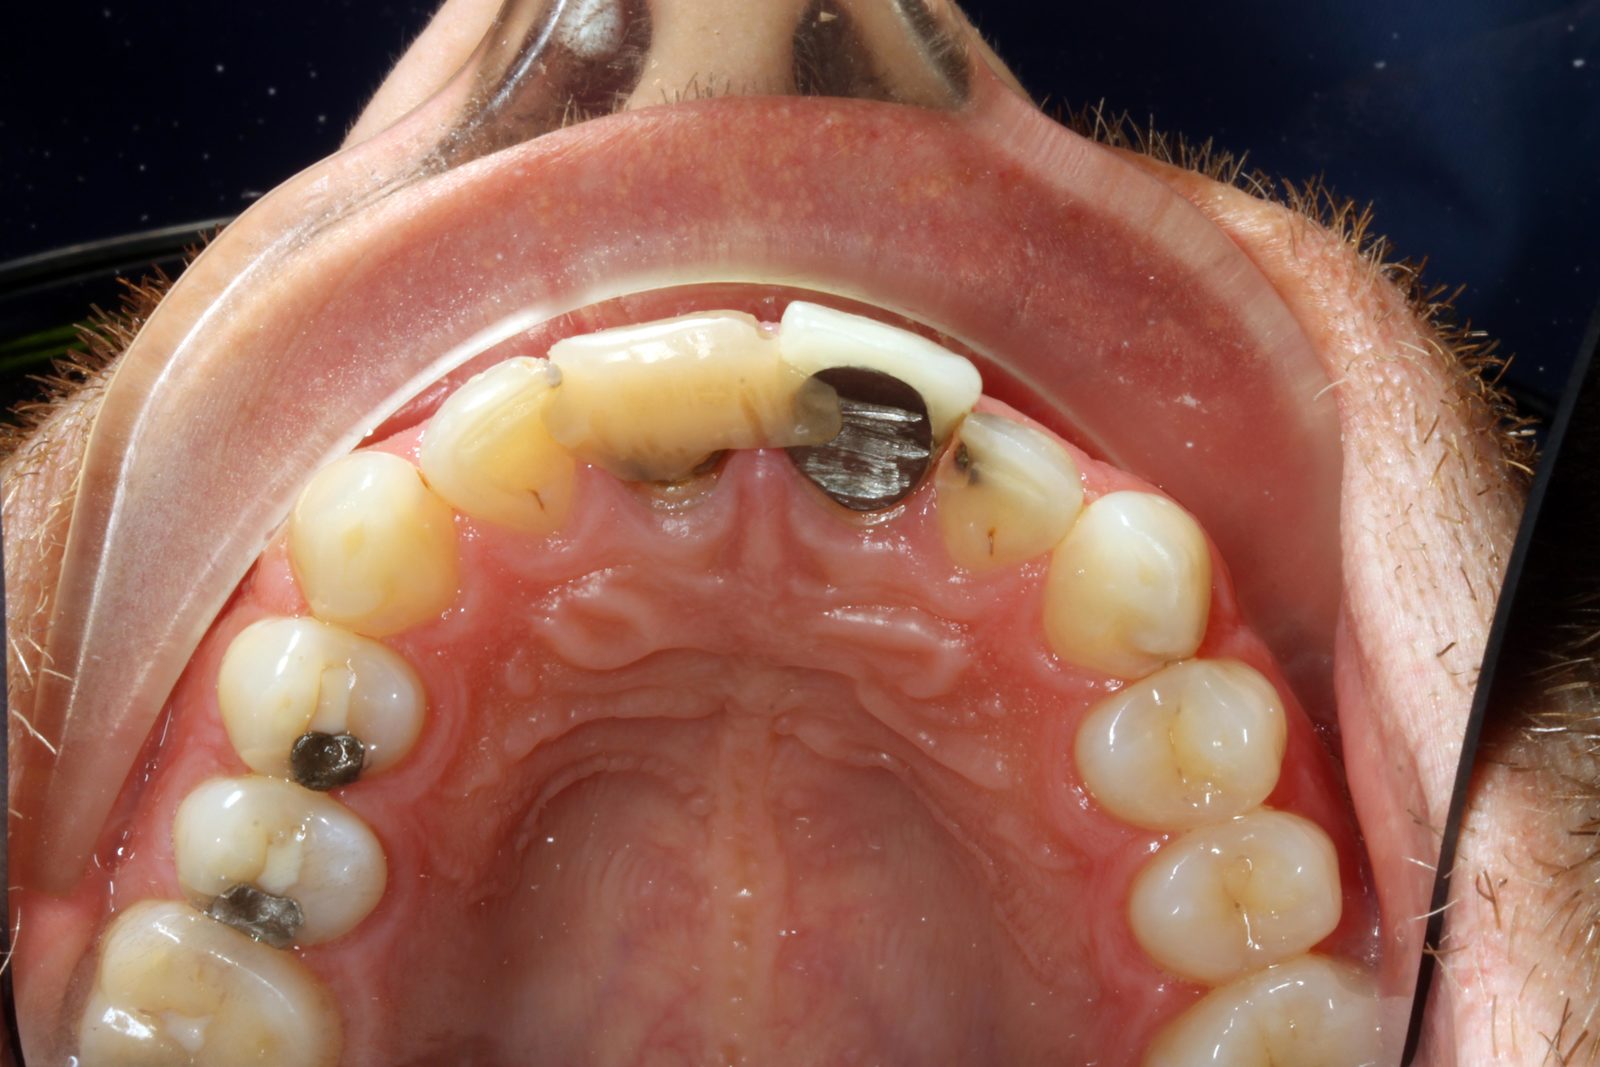
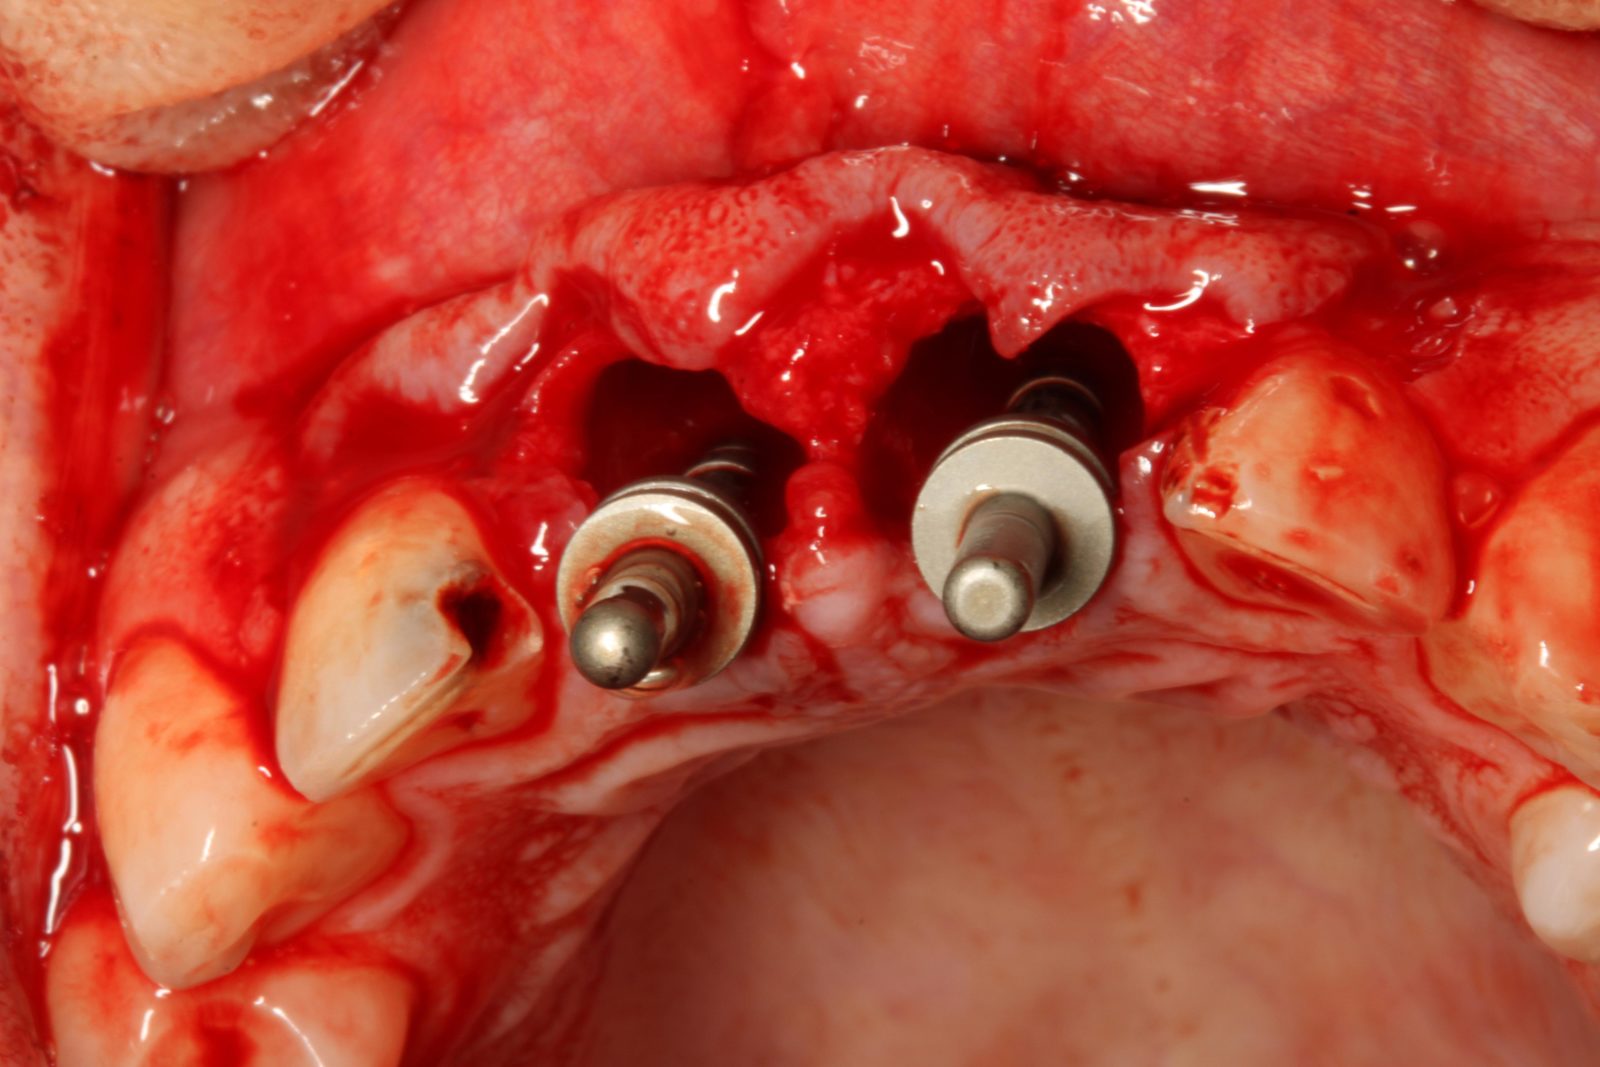
When the post-crowns were removed, it was clear that the UL1 root was carious below the gingival margin with a root fracture of the UR1 (Figure 5). At this stage, it was decided that an implant solution would be the best long-term treatment.
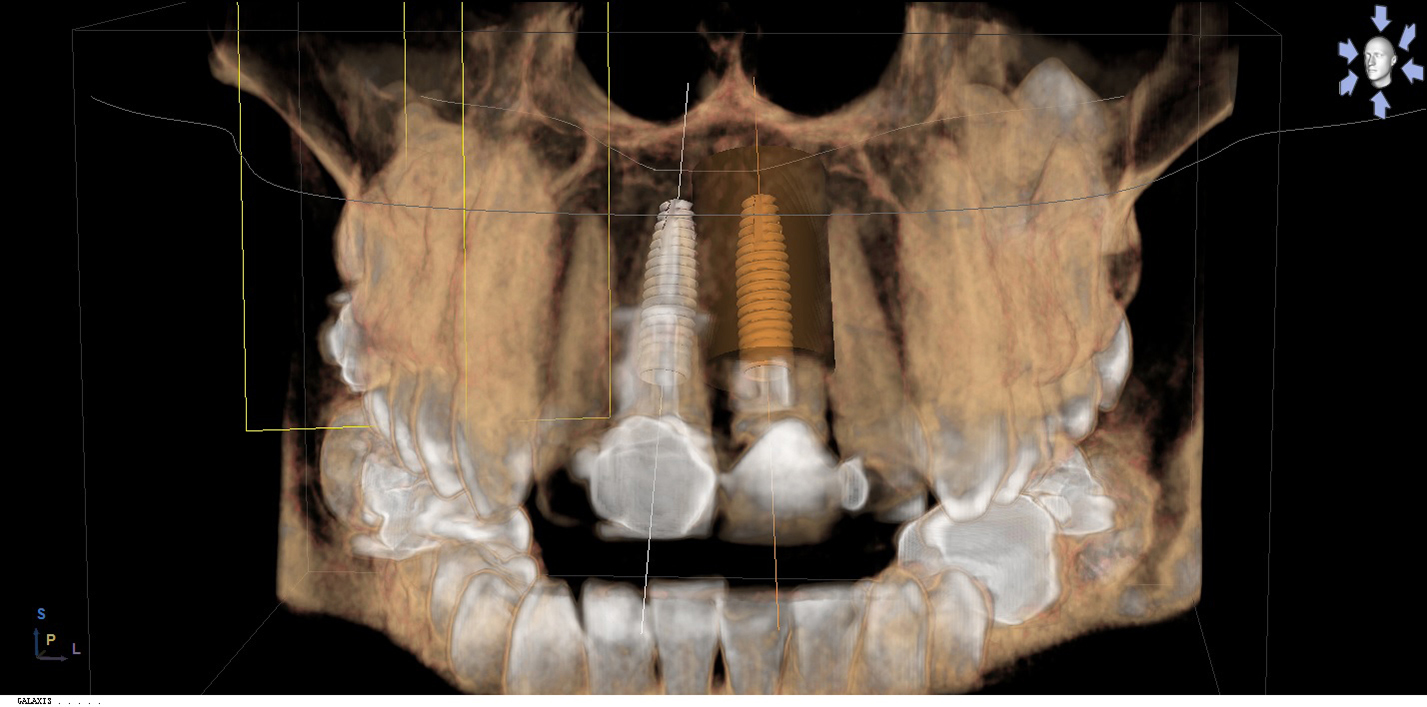
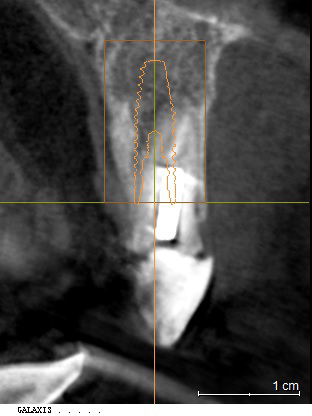
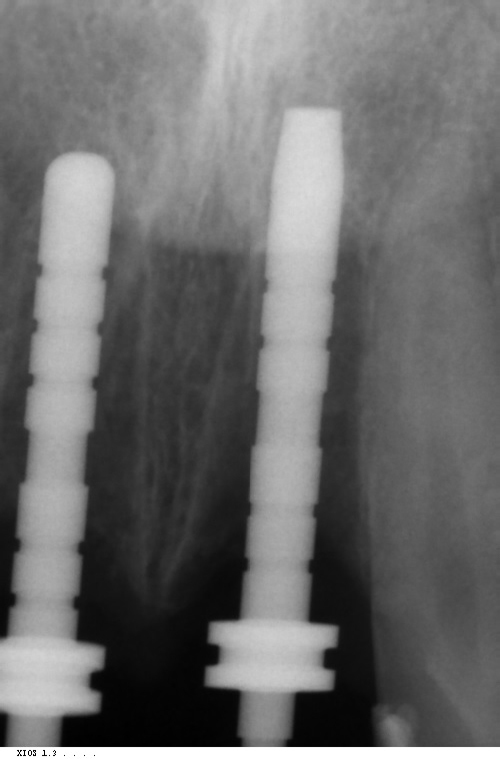
Due to a denture being ruled out, an ambitious plan of immediate implant placement, simultaneous grafting and immediate temporisation was developed. A CBCT scan showed a tall bony envelope in the upper incisor region, allowing for placement of a long and wide immediate implant (Figures 6 and 7). We would be able to engage dense palatal bone, enabling us to achieve adequate primary stability for temporisation at the time of implant placement.
The patient was keen to undergo teeth whitening and this was carried out while the implants were integrating. The decay around the upper lateral incisors was also treated at this time.
Implant placement and immediate temporisation
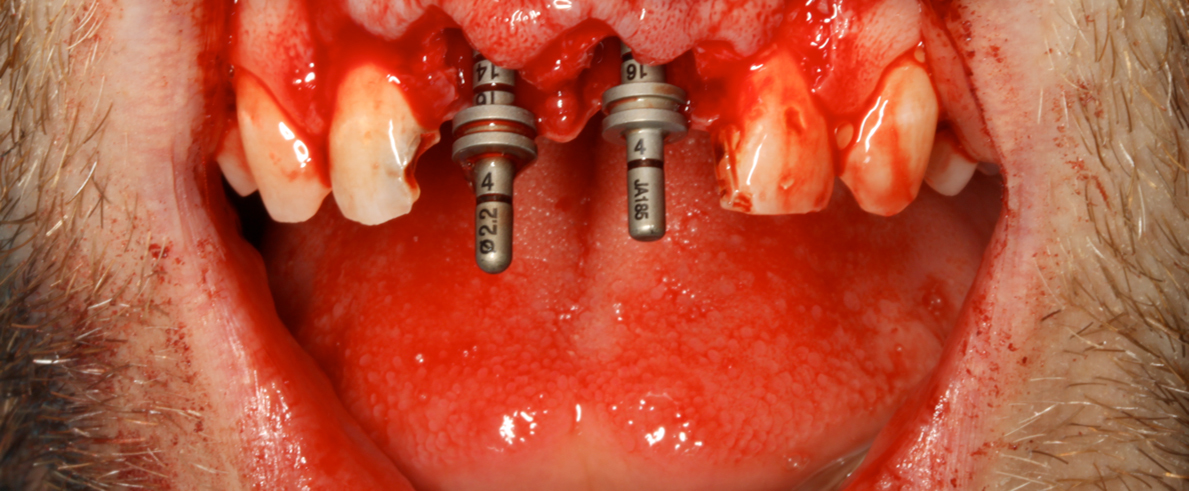
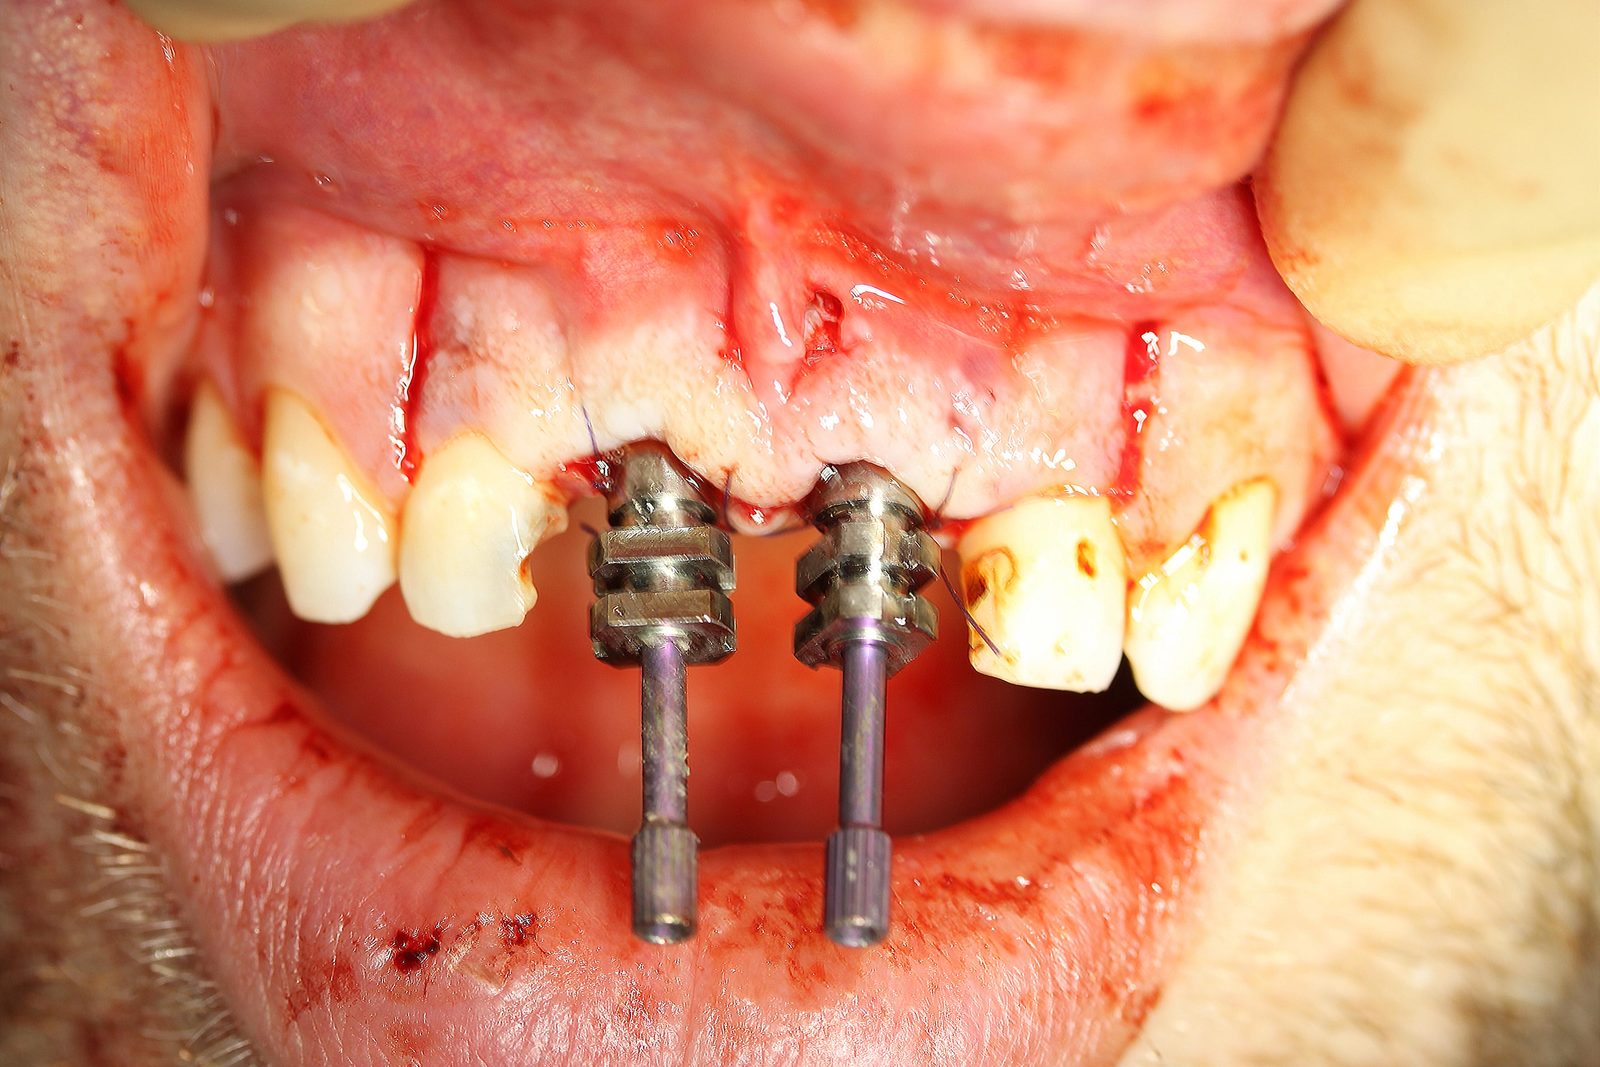
Implant placement was carried out under local anaesthetic. Both upper central incisors were removed using periotomes with care not to damage the buccal plate. Straumann 4.1 x 13mm implants were placed into the palatal bone. These achieved primary stability of 35Ncm which was sufficient stability for immediate temporization (Figures 8-10).
The jumping distance between the implants and the buccal plate was grafted with Cerabone (bovine bone substitute and a porcine membrane).
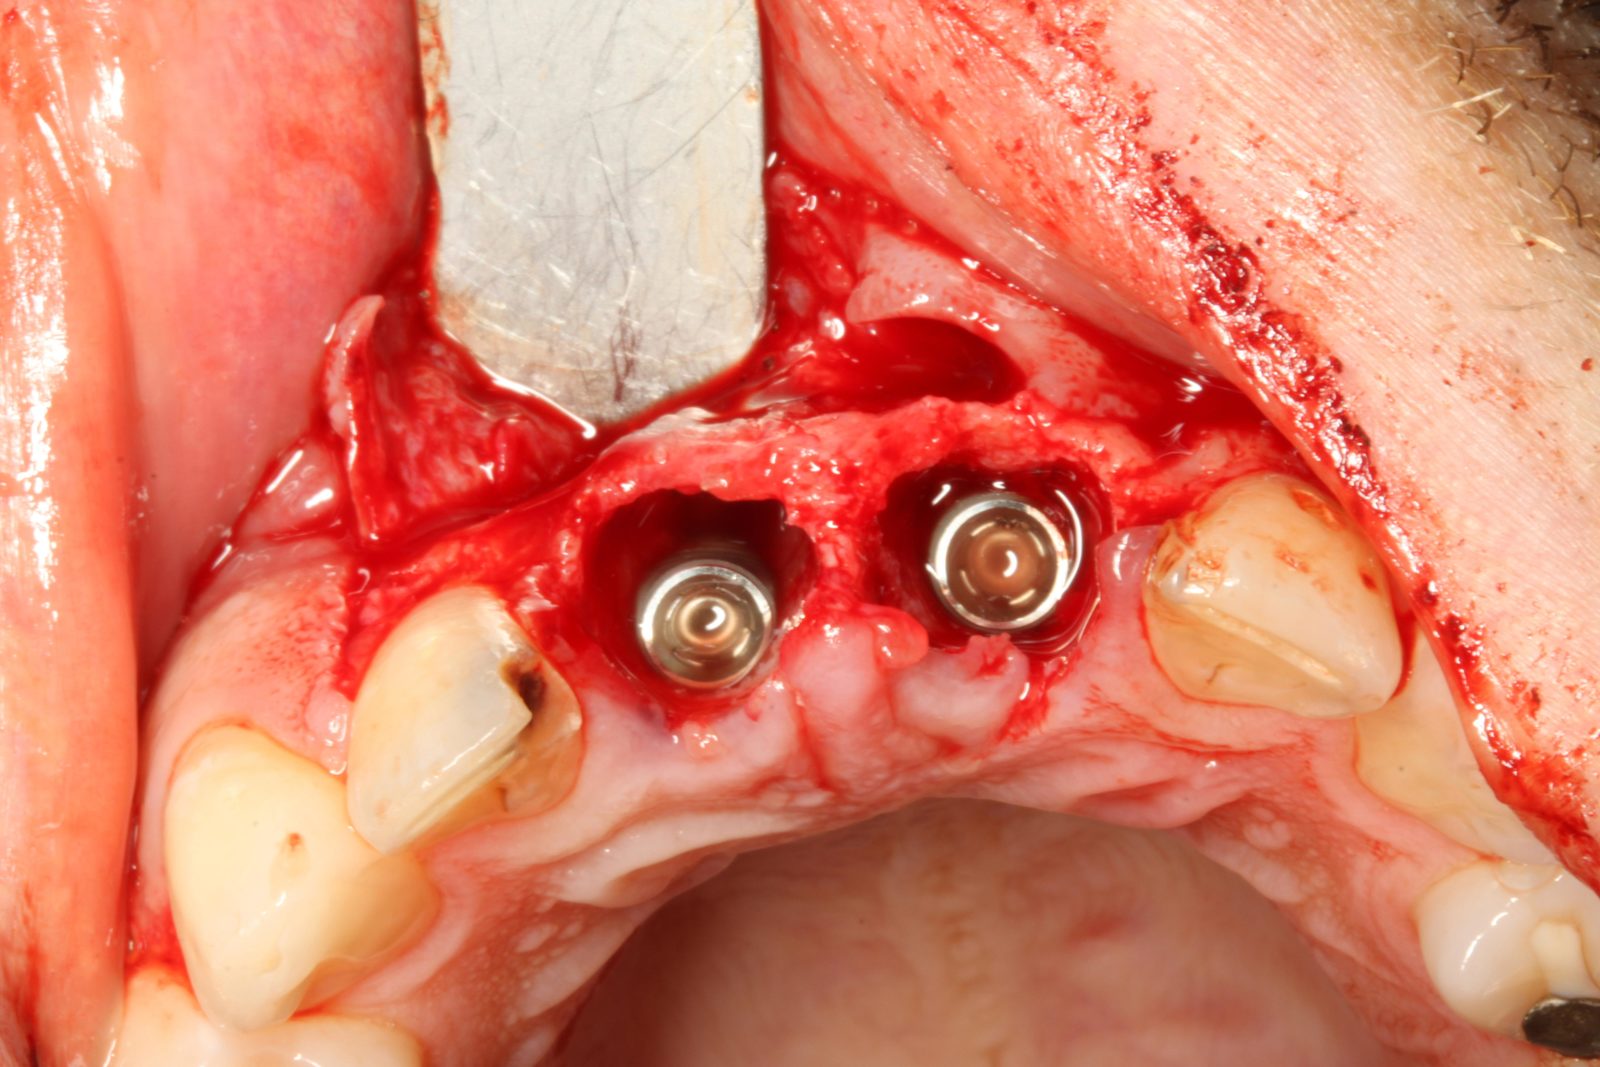
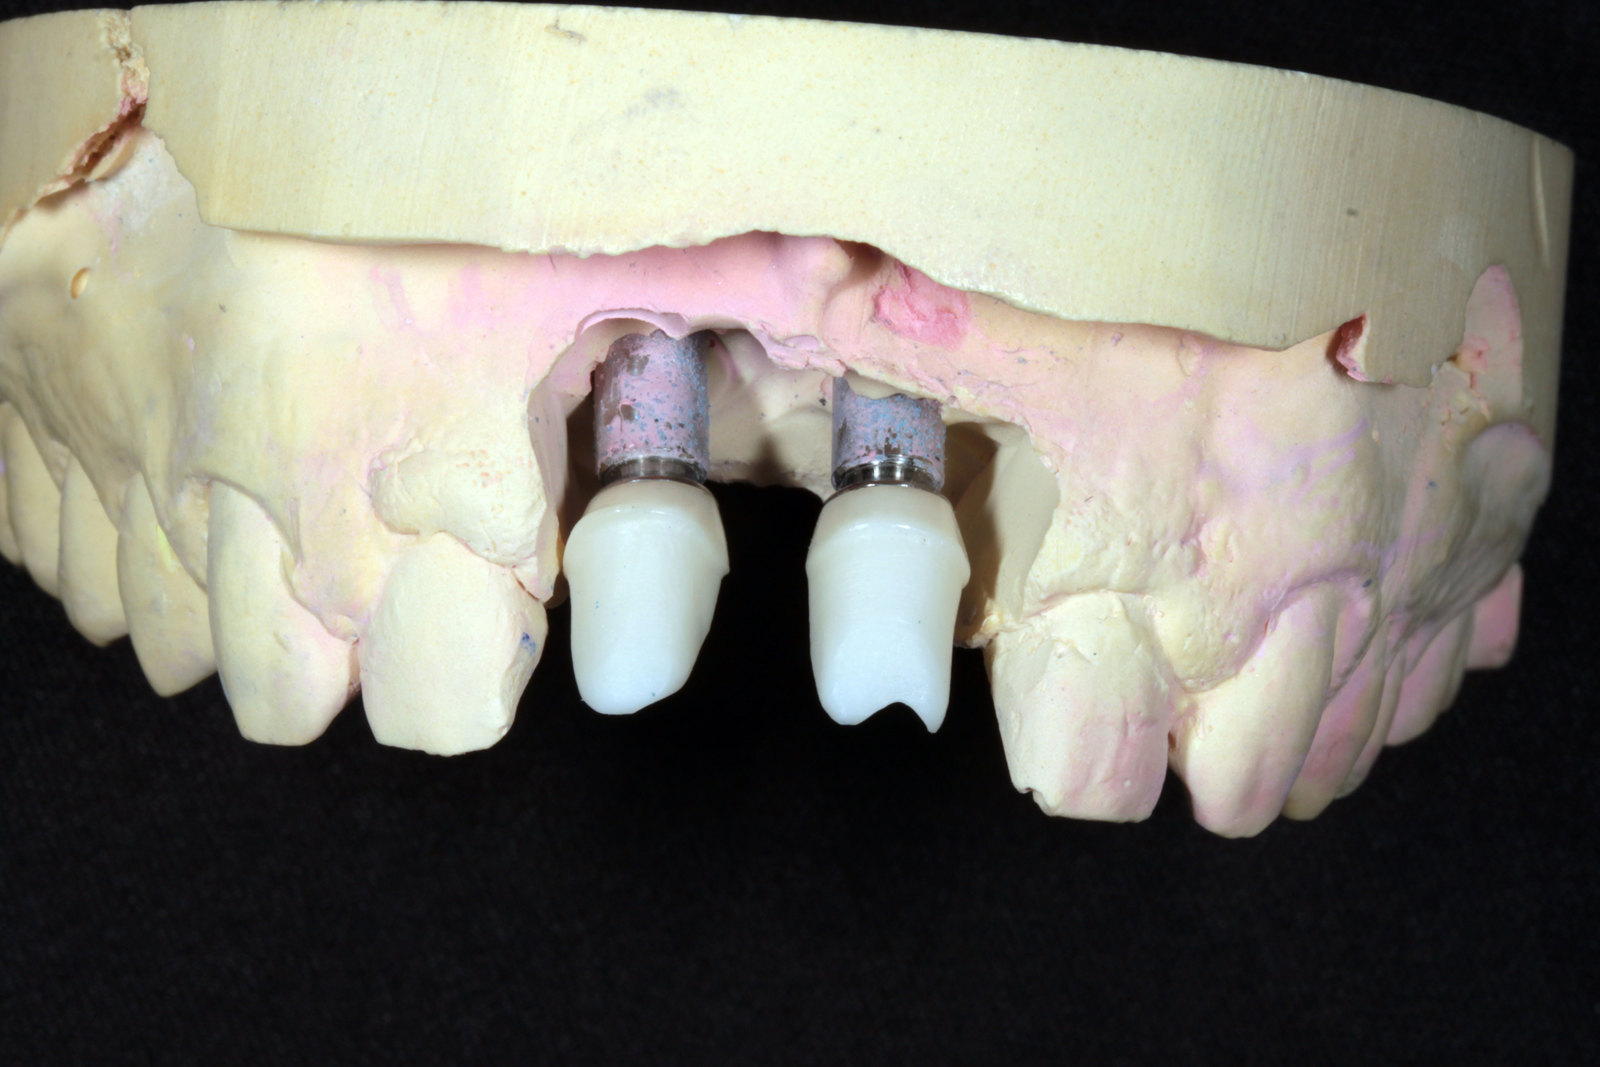
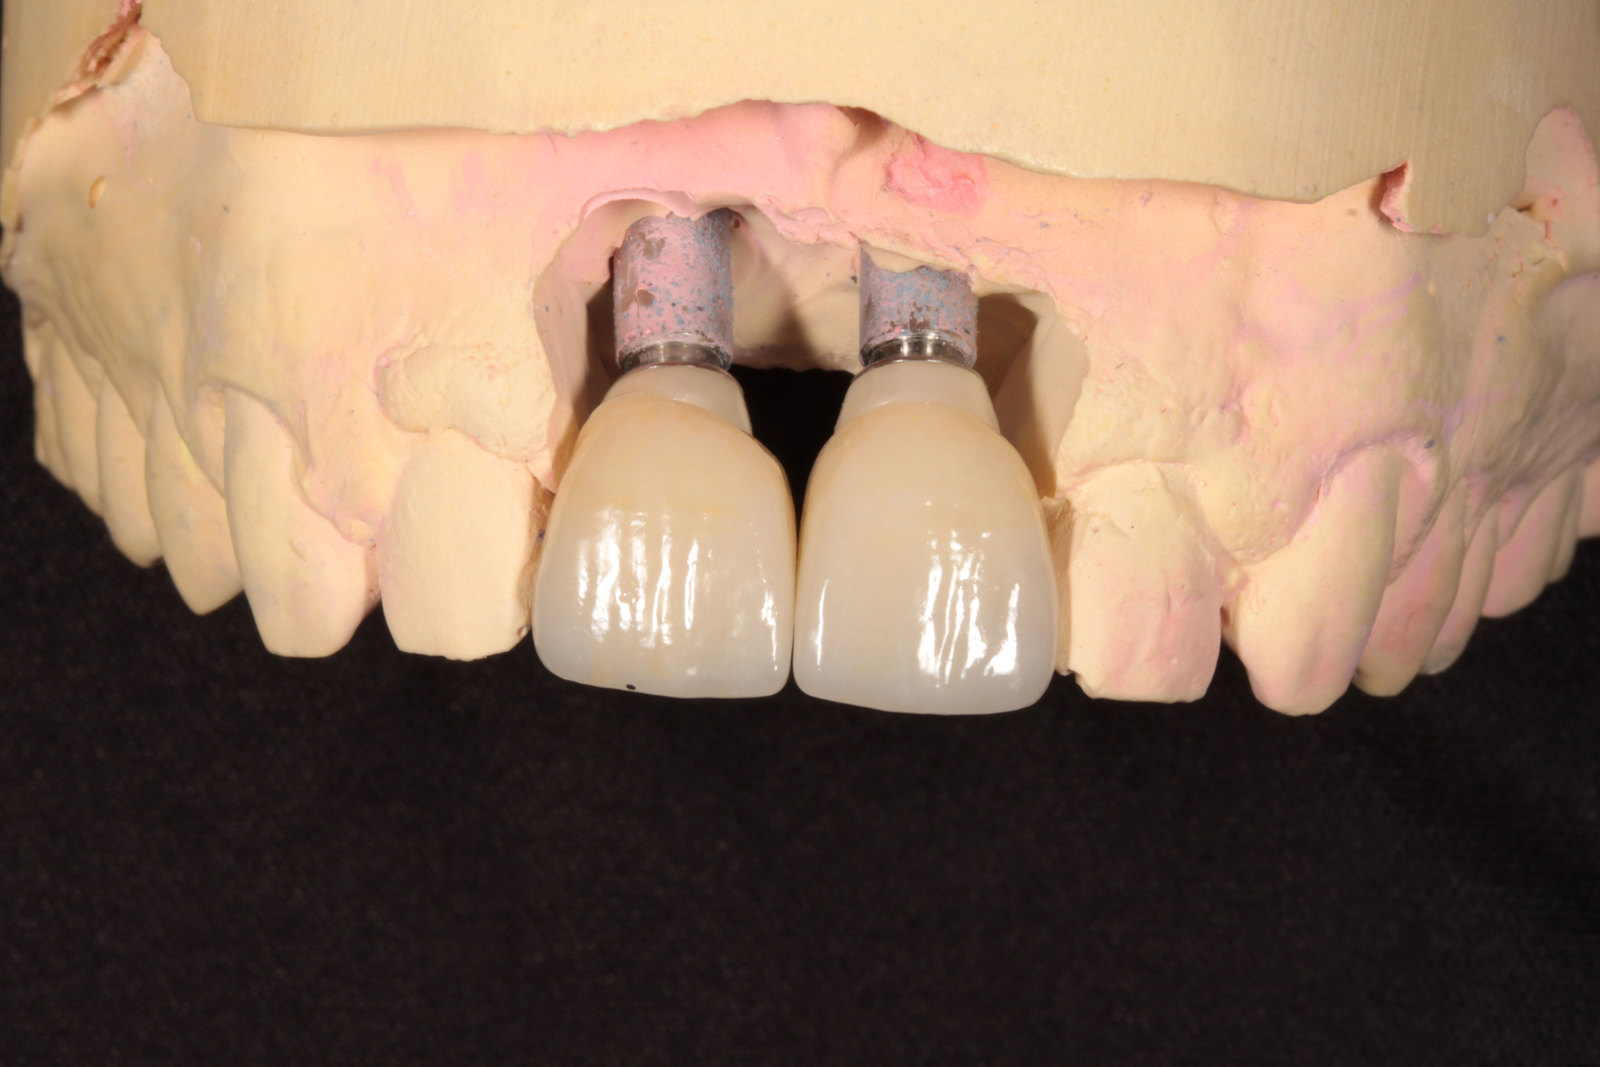
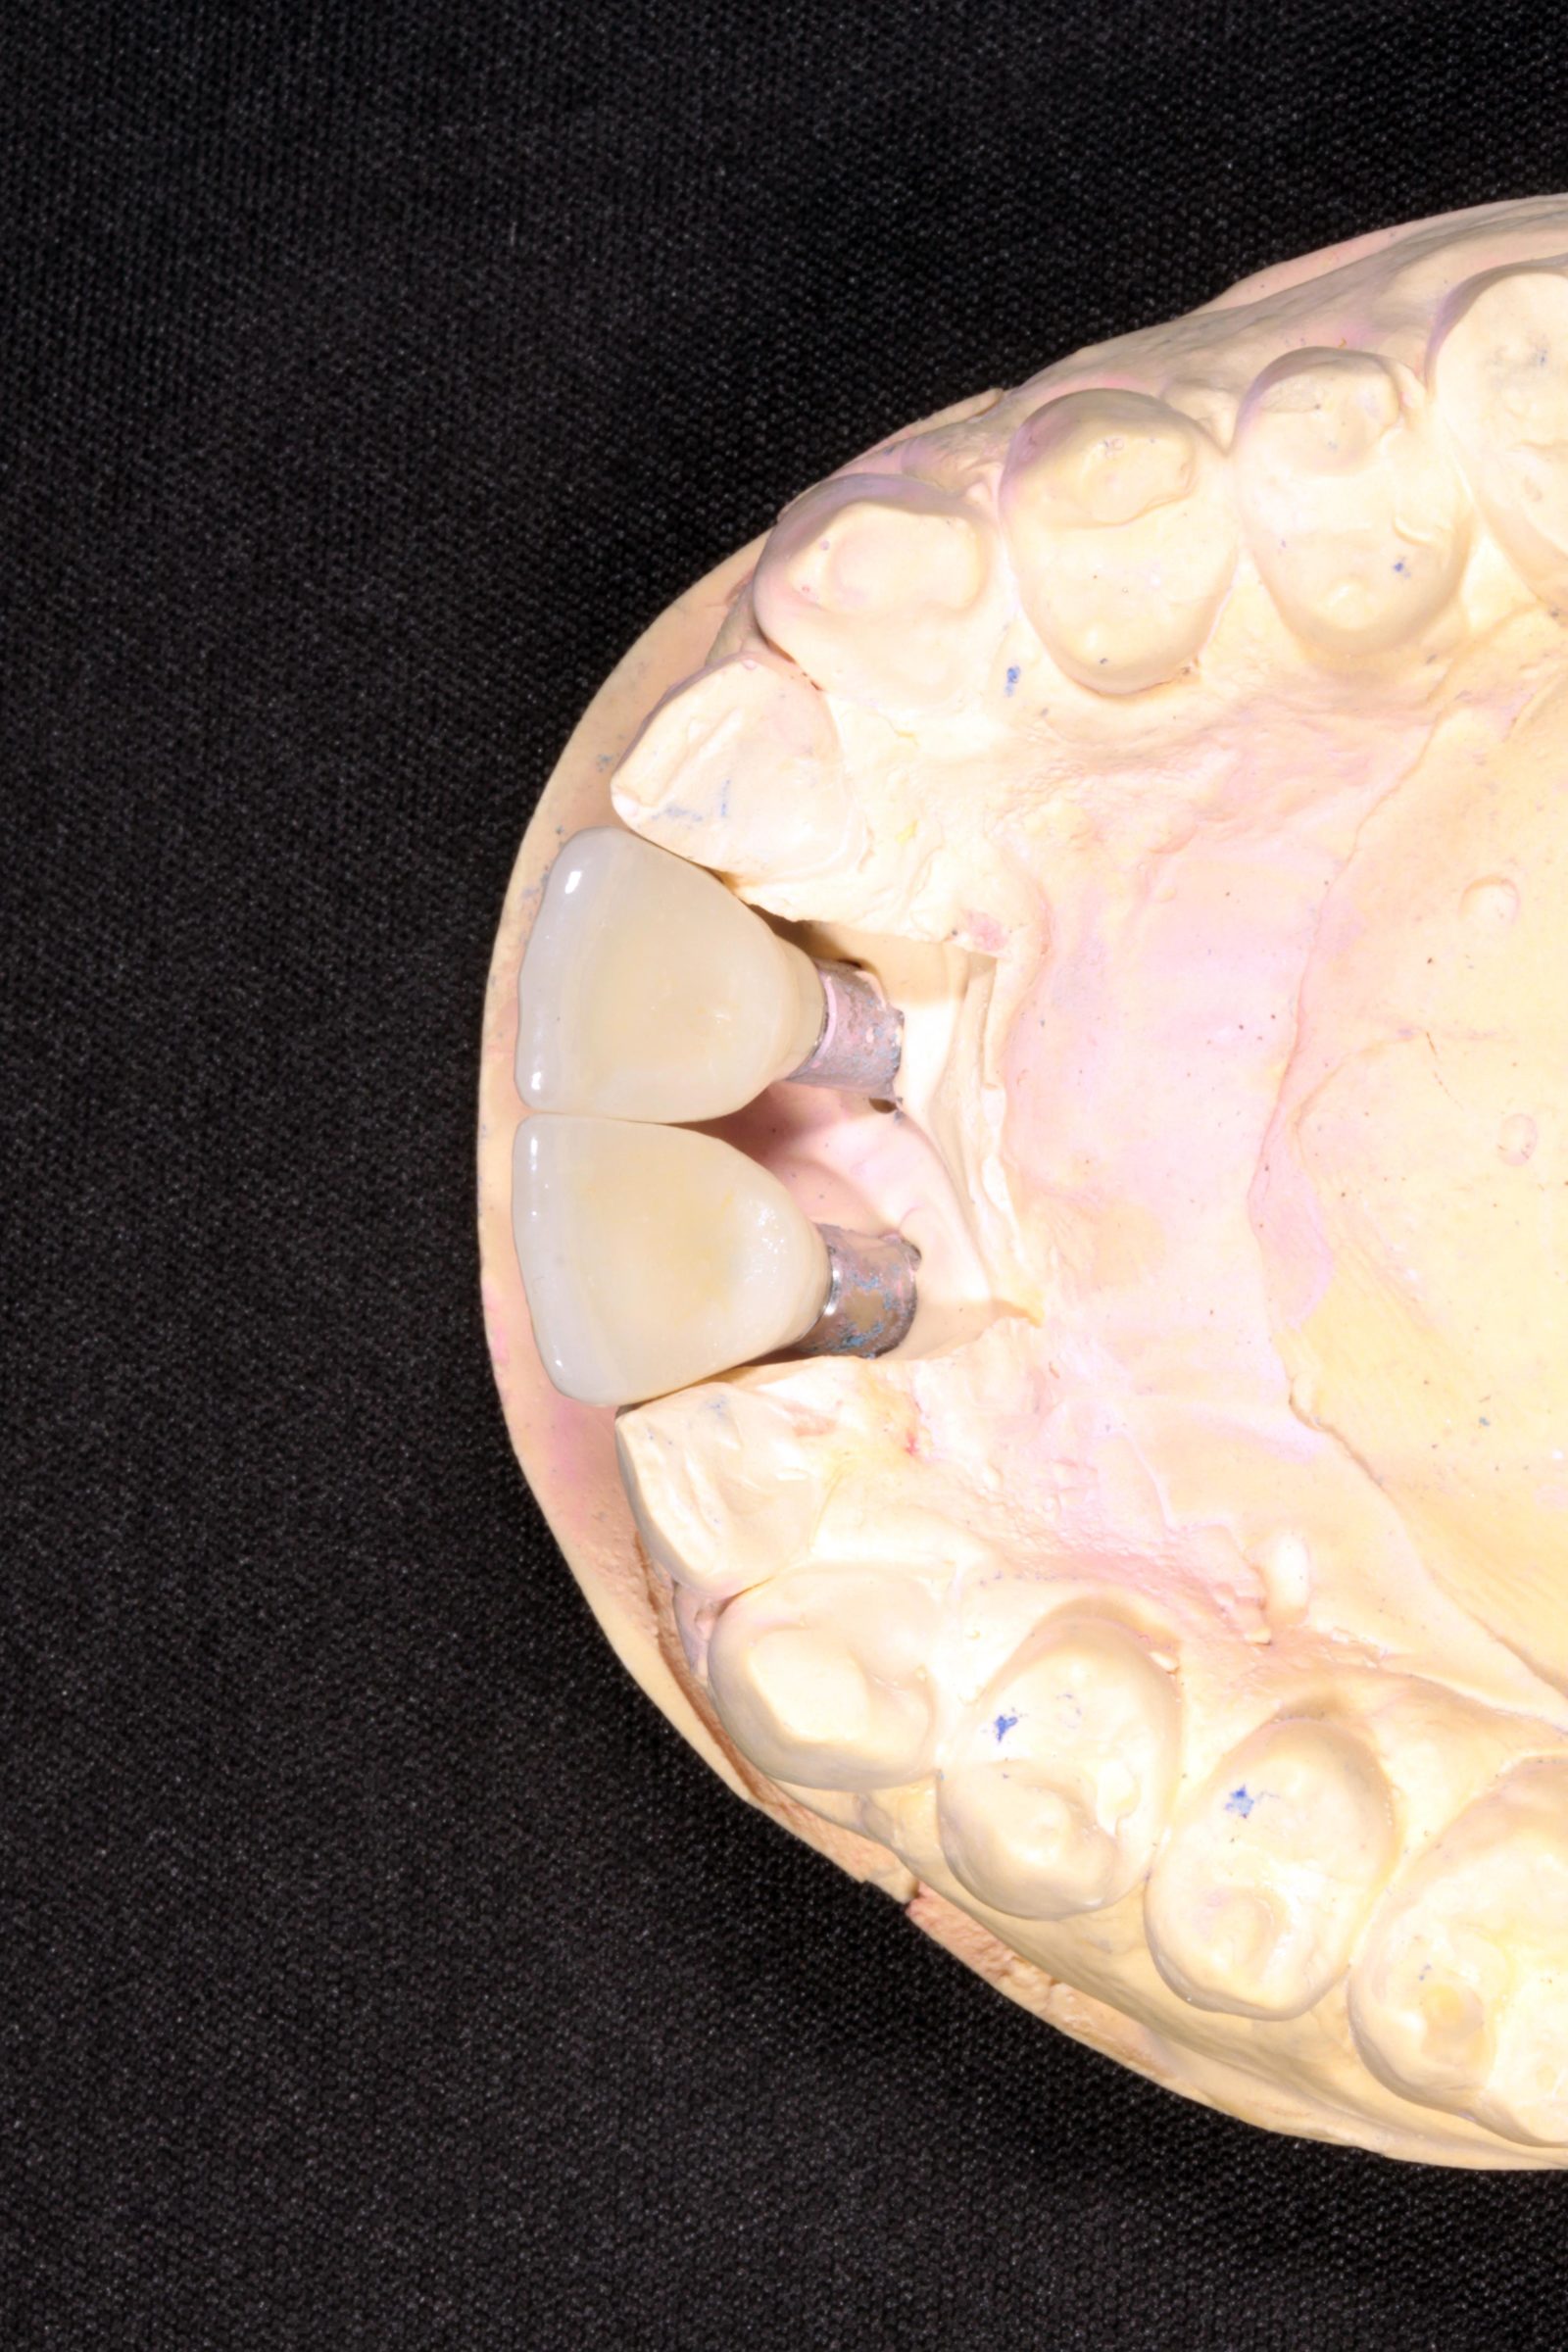
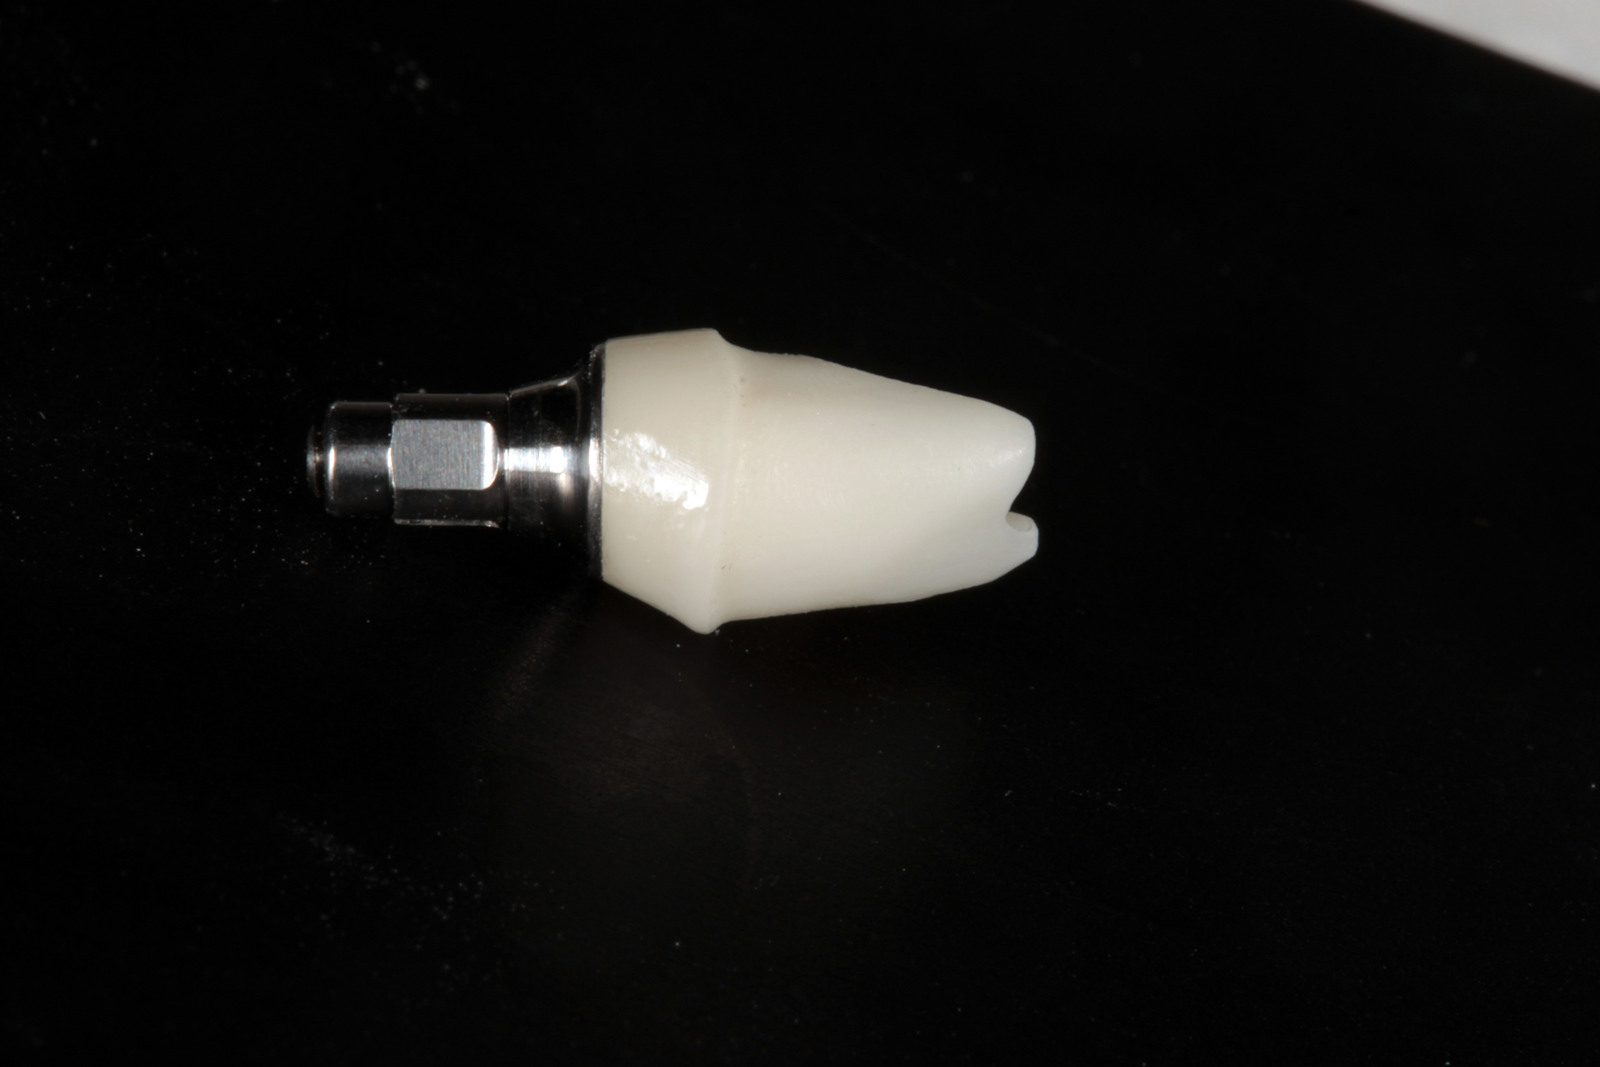
Fixture level impressions were taken at the time of implant placement. My lab technician was on hand to pour up the models and fabricate a GC Gradia screw-retained temporary bridge on temporary metal cylinders (Figures 11-14). These were hand torqued in and composite placed over the access. Note the B1 shade of the composite, which was chosen by the patient prior as he was due to start tooth whitening immediately after the implant surgery.
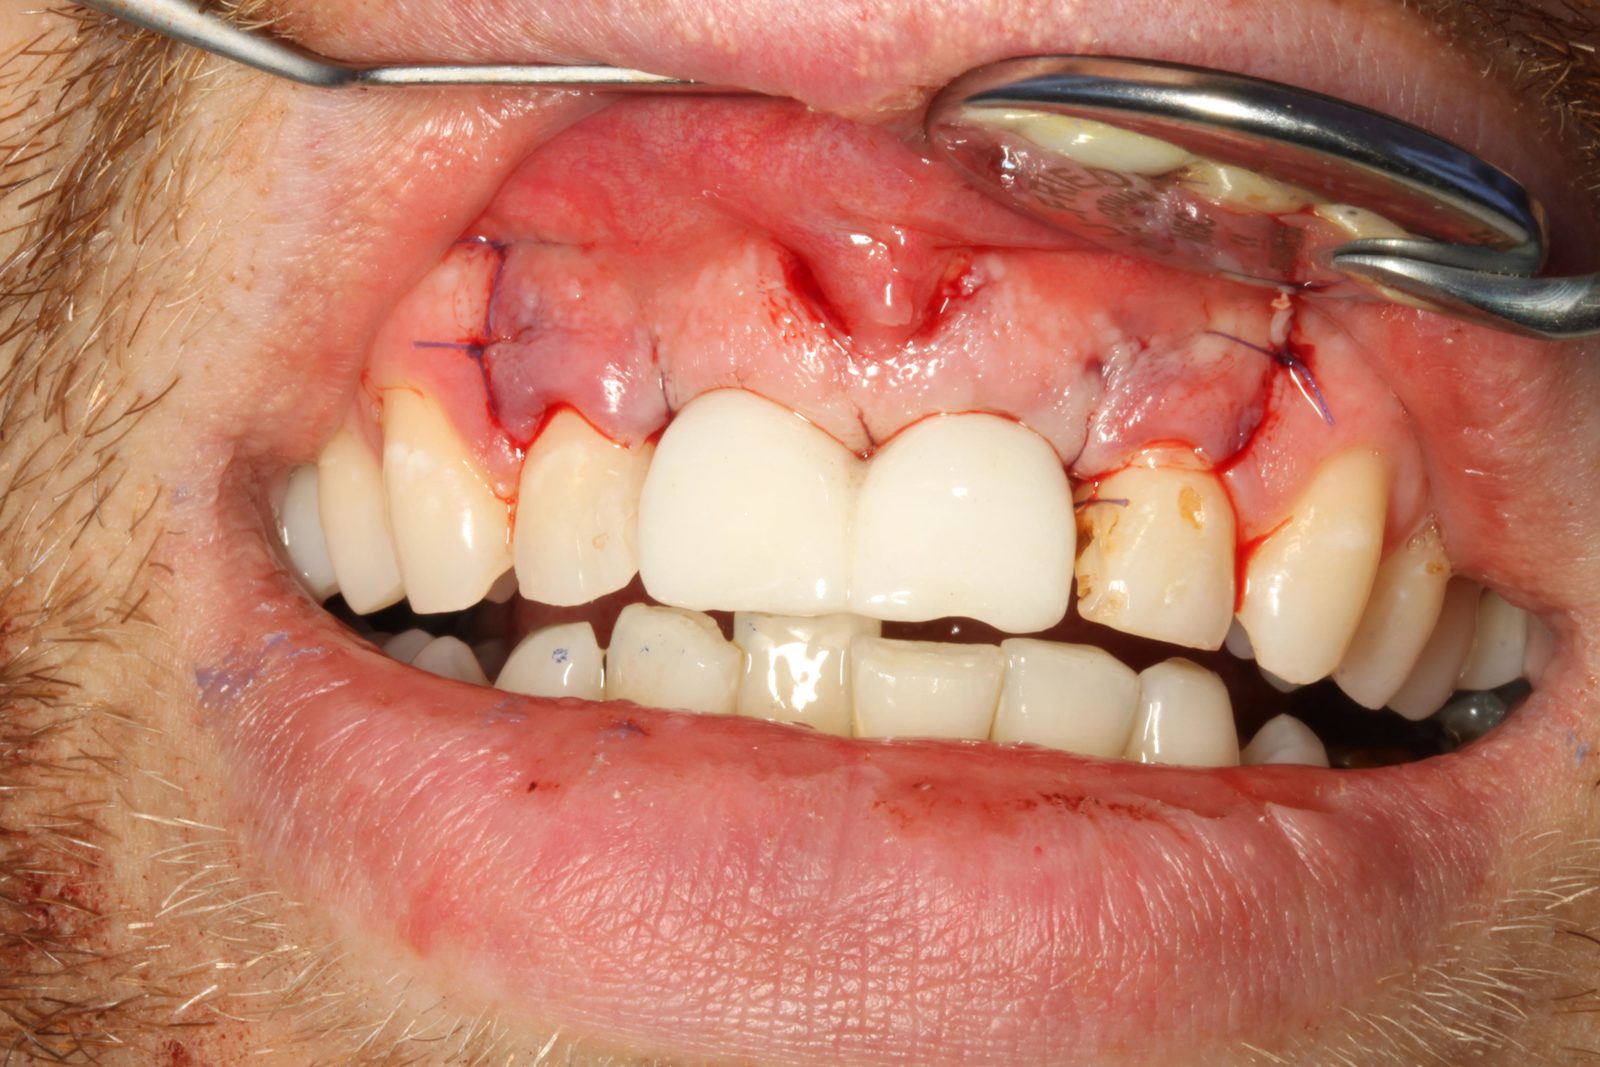
The surgical site was closed with 5,0 PGA sutures.
Review and final restoration
The patient was reviewed six weeks after implant placement and temporisation (Figure 15). It was at this visit that it was observed the patient was still not carrying out adequate home care.
He was given strict oral hygiene instructions and was sent to see my in-house hygiene team again. He was seen four weeks later with a view to taking final impressions if the soft tissues were less inflamed and his oral hygiene had improved.
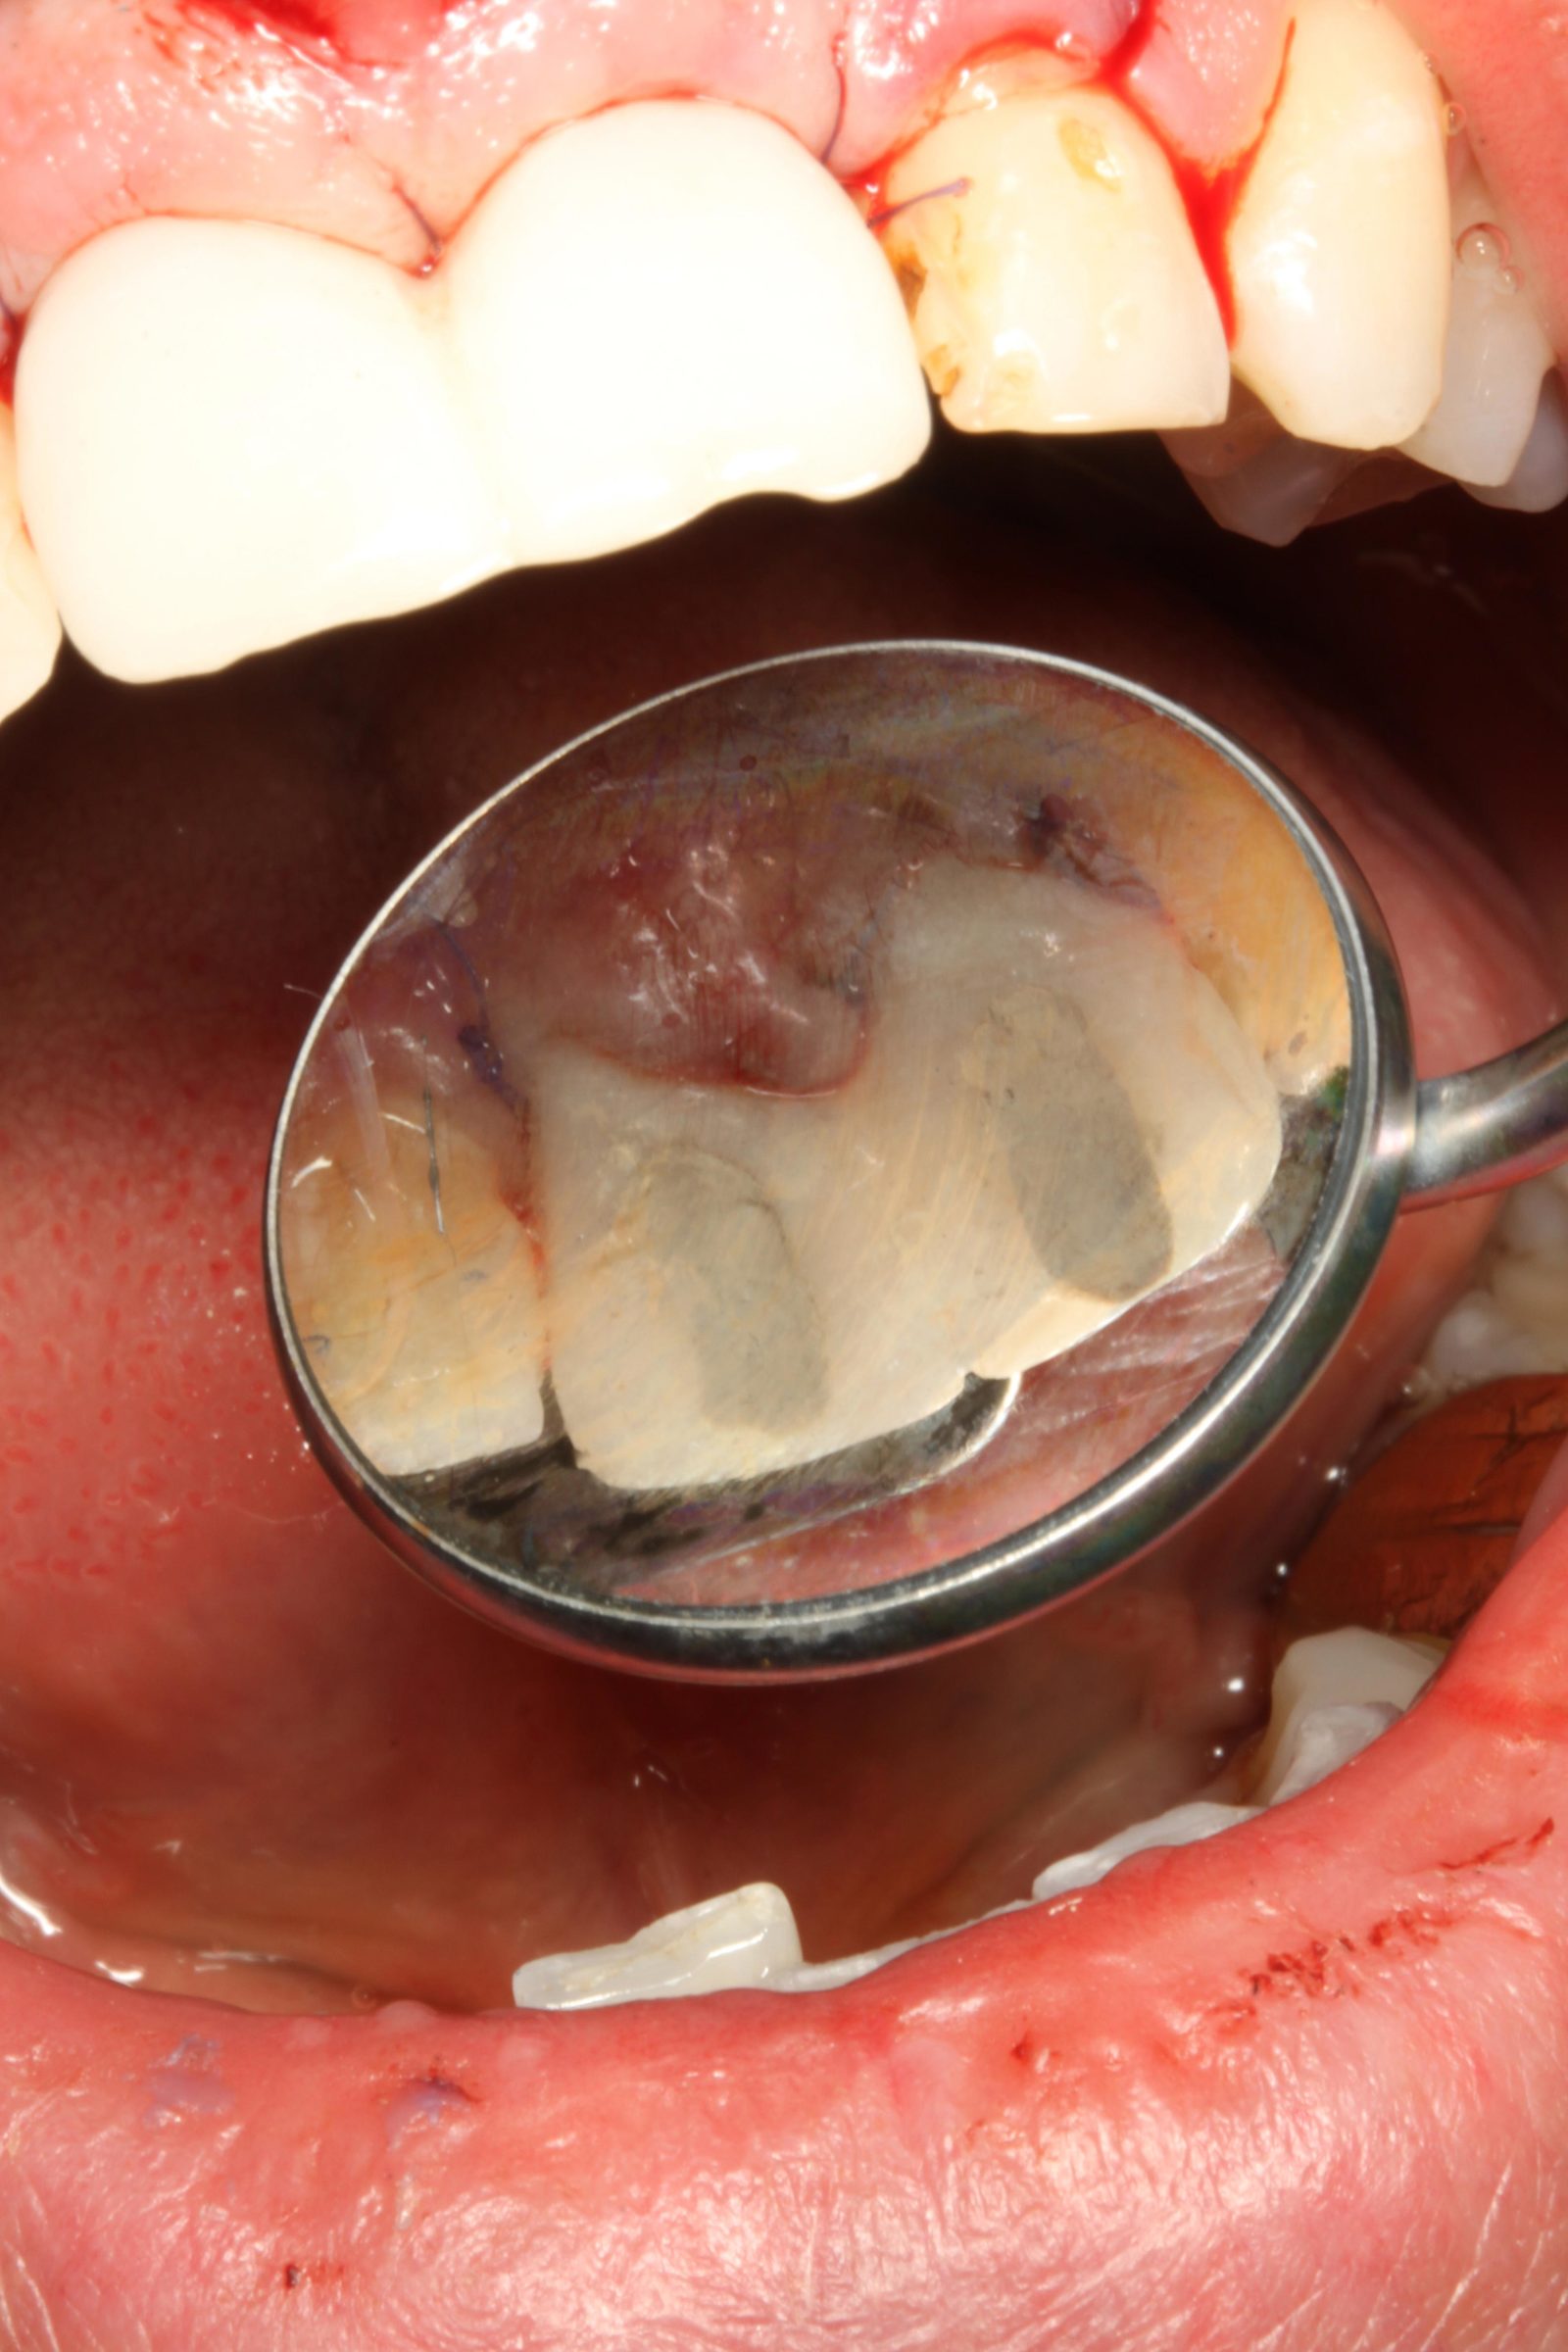
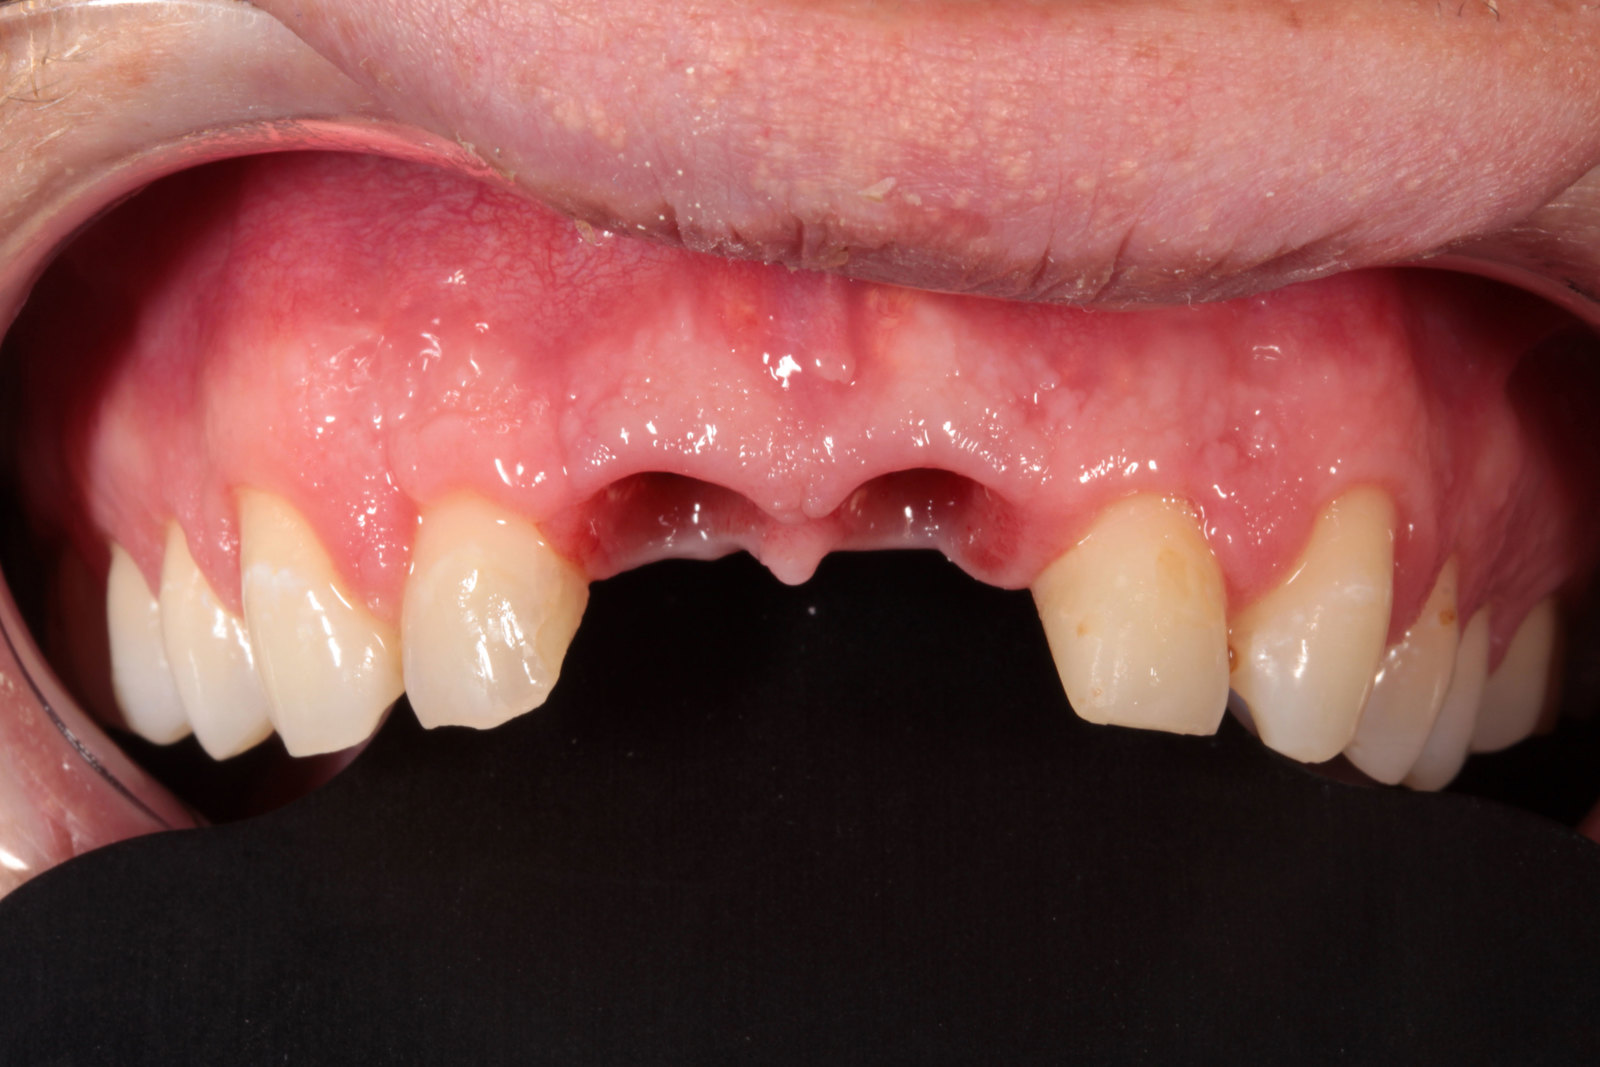
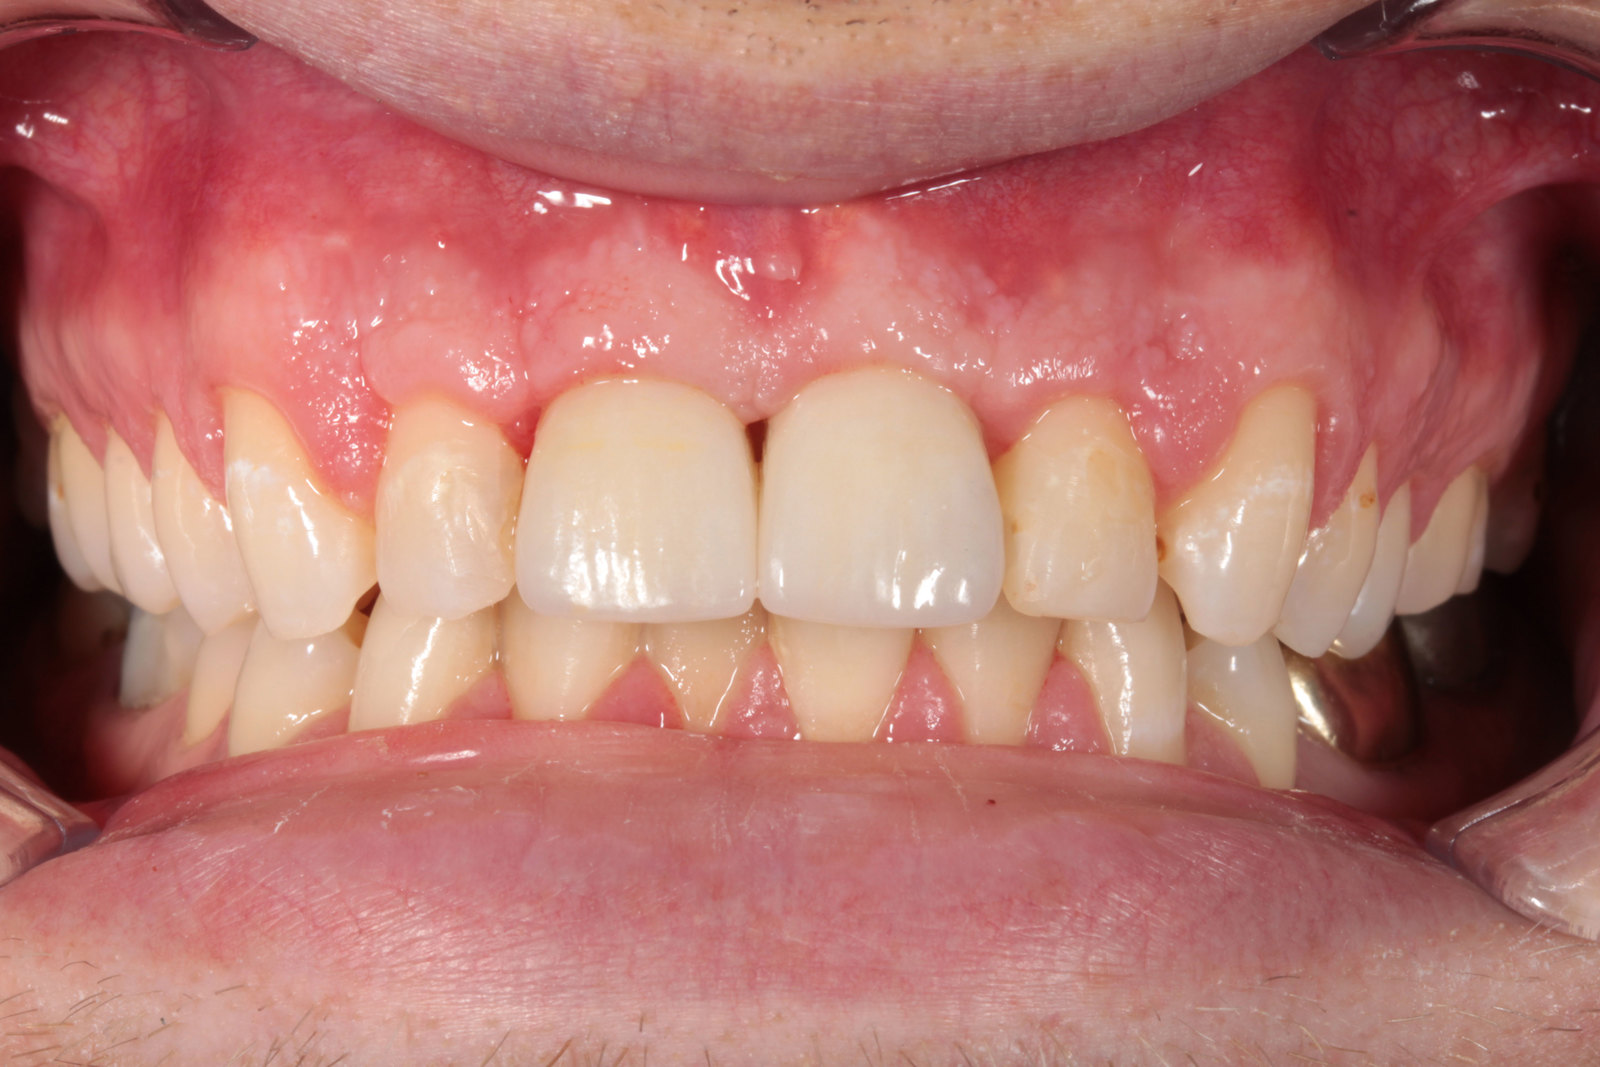
The patient drastically improved his oral hygiene and by the final restoration appointment, and it was evident that his soft tissue profile had developed very nicely. Figure 16 shows the appearance of the gingiva around the temporary bridges when they were removed. The papillae between both incisors had developed and was visible.
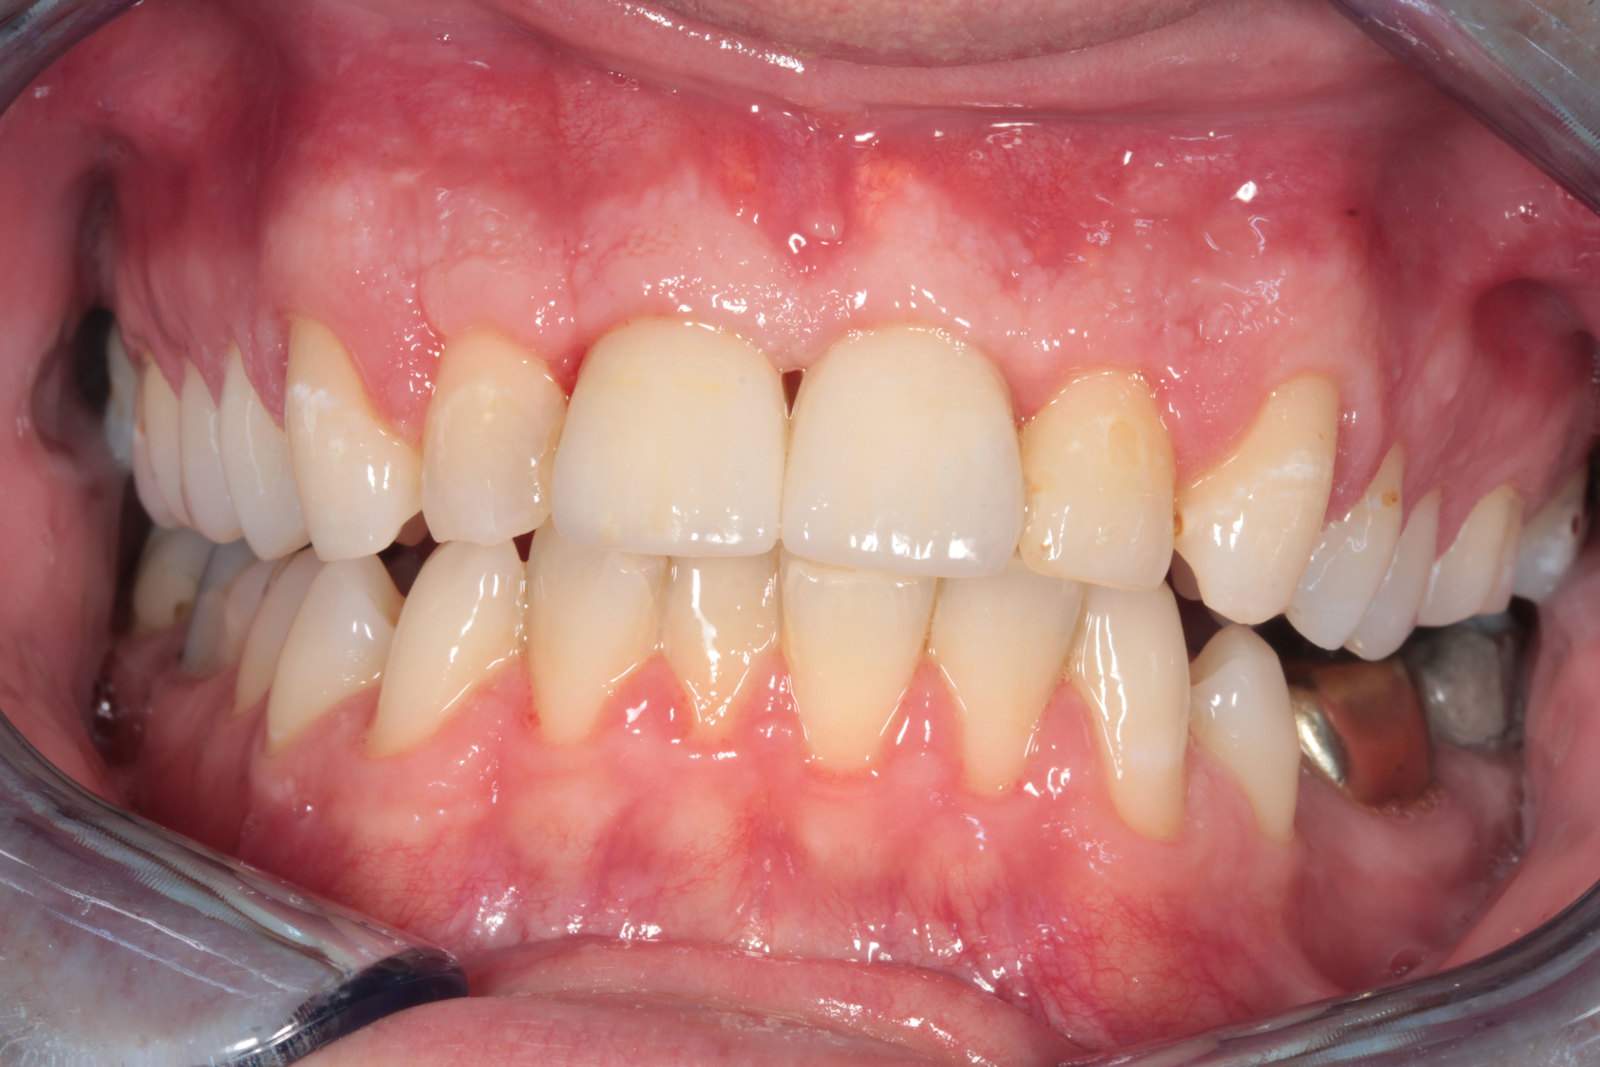
Fixture level impressions were taken and zirconia CAD/CAM abutments (Atlantis) were manufactured and E.max all ceramic restorations fabricated (Figures 17-20). It was decided to restore the implants with individual crowns as opposed to linking them so that papillae could be developed between the crowns.
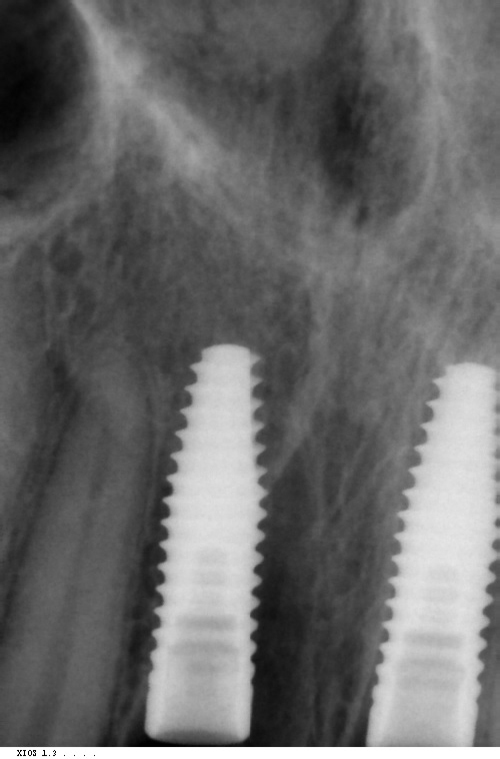
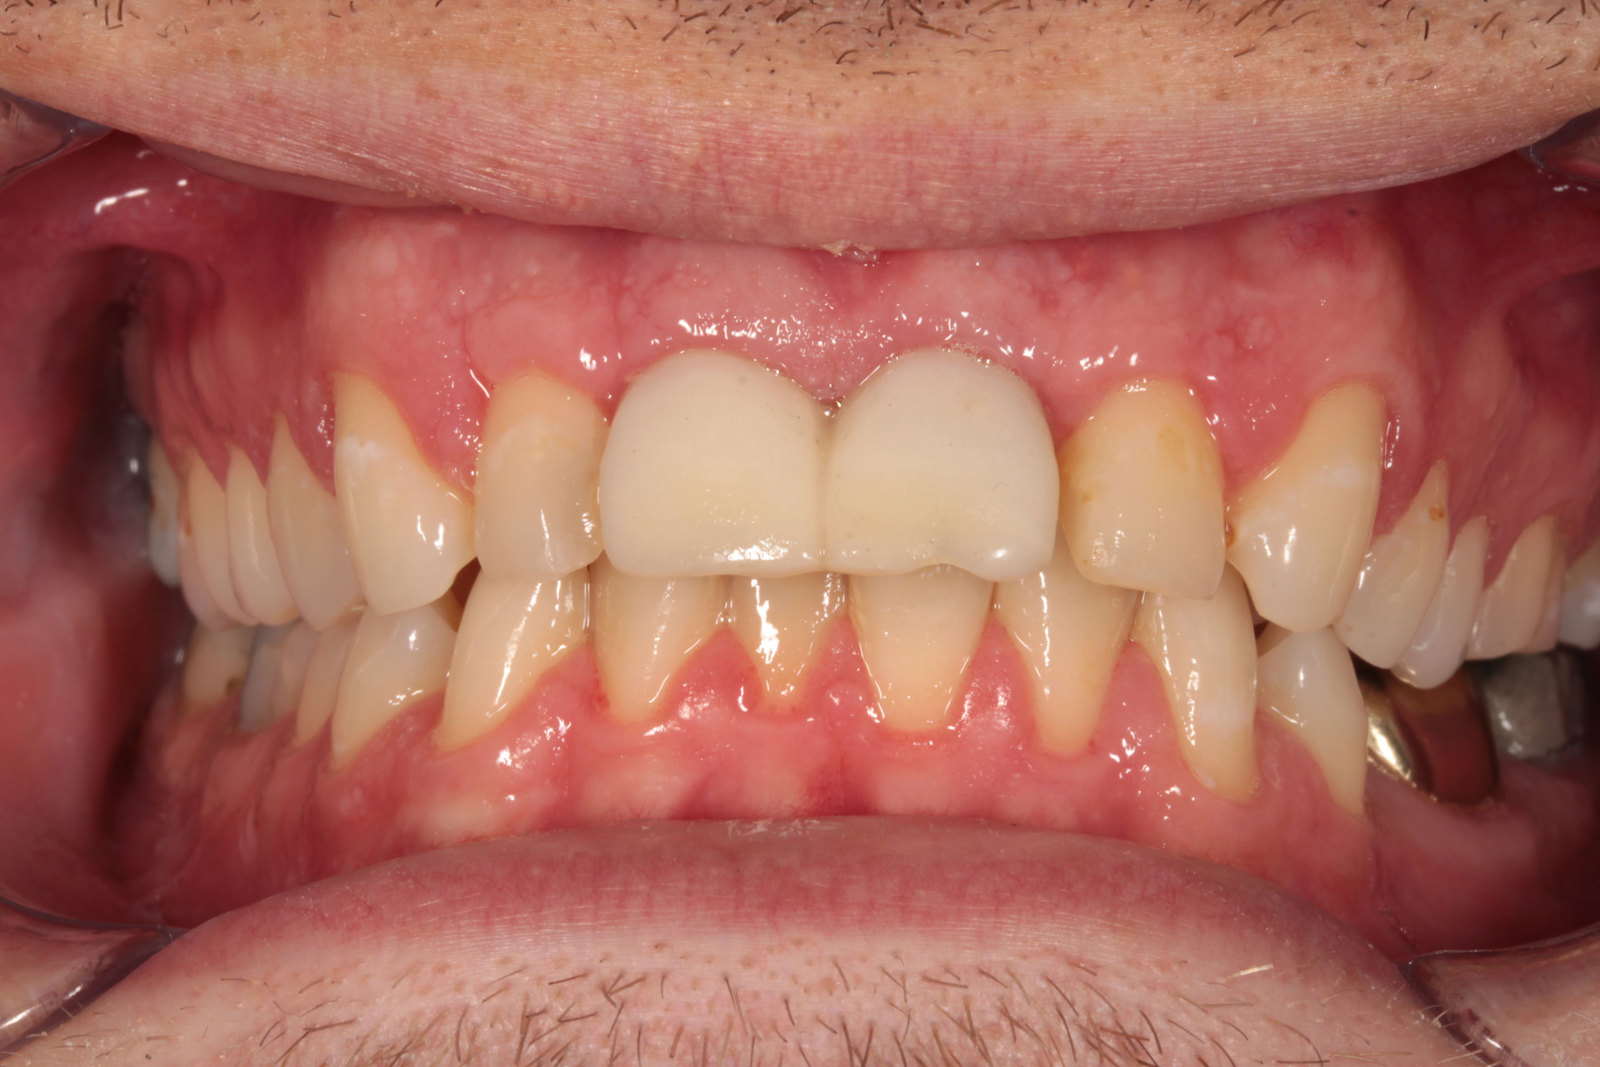
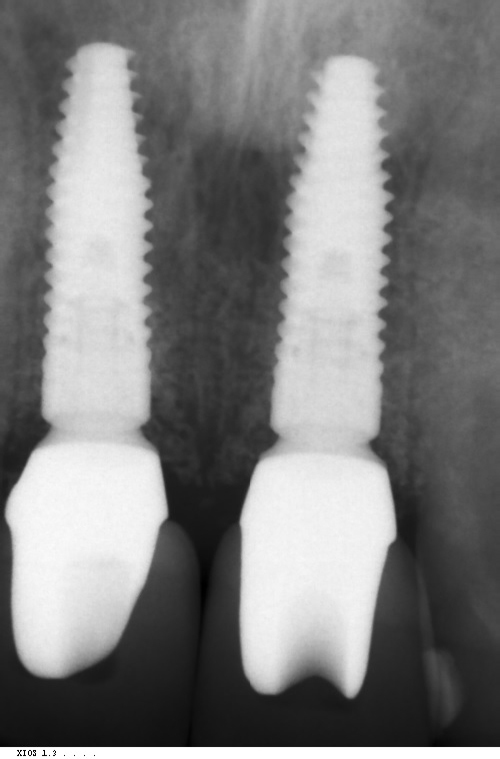
The abutments were torqued to 35Ncm and PTFE placed into the screw holes (Figures 21-23). The E.max crowns were cemented using premier implant cement and the excess removed. A baseline radiograph showed excellent bone levels around both implants with no excess cement (Figure 24).
Outcome and prognosis
The patient was very happy with the final outcome. His oral hygiene had improved dramatically during the treatment and he felt much more confident in his smile once the work was completed. The implants appeared stable with good bone levels. I would hope his long-term prognosis is very good.