Victor Cubillo Blasco finds the best possible solution following the extraction of a tooth in the aesthetic zone.
The lack of a single tooth in the aesthetic zone can cause major loss of self-confidence and self-esteem to anyone. It can provoke patients to stop smiling, and has the inevitable consequence that their character often drastically changes.
For a dentist, there are other factors that play a significant role: functionality and bone volume reduction may affect the patient’s wellness to an extreme he or she might not even realise. However, the solution is a common procedure that an expert performs quite often. For successful results, conveying confidence and expertise to the patient, and counting on great laboratory work, clinical skills and materials are indispensable.
Patient diagnosis
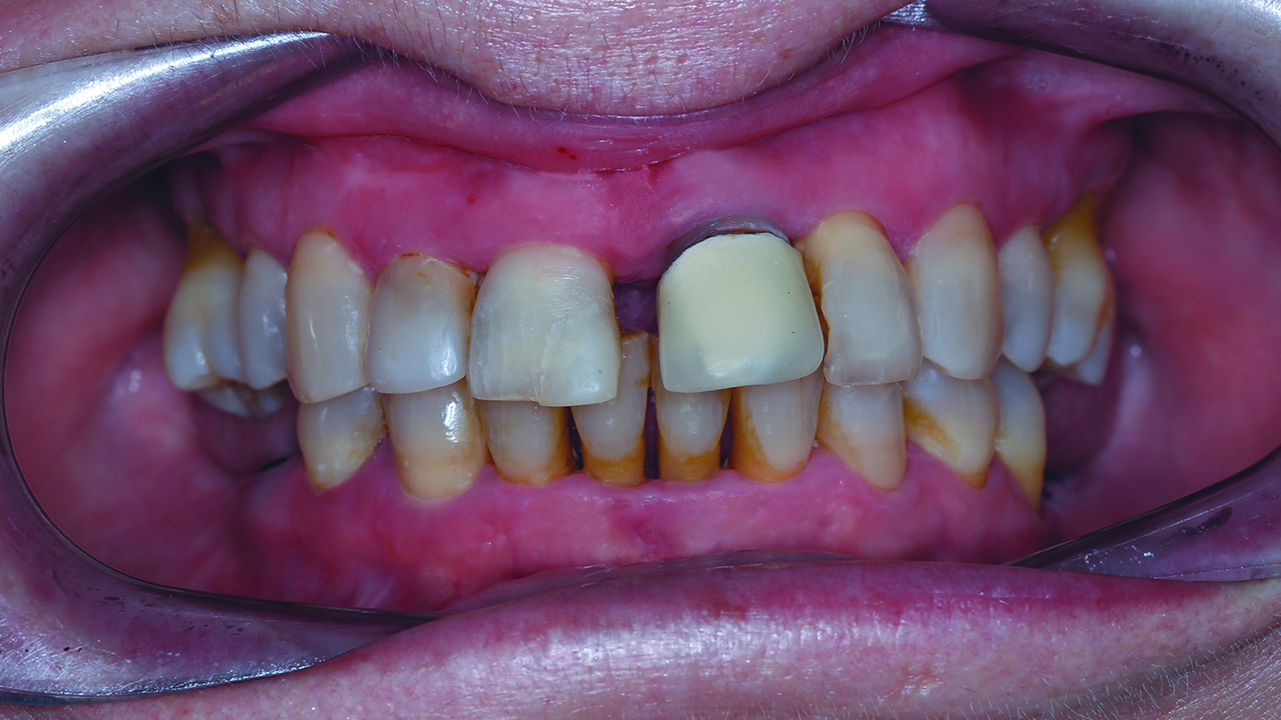
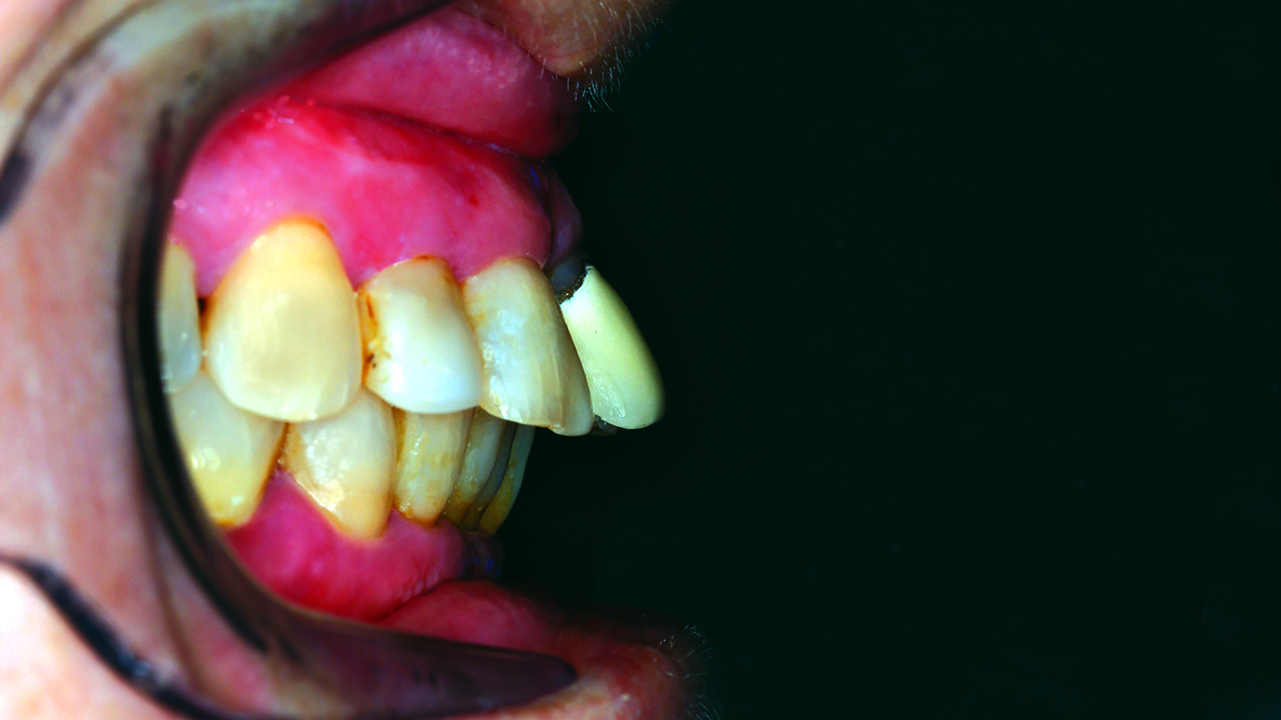
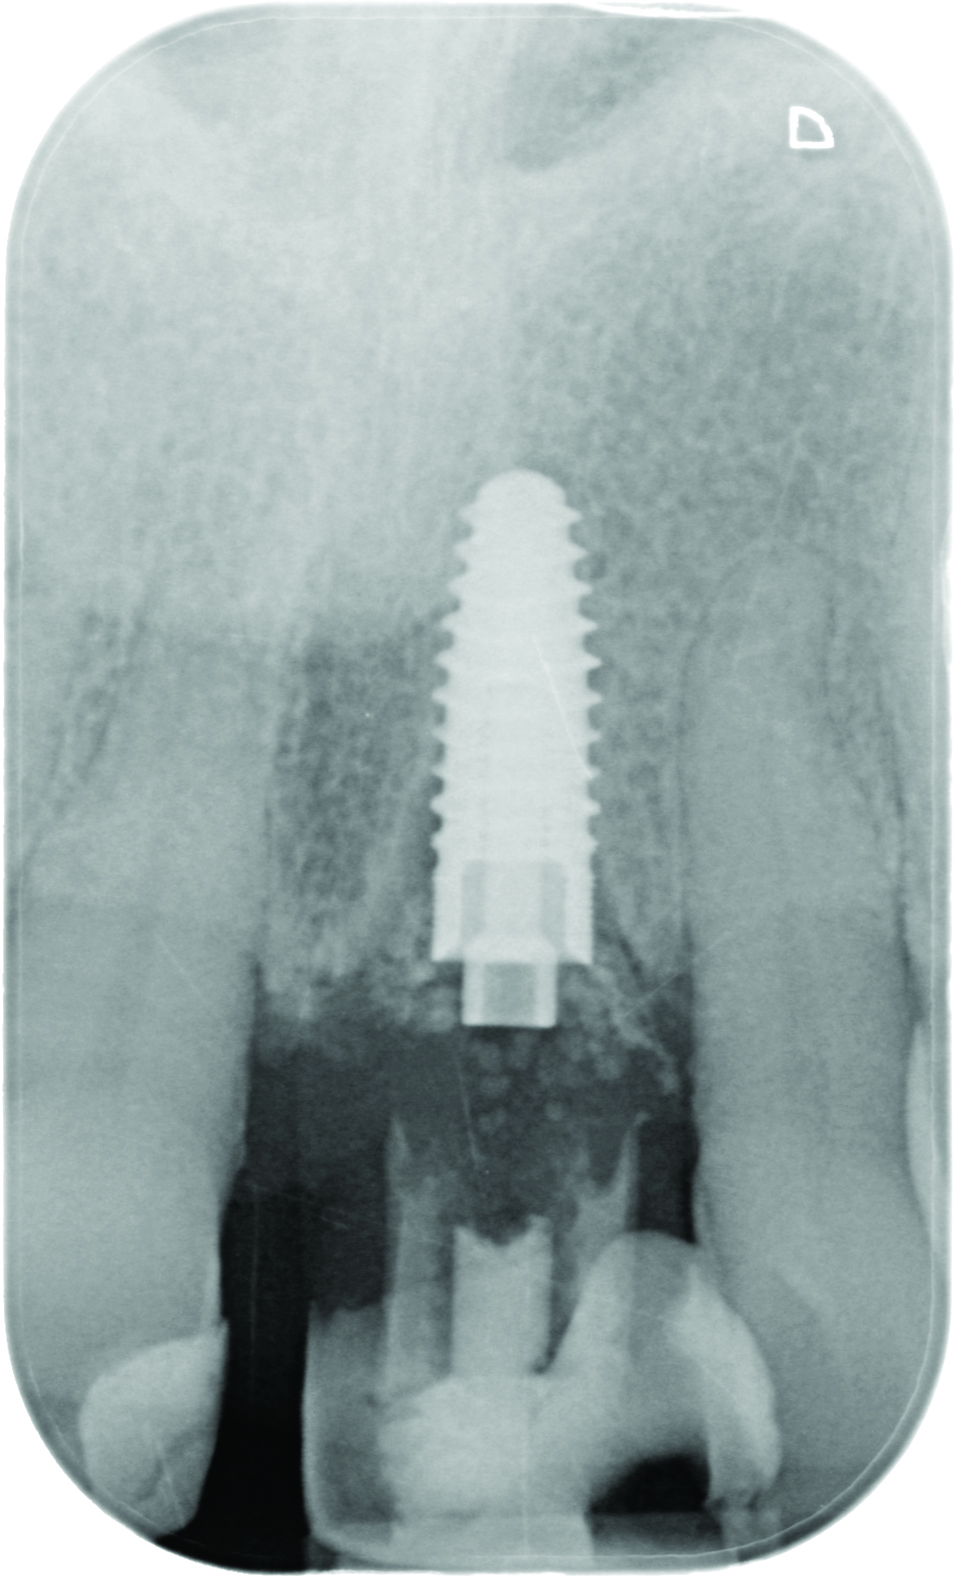
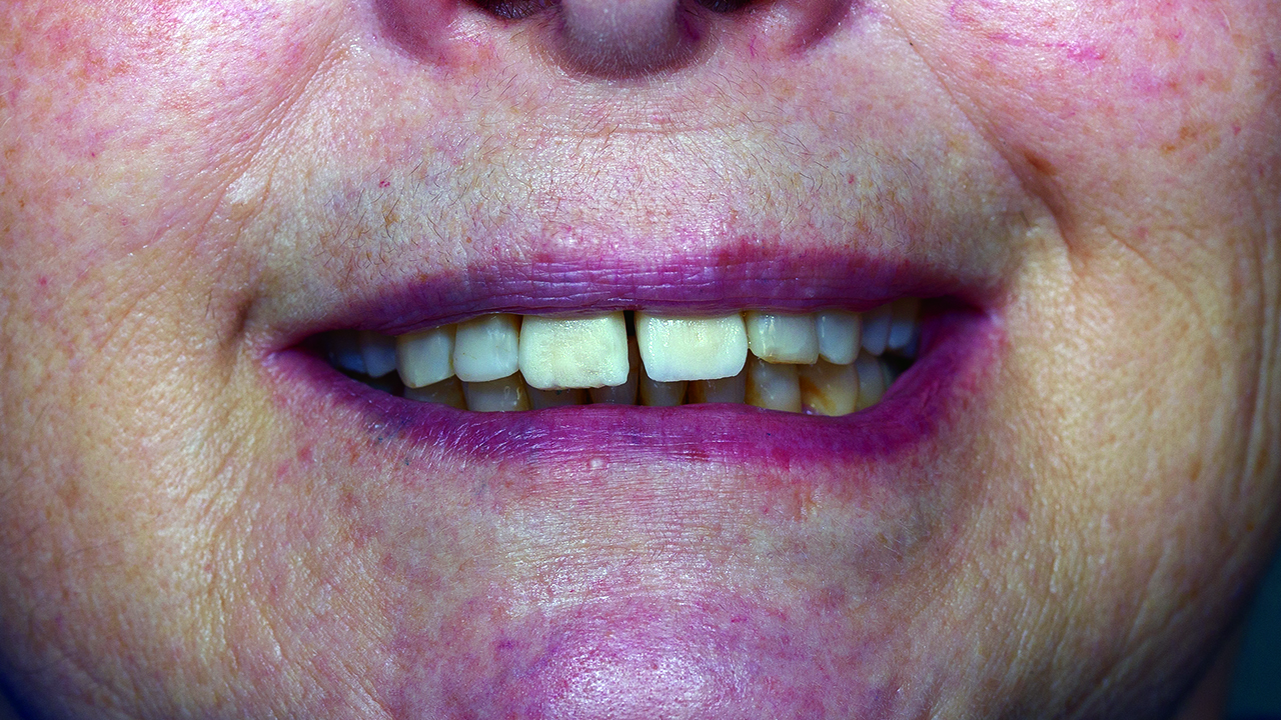
The patient presented with periodontitis around the UL1. The patient claimed that root canal treatment had been performed on the tooth five years earlier, however the X-ray did not confirm this.
The bone loss around the UL1 and the mobility of it made extraction the only solution available. The mobility and the position of the UL1 had a great impact on aesthetics and functionality (Figures 1 and 2).
Treatment options
Considering the only solution for the UL1 is extraction, there are three possible treatment options:
- Removable prosthesis placement. The only advantage related to this option is its economy. Aesthetics and comfortability did not fit the patient’s demands. It did not prevent alveolar bone reabsorption and it would require future surgical interventions to preserve both the bone and soft tissues
- Drilling UR1 and UL2 for ceramic bridge placement. The placement of a ceramic bridge fulfilled the patient’s requirements. However, it did not prevent bone reabsorption nor gingival recession in the long term. In order to correct these issues, future interventions and new ceramic prostheses would be required
- Implant placement to replace UL1. Intraosseous implant insertion is the most aesthetic and functional option in the short- and long-term. For favourable cases, as the one described, the best option would be post-extraction implant placement and provisional immediate load. This procedure would require the bone grafting of the alveolar gap. In this way, aesthetics, bone volume and gingival anatomy would be preserved. Preserving interdental papilla at the front area is the key to achieve natural aesthetics.
After discussing all the options, the patient choses the third. Furthermore, considering the UR1 is restored with a composite veneer, I proposed restoring the tooth with a zirconia-ceramic crown.
Treatment
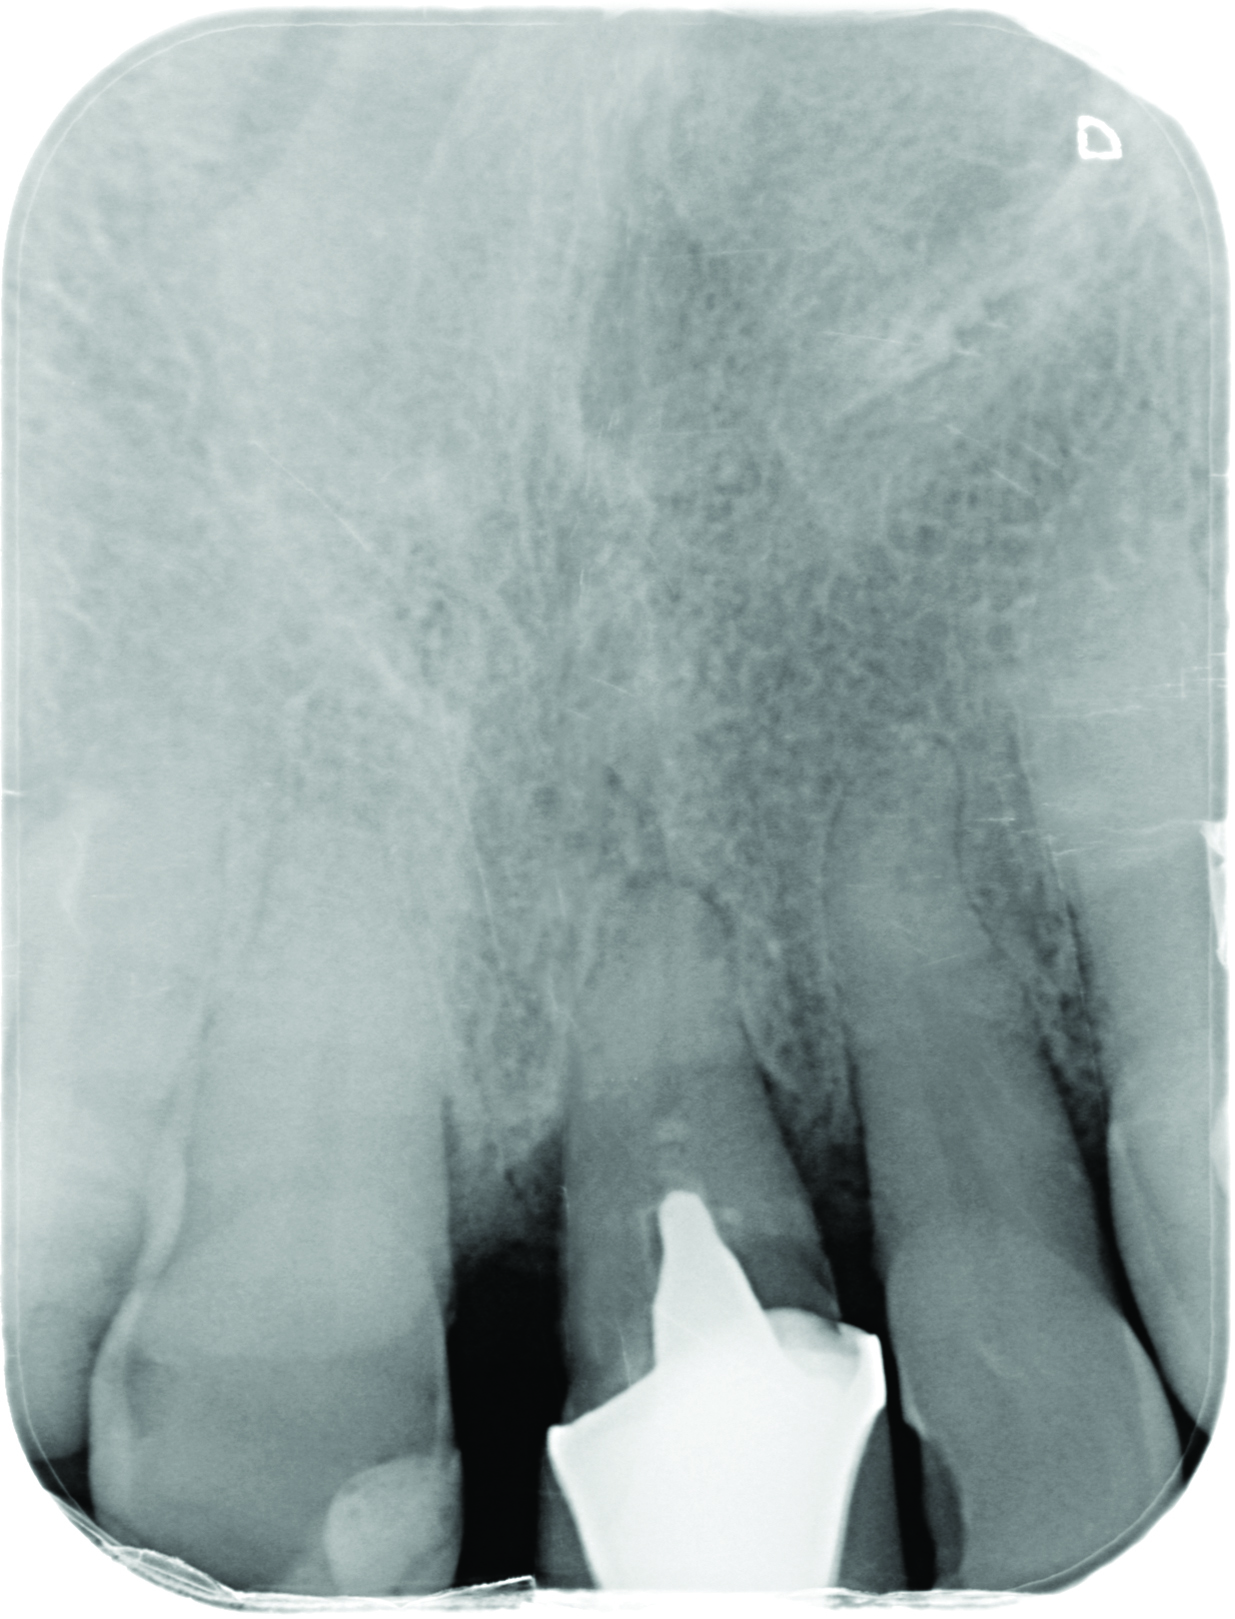
The patient undergoes clinical and radiographic evaluation. Radiographic (Figure 3), CBCT and photographic records – as well as an alginate impression – are taken. The patient is informed on the diagnosis and the different treatment options. After assessing the information, the patient decided on implant treatment to replace the UL1. The implant would be immediately provisionalised and loaded, with zirconia crowns placed on the UR1 and UL1.
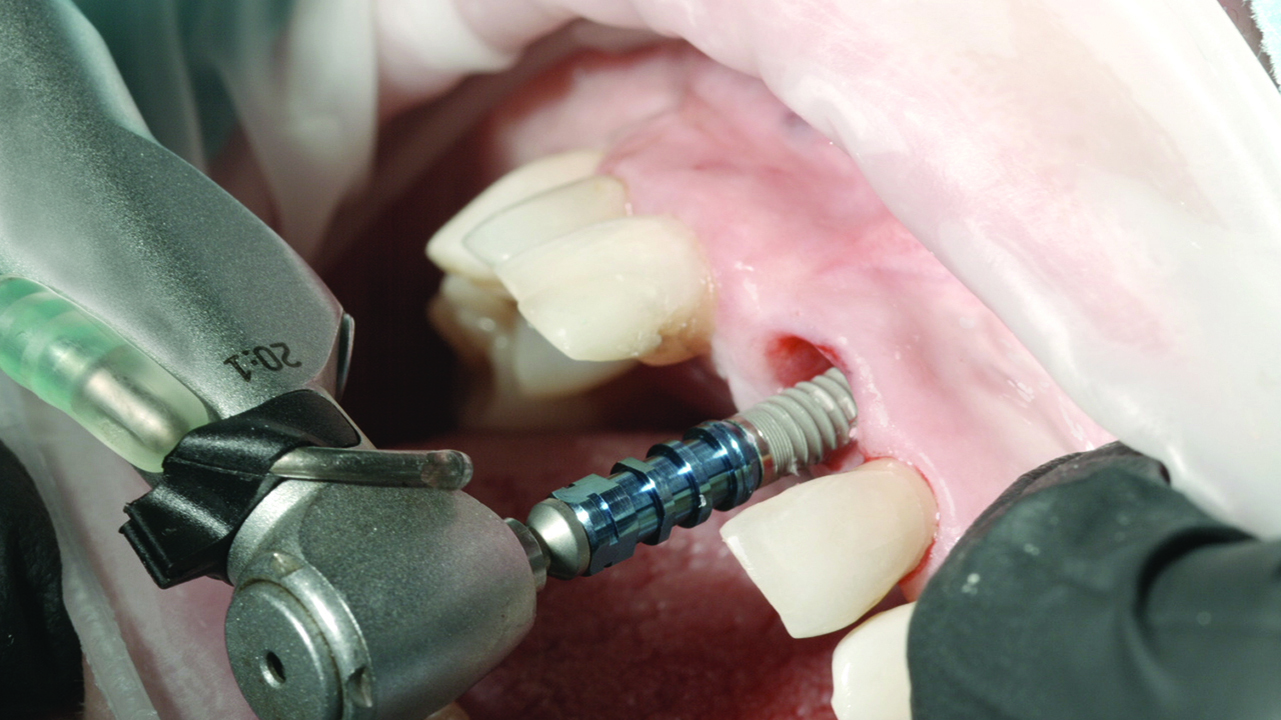
Dr Felicita Lorenzo and I placed a Ziacom Zinic MT implant. Thanks to the cone-shaped and compressive design of its body, this implant offers an ideal primary stability for these cases. The hexagonal internal connection and its mechanised ring offers the perfect stability for soft tissues in the long-term.
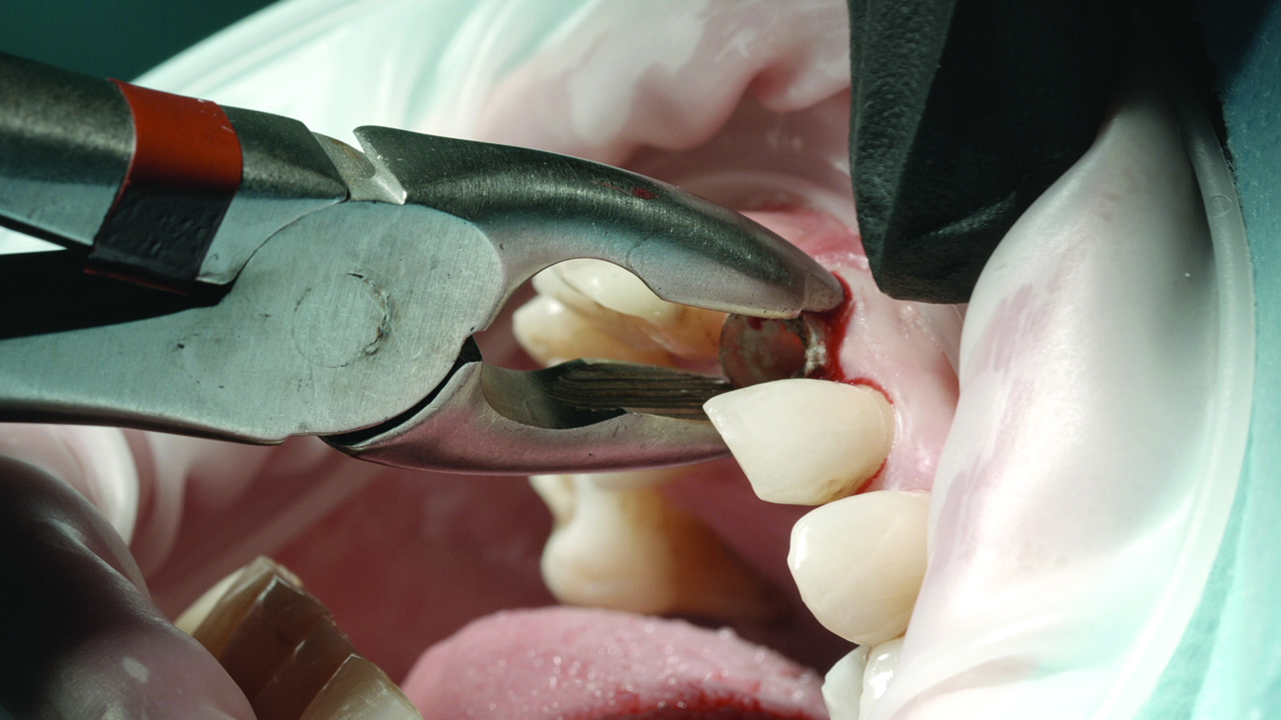
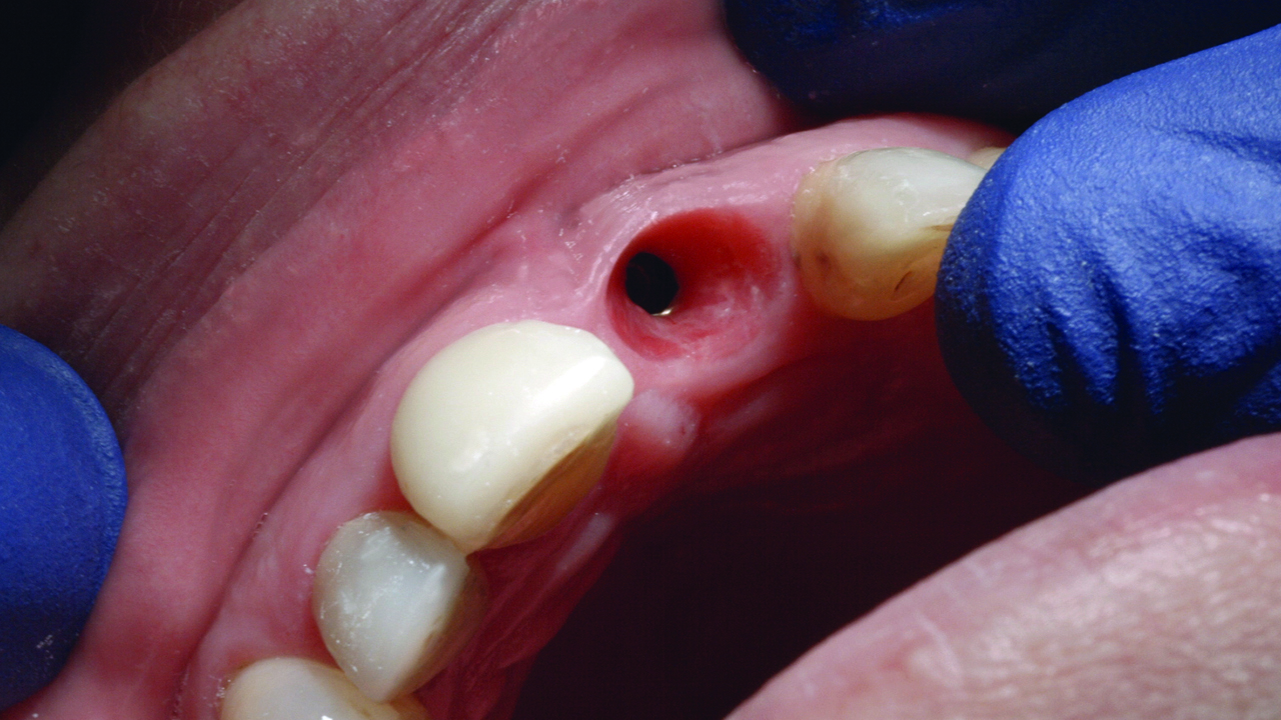
We perform the periodontal ligament detachment, and carry out the atraumatic extraction (Figure 4).
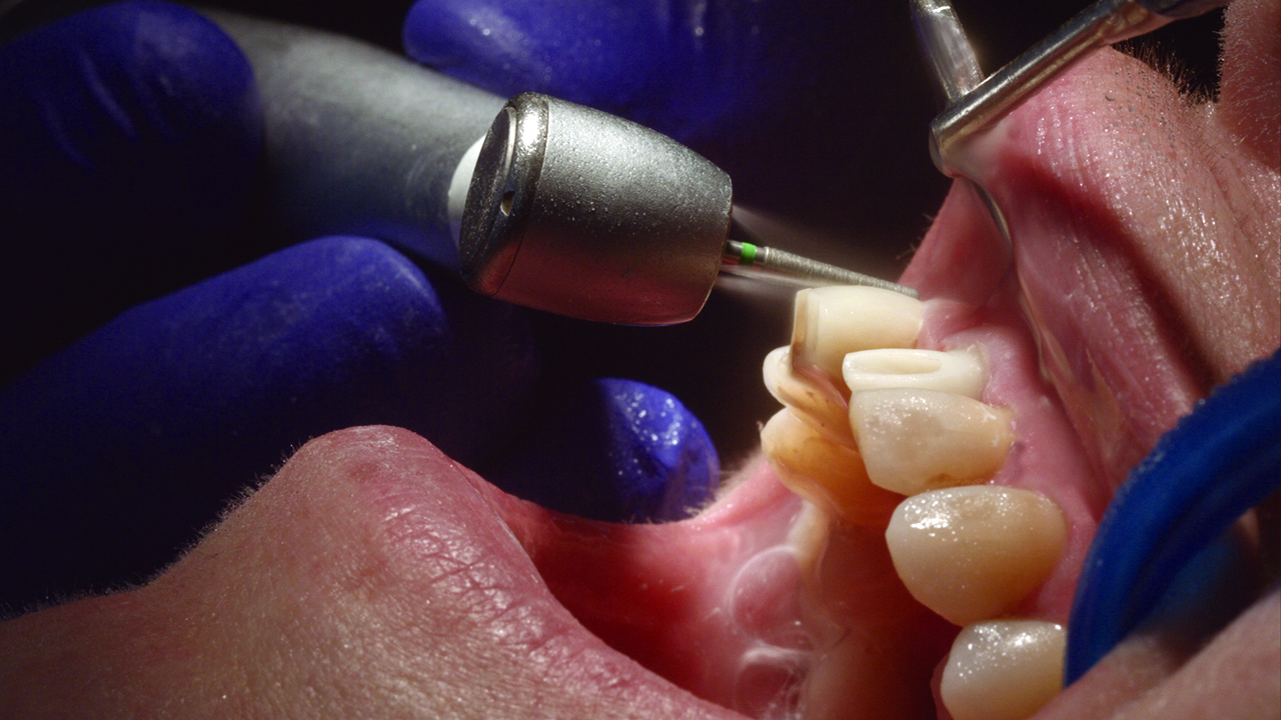
After careful cleaning of the socket, the implant socket is drilled. The ideal position for the implant would be for it to be placed palatally. However, in this specific case, for the axis of the implant to stay inside the correct area, it needed to be placed incisally (Hämmerle, Chen, Wilson, 2004; Lee et al, 2014; Tabrizi and Azizi, 2013). The result of this placement meant that a cemented ceramic restoration would be needed.
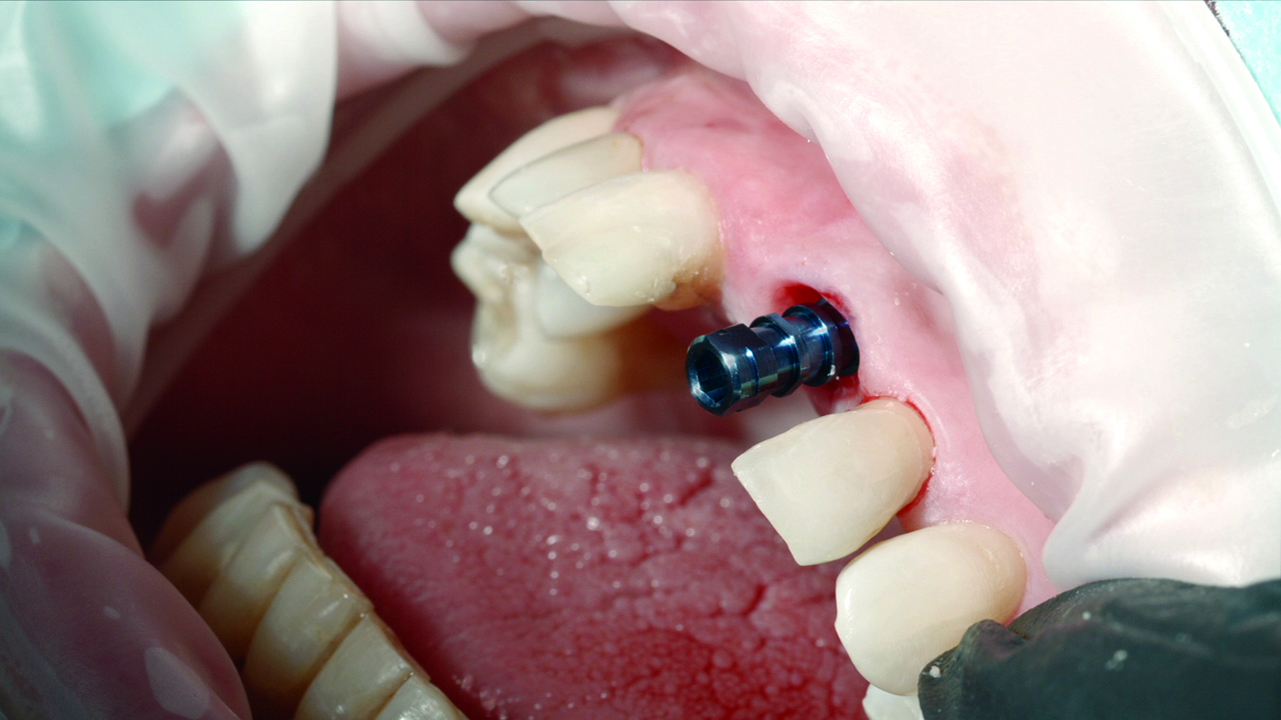
Due to bone reabsorption, the implant is placed 1mm infra-bone (Figure 5) (Huynh-Ba et al, 2010; Botticelli, Berglundh, Lindhe, 2004; Al Amri, 2016).
The primary stability of the implant is checked using Osstell, and confirms a correct value to perform immediate loading of the implant.
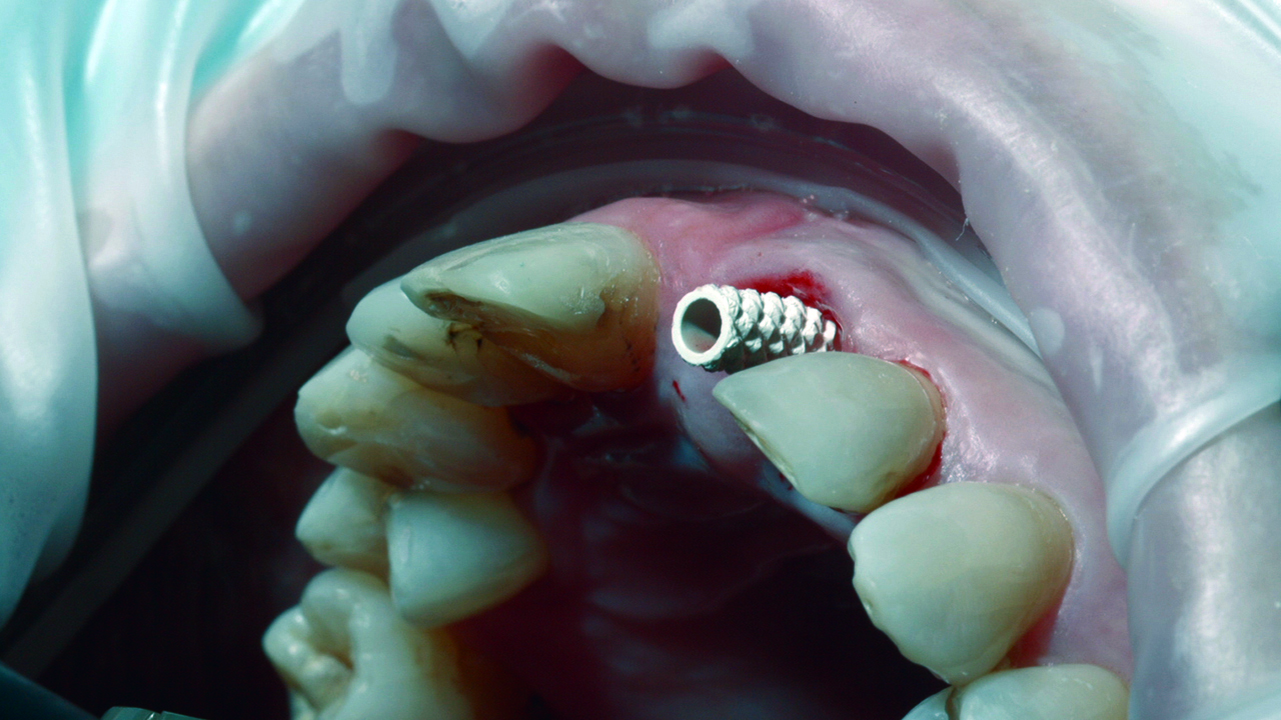
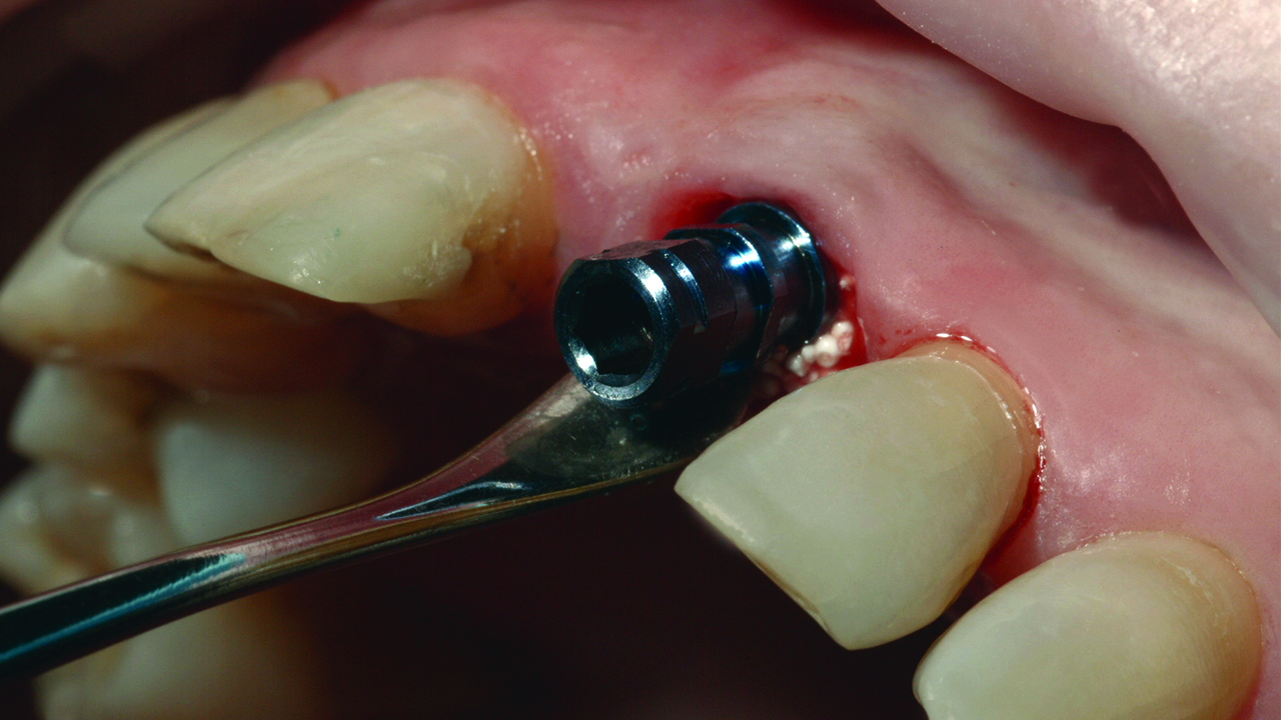
After placing the Zinic MT implant, its position is checked and is correct, thanks to the use of the Zplus abutment (Figure 6). The abutment is replaced for a provisional polyetheretherketone (PEEK) abutment (Figure 7). This abutment is chosen due to its great biocompatibility with soft tissues and its practicality when manufacturing provisional composite crowns.
We use a PMMA tooth to elaborate the provisional crown while pasting it to the provisional PEEK abutment with Visiolink adhesive and fluid composite, Crea-Lign A2 colour. Extraorally, we shape the gingival emergence with fluid composite (Crea-Lign pink colour), before being polished (Degidi et al, 2013).
The Zplus abutment is relocated to prevent the insertion of osseointegrated bone grafting biomaterial (made of beta tri-phosphate calcium) inside the implant (Figure 8). Bone regeneration of the socket-implant gap prevents bone reabsorption of the socket, preserving the gingival stability (Tomasi et al, 2010; Calvo-Guirado et al, 2015; Quaranta et al, 2016; Shakibaie-M, 2013; Cardaropoli, 2014).
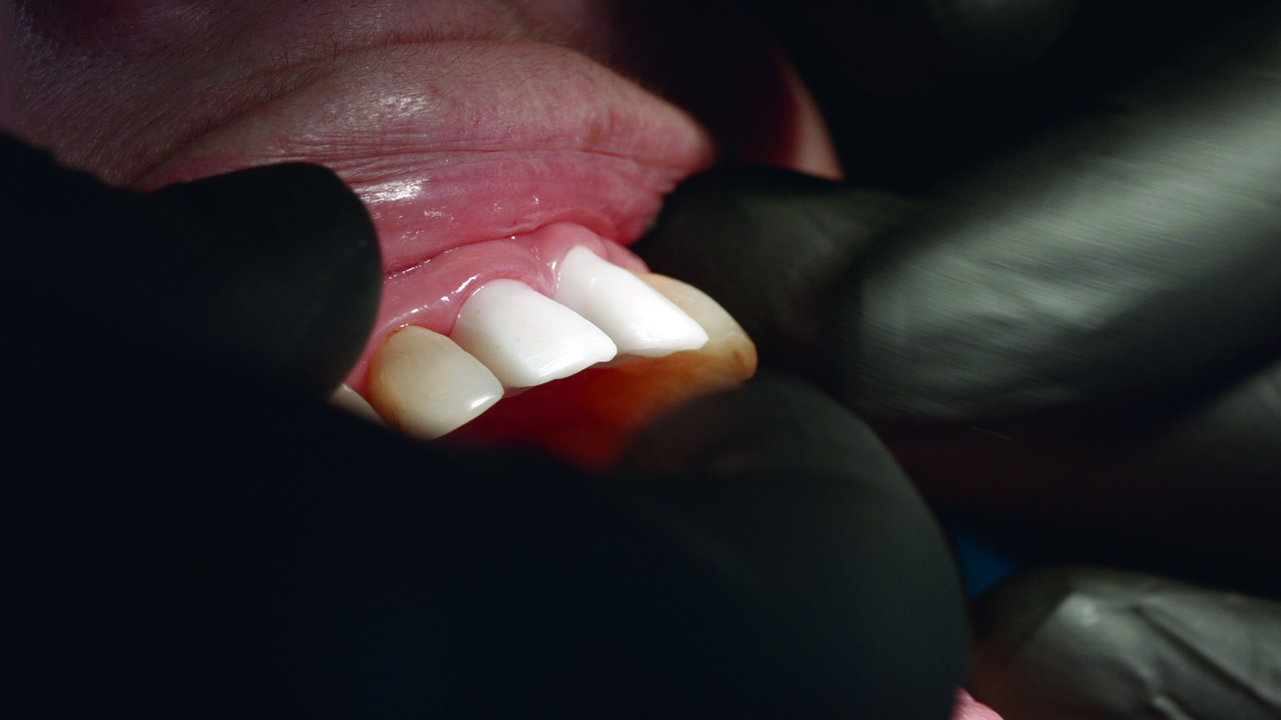
The provisional crown is placed, screwed and splinted to the UL2 to manage greater stability (Figures 9 and10).
Four months pass before the provisional crown is removed. This allows for bone integration and soft tissue stabilisation (Caneva et al, 2010). Once the crown is removed, the stability of the implant and soft tissues surrounding the implant are checked (Cardaropoli et al, 2015; Yan et al, 2016).
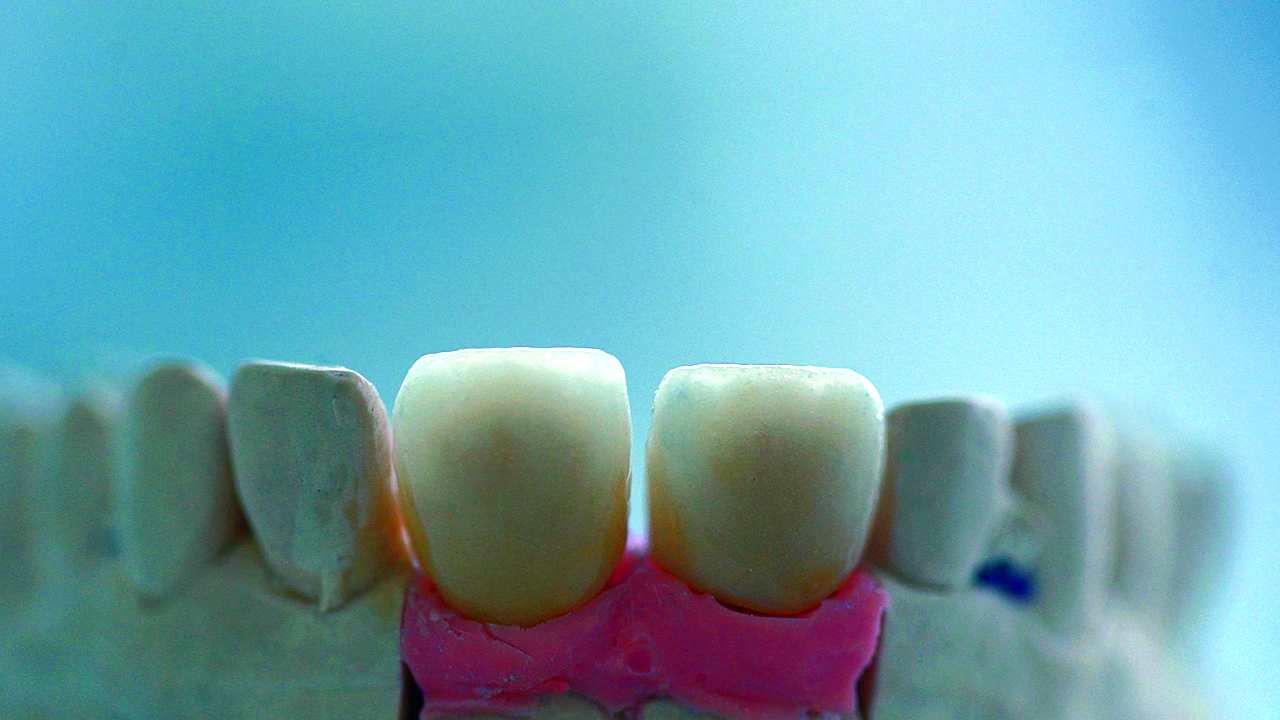
Using the provisional crown as a model, the gingival emergence is copied in an impression transfer ready for the laboratory to mimic (Figure 11).
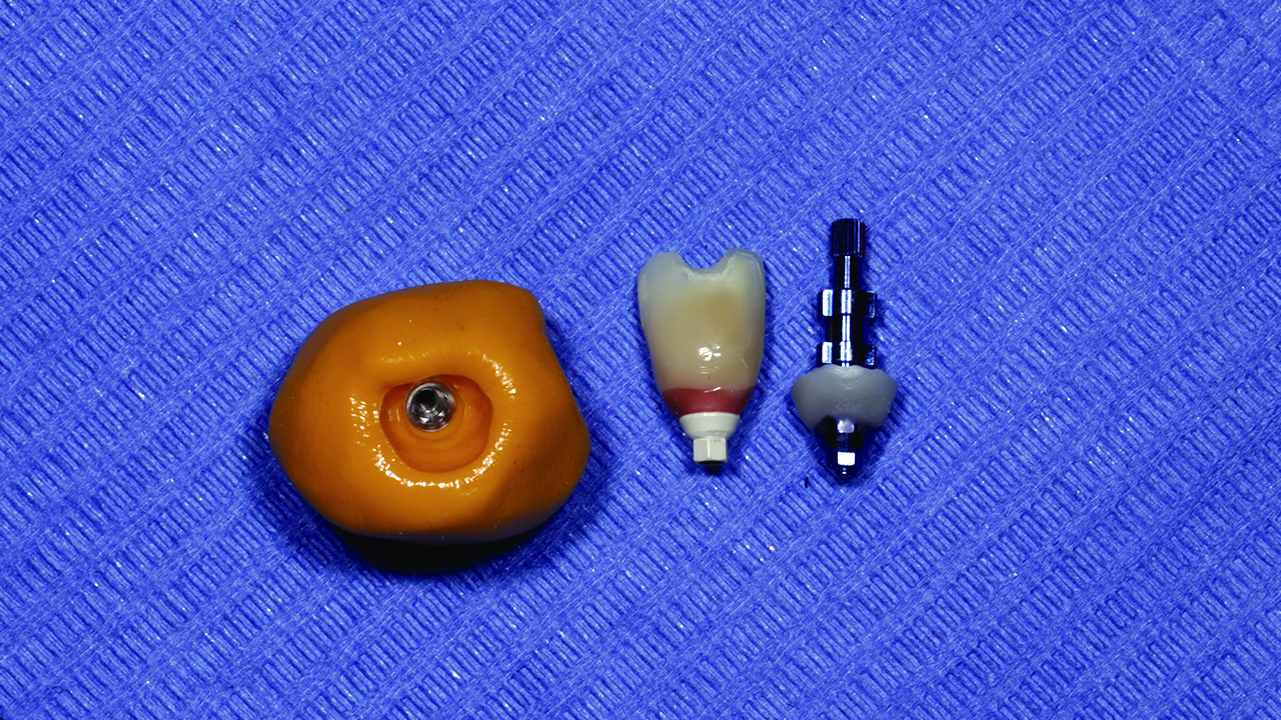
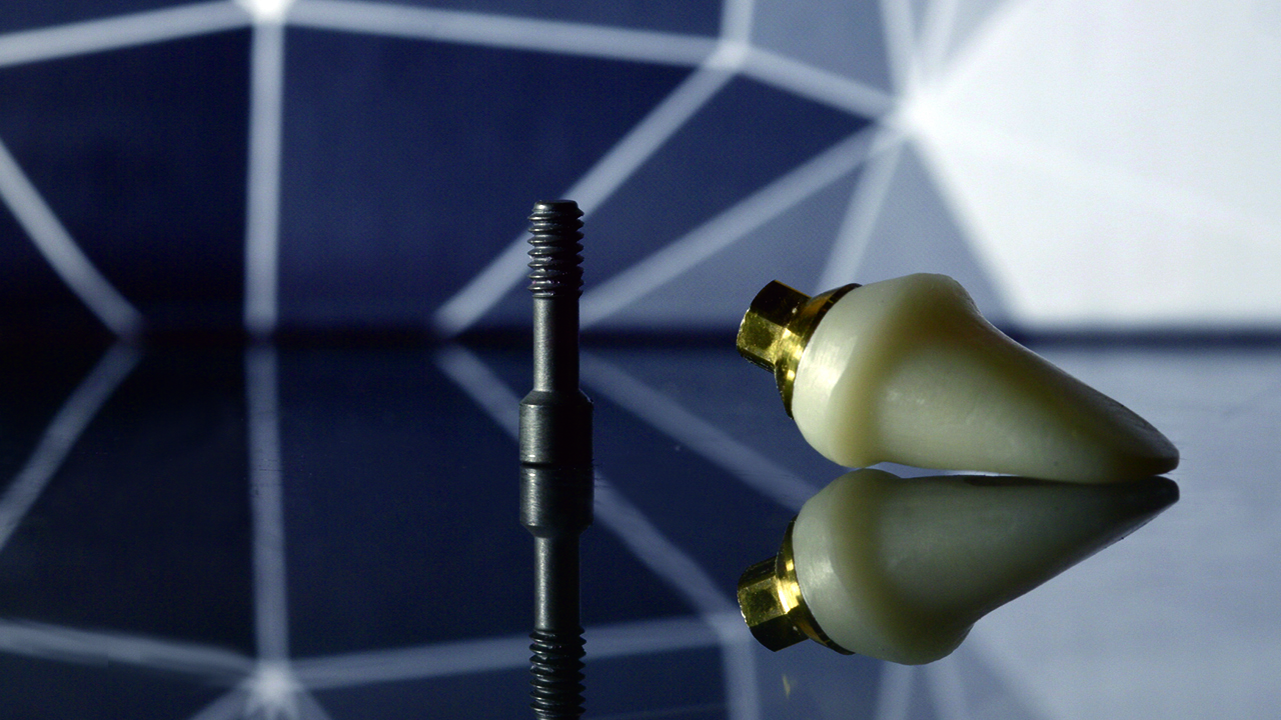
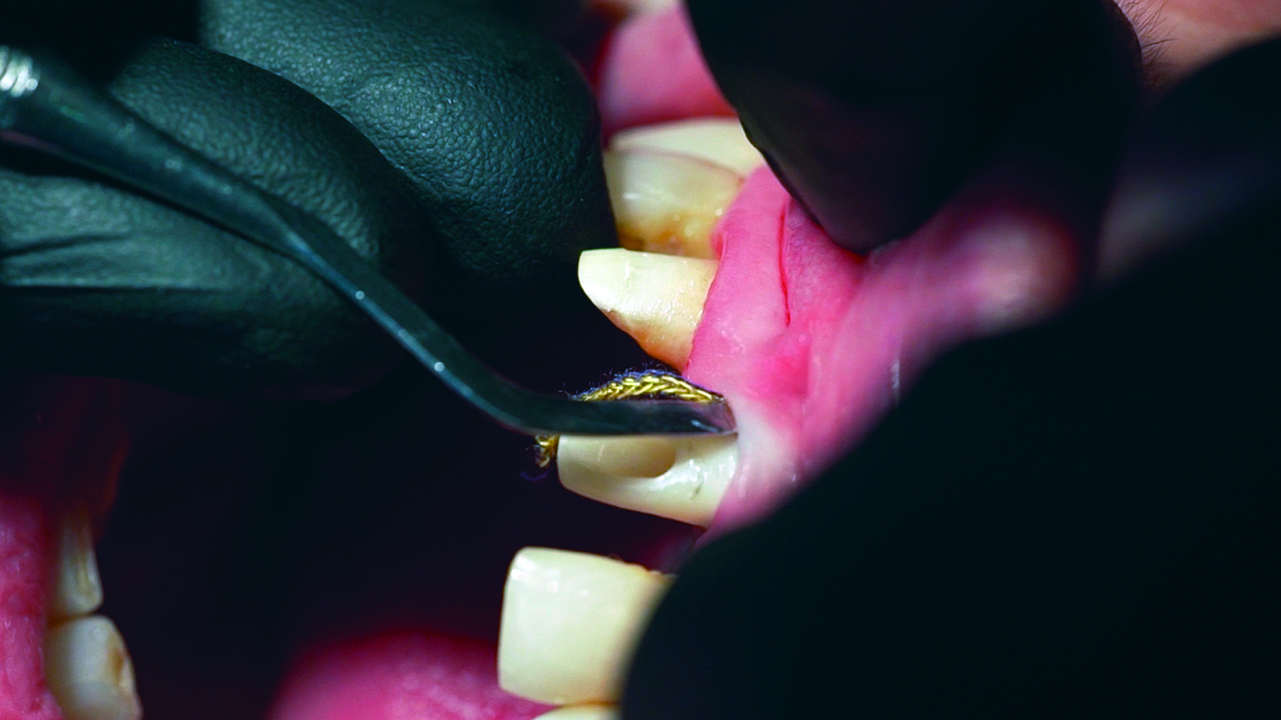
A milled zirconia abutment over a manufactured titanium post is created at Ziacor CAD/CAM milling centre (Figure 12). This abutment is checked intraorally, paying special attention at the critical and subcritical level areas, so the gingival peak and margin are shaped correctly. Once the post is placed with 30Ncm torque, it is not removed, following the ‘one abutment one time’ technique (Figures 13 and 14).
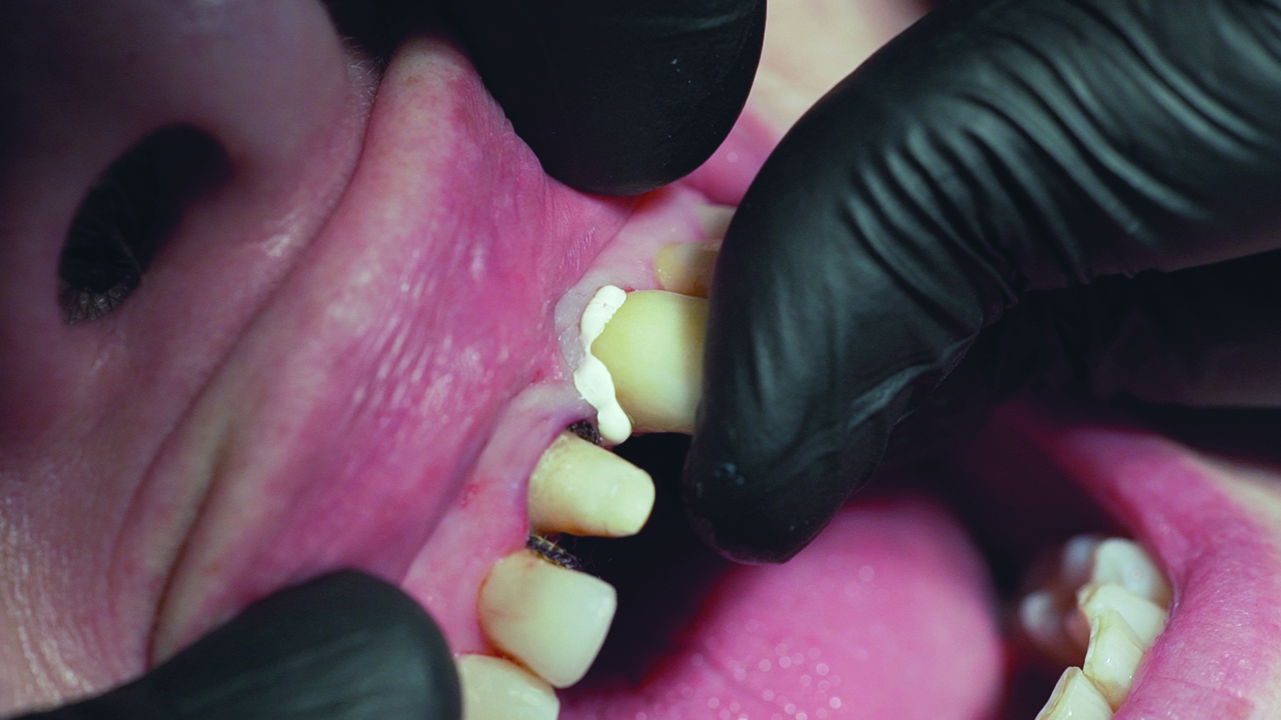
The UR1 is prepared for the zirconia-ceramic crown, and an impression of both preparations is taken. Provisional crowns are placed while the definitive ones are manufactured (Figure 15). Ziacor CAD/CAM milling centre manufactures two zirconia caps for both crowns in the UR1 and the UL1 (Figure 16). Once the caps are verified, they are loaded with ceramic to be verified again intraorally (Figure 17).
Finally, both crowns are cemented. UR1 is cemented with Panavia resin cement and the implant at UL1 is cemented with Implant Cem. Retraction cord is used to prevent any remains of the cement around the implant (Figures 18 and 19).
The final result is a crown over the implant with a perfect implant-post adjustment, and the gap to the cemented crown at 3mm of the implant, reducing peri-implantitis risk and supporting the biological sealing (Figures 20-23).
Summary
Immediate loading after extraction has been largely described in literature and different techniques have been developed. Some authors graft the gap implant-socket with bone substitutes while others don’t graft it at all. Some techniques describe the use of allogeneic membranes and some techniques describe the use of PRF (Salgado et al, 2014; Fenus et al, 2010; Kim et al, 2016; Gupta et al, 2012; García Gargallo et al, 2016; de Medeiros et al, 2016).
A flap may be raised, depending on the need to graft the vestibular plate or not.
The goal of every technique is to replace the dental piece immediately after extraction, while also minimising the bone loss and maintaining the soft tissue architecture surrounding the implant.
This soft tissue, specially the papilla, is the key factor for an aesthetic and satisfactory result.
The correct management of the contact points, the available distance for the soft tissue to biologically seal around the implant and the clinician’s ability to modify the critical and subcritical area of the emergence profile are the prosthetic skills the clinician must handle carefully in order to achieve a satisfactory and aesthetic result.
From the surgical part of the process, a correct diagnose and treatment plan are essential. For long-term implant survival, the choice of implant to be used and its correct 3D position, as well the right prosthetic abutments and materials, are vital.
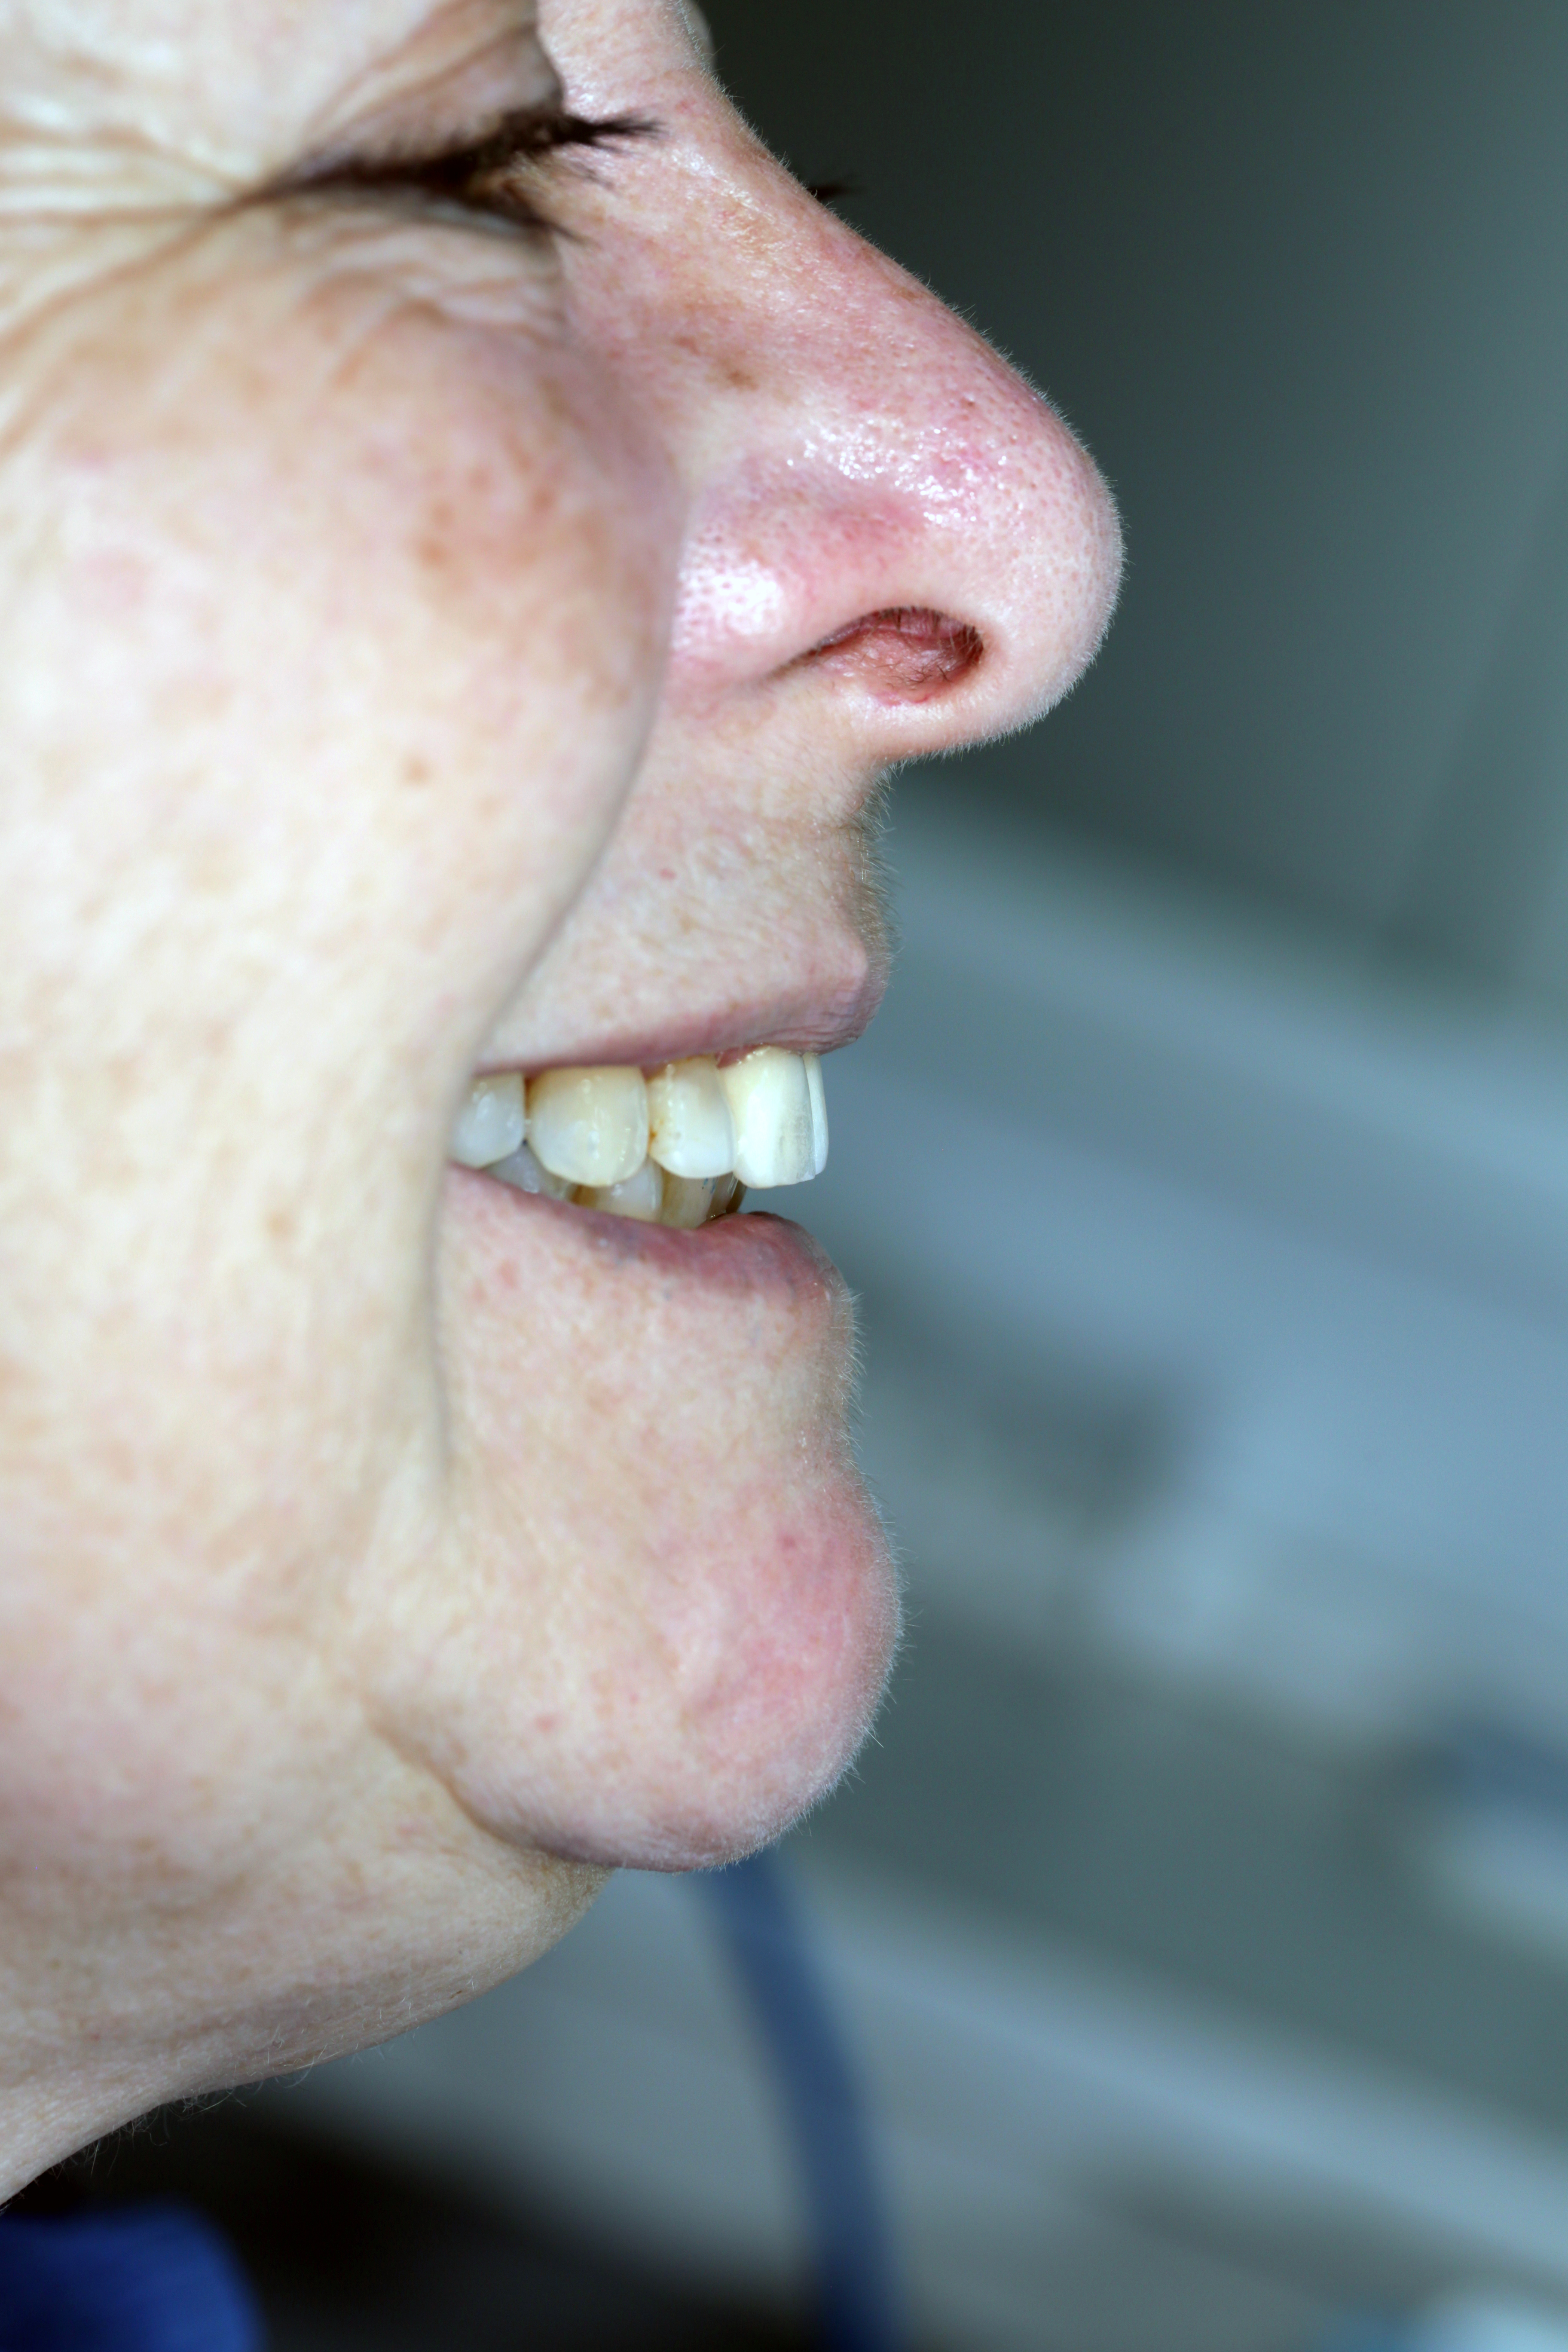
A skilled clinician using the right materials and techniques is all the patient needed to face her fears about implants and surgery. With only one surgical act, the patient’s appearance and self-esteem improved greatly. From that point forward, the patient was very pleased and relaxed during the prosthetic procedure as the surgical procedure had given her more than she expected.
References are available from [email protected].